Rear Trailing Arm Bushings....with pix.
-
- Posts: 614
- Joined: Thu Jul 05, 2012 7:06 pm
- Your car is a: 1972 124 Spider
Rear Trailing Arm Bushings....with pix.
As promised, a few pix of how I got (almost all of) the little monsters out without resorting to barbecue like methods!
Equipment used: 4 1/2 inch bench vise, 5 inch C Clamp, 1 3/16 Deep well and Regular 1/2 in dr socket, 1/2 inch deep well 1/4 in socket, 1 1/8 deep well 1/2 in dr socket.
As mentioned, soaked everything for a night or two with PB Blaster and WD 40.
1. Start pressing out metal sleeve with the 1/2 in deep well 1/4 drive socket, using bench vise to press socket and sleeve into 1 3/16 reg socket (with a deeper throated vise, one could go right to the 1 3/16 deep well):
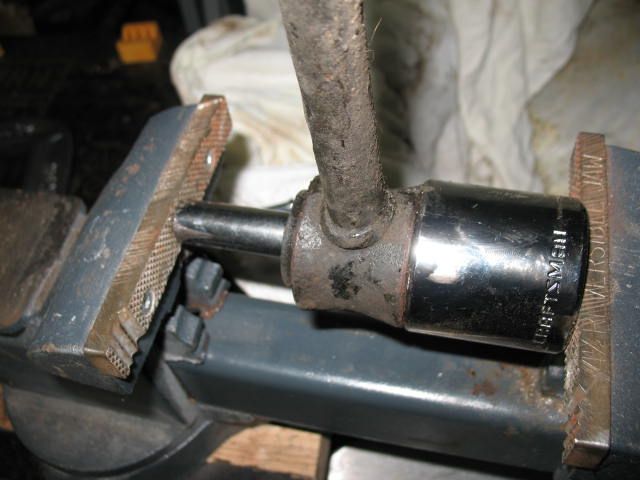
2. Finish pressing out sleeve with 1/2 in deep well, pressing sleeve into 1 3/16 deep well. 1 3/16 socket seems to keep the rubber bushing in place, allowing the sleeve to break adhesion and slide.
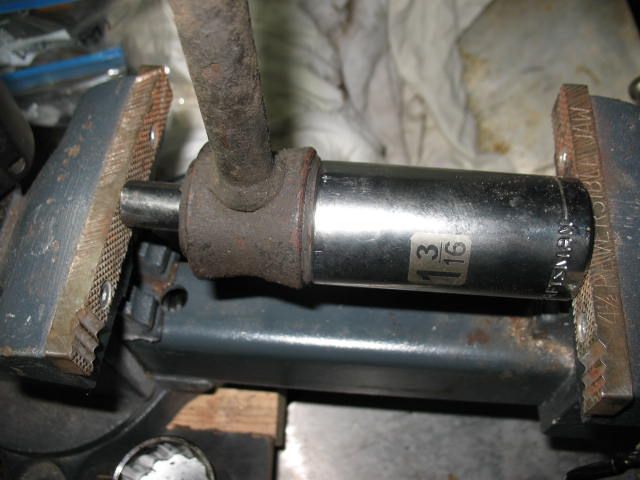
3. Clamp C Clamp into vise, and use C Clamp to press rubber bushing out into 1 3/16 regular socket. One learning point for me: rubber wants to ooze, so I learned to be patient, and apply additional screw pressure every other minute or so. Eventually the bushing softly pops out, and can be removed by hand after taking it out of the C Clamp.
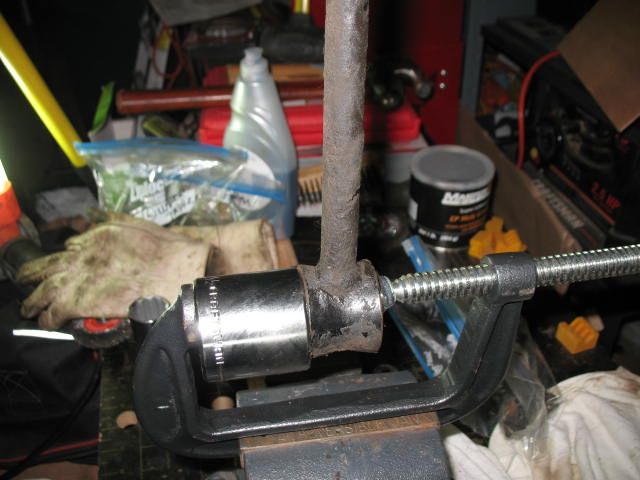
4. For stubborn ones, I added a 1 inch 1/2 dr socket to the pushing side, and used the bench vise.
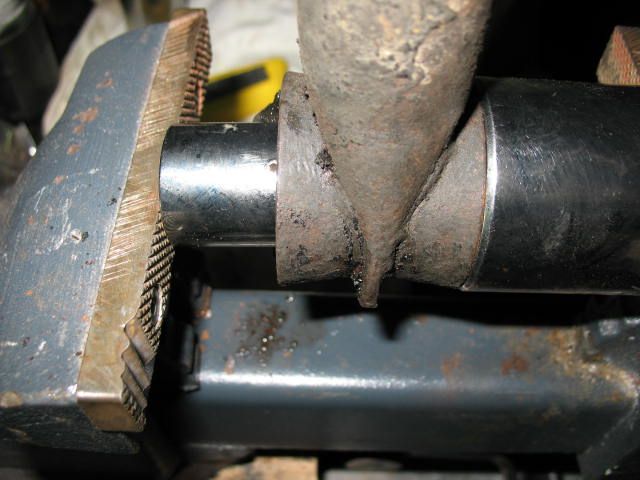
Got all but one out this way. I'll post some re-install pix once I get the trailing arms brushed, primed, and painted. Hope this helps !
Neil
Neil O'Connor
Madison, WI
72 FIAT 124 Spider
12 Jeep Grand Cherokee Overland Summit
14 Ram 1500 Laramie Longhorn Eco-Diesel
ex-71 FIAT 124 Coupe
and a host of Audi's, Saabs, VW's, MOPAR's, Fords, and a Bimmer....
Madison, WI
72 FIAT 124 Spider
12 Jeep Grand Cherokee Overland Summit
14 Ram 1500 Laramie Longhorn Eco-Diesel
ex-71 FIAT 124 Coupe
and a host of Audi's, Saabs, VW's, MOPAR's, Fords, and a Bimmer....
Re: Rear Trailing Arm Bushings....with pix.
Nicely done
How would you like a job in our tech dept
-
- Posts: 614
- Joined: Thu Jul 05, 2012 7:06 pm
- Your car is a: 1972 124 Spider
Re: Rear Trailing Arm Bushings....with pix.
Ask me after the last one is out! That's my "diploma"....
Neil O'Connor
Madison, WI
72 FIAT 124 Spider
12 Jeep Grand Cherokee Overland Summit
14 Ram 1500 Laramie Longhorn Eco-Diesel
ex-71 FIAT 124 Coupe
and a host of Audi's, Saabs, VW's, MOPAR's, Fords, and a Bimmer....
Madison, WI
72 FIAT 124 Spider
12 Jeep Grand Cherokee Overland Summit
14 Ram 1500 Laramie Longhorn Eco-Diesel
ex-71 FIAT 124 Coupe
and a host of Audi's, Saabs, VW's, MOPAR's, Fords, and a Bimmer....
- 70spider
- Posts: 676
- Joined: Fri Mar 14, 2014 3:05 pm
- Your car is a: 1970 Fiat spider
- Location: N.E. New Mexico
Re: Rear Trailing Arm Bushings....with pix.
Nice job.
On mine, lower trailing arm, my biggest problem was getting the washer off the center shaft. To remedy this I used a ball joint pickle fork and my little persuader, work like a charm. My friend's father once said, "If all else fails then use brut force and ignorance". Once I pulled the center shaft out the bushings were so distorted and deteriorated they came right out with a little prying with a screwdriver.
Now to get the new bushings in. I thought maybe putting the trailing in the oven and heating it up, putting the bushing in the freezer, then use soap water and a vice to press them in. Does this sound like a feasible idea?
I think I may wait and here how you did it, plus it is $5 Fridays at the local golf course so I'll be there all day .
1970 Fiat Spider 124 Sport aka "Pesto"
2002 Mazda Protege5
2013 Buddy 170i
2002 Mazda Protege5
2013 Buddy 170i
-
- Posts: 614
- Joined: Thu Jul 05, 2012 7:06 pm
- Your car is a: 1972 124 Spider
Re: Rear Trailing Arm Bushings....with pix.
Nothing gets in the way of golf. Roger that.
My new bushings have been in the fridge since arrival, much to spouse's puzzlement. I did not use heat on the panhard rod, but pressed the bushings in with the bench vise, using the 1 3/16 socket as a receiving cup. I used Dawn dish soap as lubricant, and remembered to let the rubber ooze its way in at it's own speed. Same with the steel sleeve, except I needed to use a necked down 1/4 in dr socket to push it in the last few mm. Again, used the bench vise. I'm at least a weekend away from the trailing arms (they are pretty cruddy), but I'll mock something up tonight as a demo.
Update: never underestimate the power of time and pressure (cf, Rocky Mountains, et al). Left the stubborn trailing arm in the vise overnight, and this morning, the steel sleeve is halfway out! Hope to finish it tonight without a trip to the local machine shop.
Neil
Neil O'Connor
Madison, WI
72 FIAT 124 Spider
12 Jeep Grand Cherokee Overland Summit
14 Ram 1500 Laramie Longhorn Eco-Diesel
ex-71 FIAT 124 Coupe
and a host of Audi's, Saabs, VW's, MOPAR's, Fords, and a Bimmer....
Madison, WI
72 FIAT 124 Spider
12 Jeep Grand Cherokee Overland Summit
14 Ram 1500 Laramie Longhorn Eco-Diesel
ex-71 FIAT 124 Coupe
and a host of Audi's, Saabs, VW's, MOPAR's, Fords, and a Bimmer....
- 70spider
- Posts: 676
- Joined: Fri Mar 14, 2014 3:05 pm
- Your car is a: 1970 Fiat spider
- Location: N.E. New Mexico
Re: Rear Trailing Arm Bushings....with pix.
Before I try to press the bushing in I need to paint the lower trailing arm. It had burnt rubber caked on the inside, where the bushing goes and also on the metal sleeve. I cleaned it up using a dremel and 400 grit sandpaper, I was curious do I paint the inside where the bushing sets, for protection against rust?
Also, I measured the OD of the metal sleeve it is 19mm the ID of the bushing is 14mm, how the heck is it possible to press it in?
I am going to the local metal recycle yard tommorrow and seeing how much he wants for some u-shape and flat iron, entertaining the idea of building a press.
Thanks for this thread, it has helped alot.
1970 Fiat Spider 124 Sport aka "Pesto"
2002 Mazda Protege5
2013 Buddy 170i
2002 Mazda Protege5
2013 Buddy 170i
-
- Posts: 614
- Joined: Thu Jul 05, 2012 7:06 pm
- Your car is a: 1972 124 Spider
Re: Rear Trailing Arm Bushings....with pix.
Remember that rubber will compress, though these bushings do like a fight.
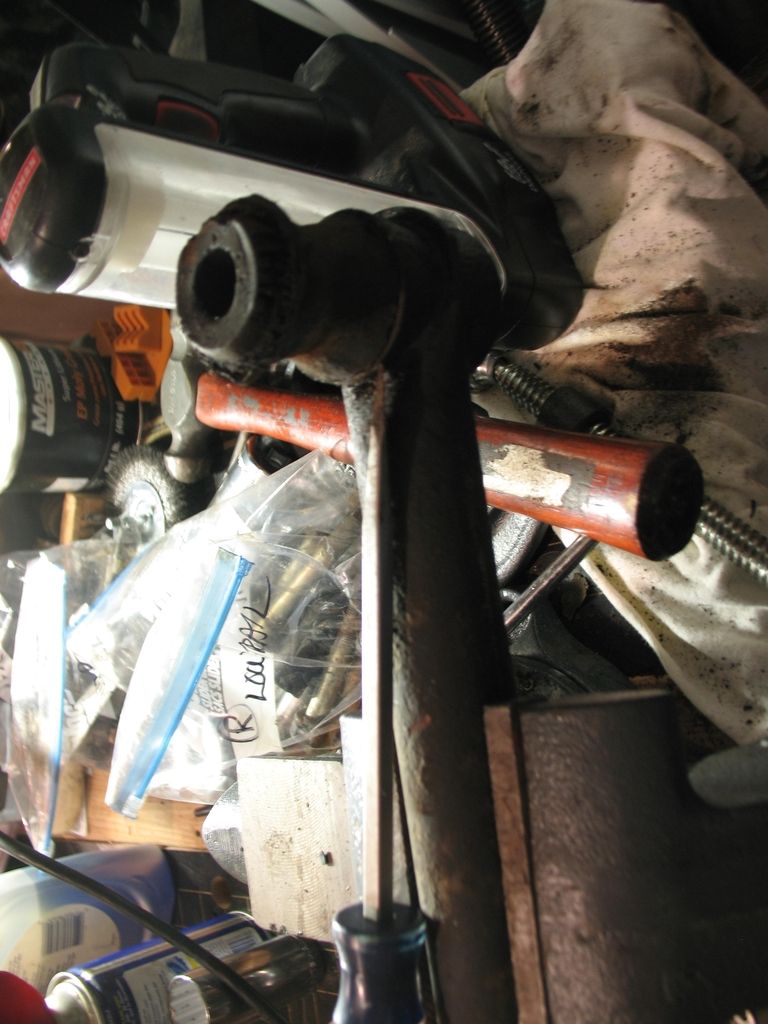
Got the last one out tonight, but had to use alternative methods. Sleeve was half way out with the socket method, would not budge from there. Secured the trailing arm in the (padded) bench vise, and tapped away at the inner side of the sleeve with a punch and hammer. A few taps and it came right out. Got the rubber bushing out about 1/4 inch with the socket press, back to the padded vice, and pried away with a large screwdriver:
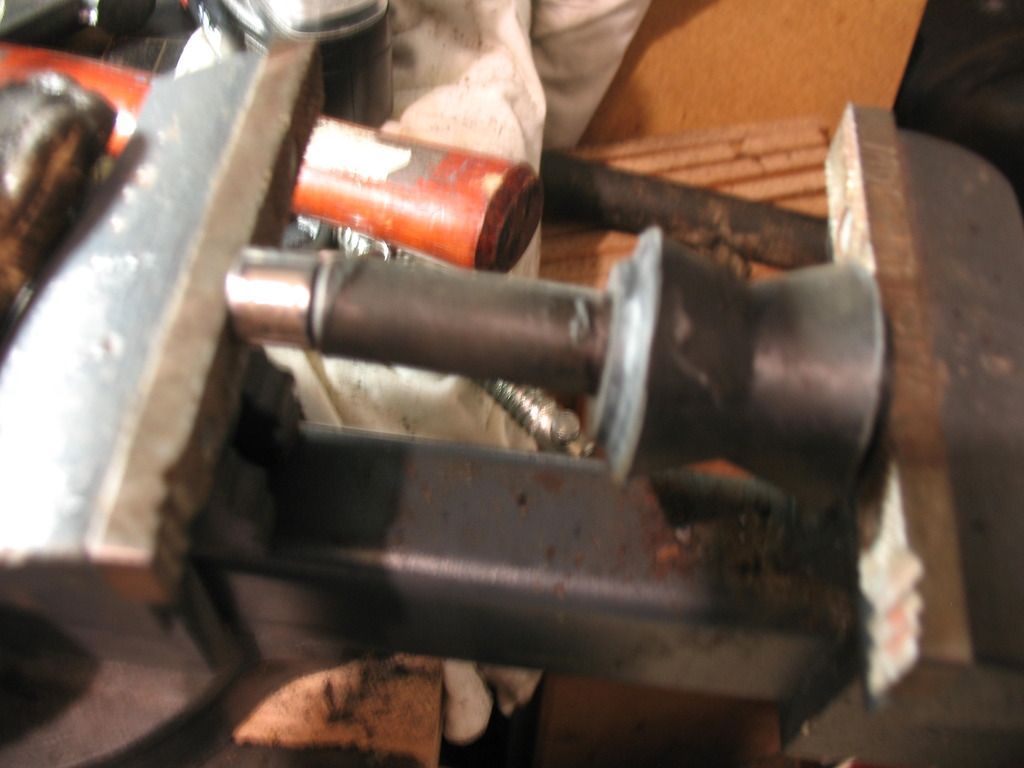
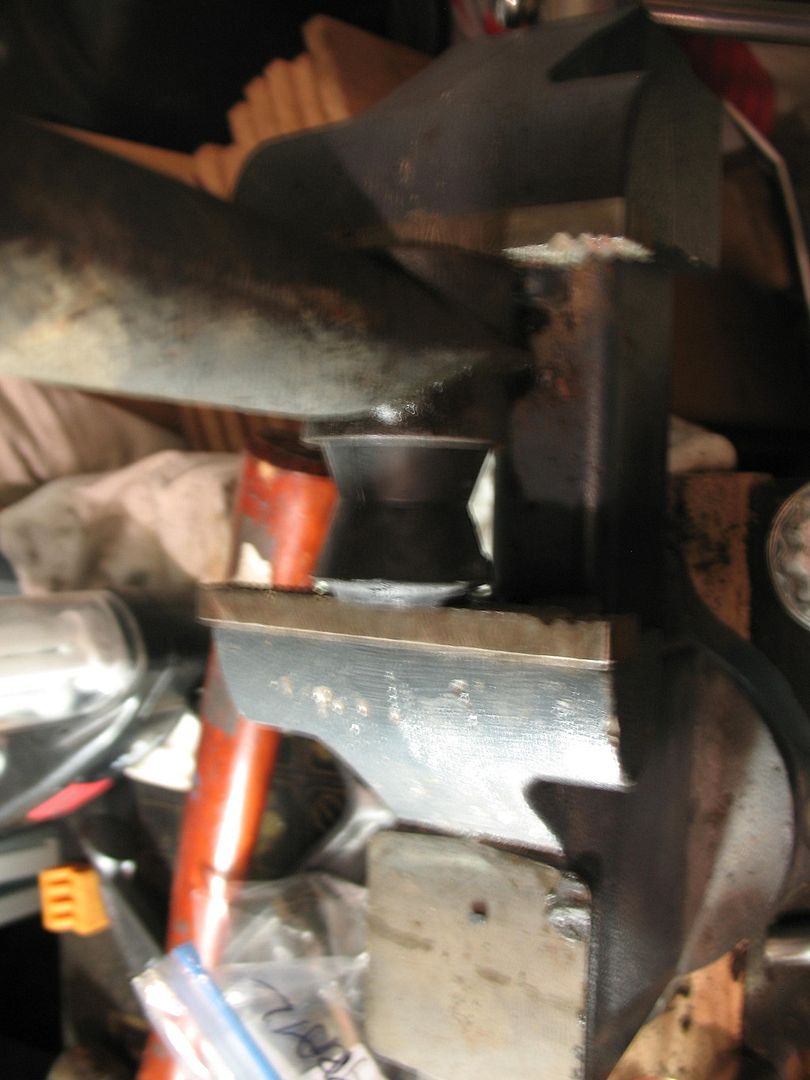
Here's a mockup of the re-install process. Use bench vise to press dish soap lubed rubber bushing into the control arm:
Use a necked down 1/4 drive socket (this one's a 6mm) to press steel sleeve into rubber bushing (pretend this bushing is already inside the trailing arm):
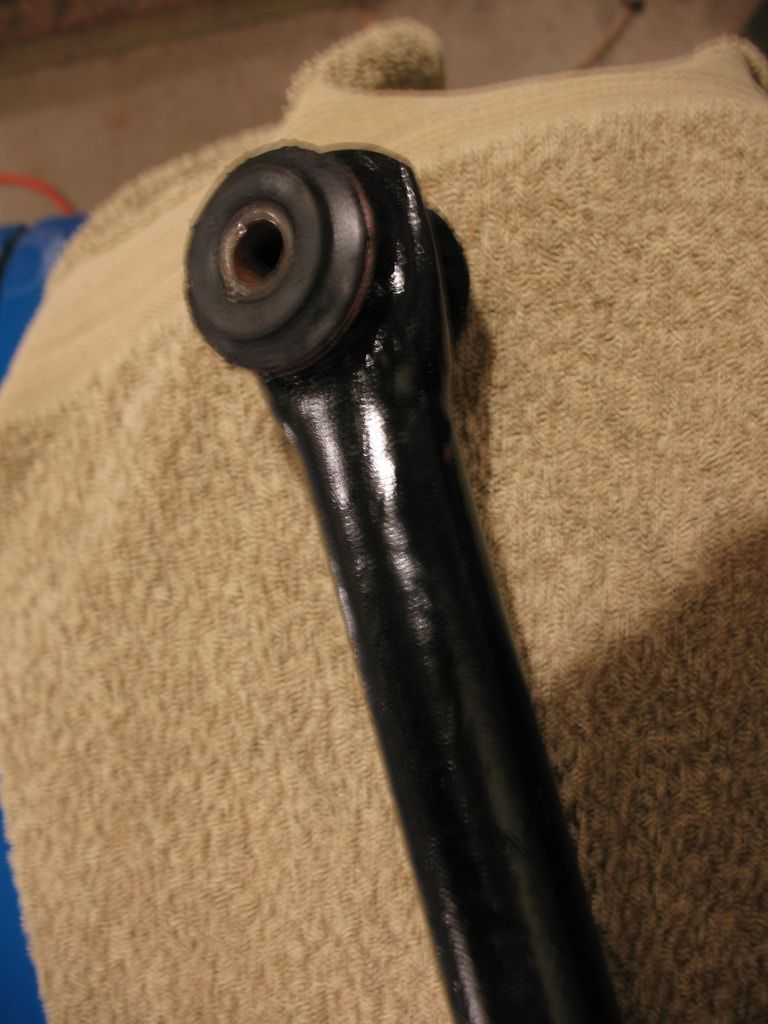
End result (after priming and painting as well) with the panhard rod:
Wire wheels, primer and paint up next.
How'd you hit them on the course today?
Neil
Neil O'Connor
Madison, WI
72 FIAT 124 Spider
12 Jeep Grand Cherokee Overland Summit
14 Ram 1500 Laramie Longhorn Eco-Diesel
ex-71 FIAT 124 Coupe
and a host of Audi's, Saabs, VW's, MOPAR's, Fords, and a Bimmer....
Madison, WI
72 FIAT 124 Spider
12 Jeep Grand Cherokee Overland Summit
14 Ram 1500 Laramie Longhorn Eco-Diesel
ex-71 FIAT 124 Coupe
and a host of Audi's, Saabs, VW's, MOPAR's, Fords, and a Bimmer....
- 70spider
- Posts: 676
- Joined: Fri Mar 14, 2014 3:05 pm
- Your car is a: 1970 Fiat spider
- Location: N.E. New Mexico
Re: Rear Trailing Arm Bushings....with pix.
Thanks for the how to. As for the golf yesterday I was hitting and putting well, but didn't score well. Pitch shots comming up to short and a missed putt here and there ruins the scorecard. (2 birdies and 4 bogeys for a 2 over par). I did make a birdie on a par 3, which for me equals a good day.
1970 Fiat Spider 124 Sport aka "Pesto"
2002 Mazda Protege5
2013 Buddy 170i
2002 Mazda Protege5
2013 Buddy 170i
-
- Posts: 614
- Joined: Thu Jul 05, 2012 7:06 pm
- Your car is a: 1972 124 Spider
Re: Rear Trailing Arm Bushings....with pix.
Good round! I consistently shoot double bogey, so a bogey or a par is worthy of great joy!
Yard work today (while parts soak), more progress tomorrow (I hope).
Neil
Yard work today (while parts soak), more progress tomorrow (I hope).
Neil
Neil O'Connor
Madison, WI
72 FIAT 124 Spider
12 Jeep Grand Cherokee Overland Summit
14 Ram 1500 Laramie Longhorn Eco-Diesel
ex-71 FIAT 124 Coupe
and a host of Audi's, Saabs, VW's, MOPAR's, Fords, and a Bimmer....
Madison, WI
72 FIAT 124 Spider
12 Jeep Grand Cherokee Overland Summit
14 Ram 1500 Laramie Longhorn Eco-Diesel
ex-71 FIAT 124 Coupe
and a host of Audi's, Saabs, VW's, MOPAR's, Fords, and a Bimmer....
-
- Posts: 614
- Joined: Thu Jul 05, 2012 7:06 pm
- Your car is a: 1972 124 Spider
Re: Rear Trailing Arm Bushings....with pix. And update...ooops.
Uhhh...disregard re-install instructions for now. Just discovered I mistakenly put the lower arm bushings into the panhard rod. Taking them out was a snap.Putting the smaller bushings back in was fine; but getting that sleeve back in is a major pITA. I can get the sleeve into the bushing by itself, but can't get the combo to go into the panhard rod, nor the sleeve into the bushing once the bushing is in the panhard rod. Head scratching a solution while out weeding and stuff. Ideas welcome.
Lesson: there are 4 larger rubber bushings (lower trailing arms) and 6 smaller ones (Upper trailing arms and panhard rod) in the 10 bushing kit (and, yeah, I recall seeing that someplace and just forgot it...). Ramzi, you may want to withdraw the tech offer....
Neil
Lesson: there are 4 larger rubber bushings (lower trailing arms) and 6 smaller ones (Upper trailing arms and panhard rod) in the 10 bushing kit (and, yeah, I recall seeing that someplace and just forgot it...). Ramzi, you may want to withdraw the tech offer....
Neil
Neil O'Connor
Madison, WI
72 FIAT 124 Spider
12 Jeep Grand Cherokee Overland Summit
14 Ram 1500 Laramie Longhorn Eco-Diesel
ex-71 FIAT 124 Coupe
and a host of Audi's, Saabs, VW's, MOPAR's, Fords, and a Bimmer....
Madison, WI
72 FIAT 124 Spider
12 Jeep Grand Cherokee Overland Summit
14 Ram 1500 Laramie Longhorn Eco-Diesel
ex-71 FIAT 124 Coupe
and a host of Audi's, Saabs, VW's, MOPAR's, Fords, and a Bimmer....
- 70spider
- Posts: 676
- Joined: Fri Mar 14, 2014 3:05 pm
- Your car is a: 1970 Fiat spider
- Location: N.E. New Mexico
Re: Rear Trailing Arm Bushings....with pix.
That is what I was thinking, how can a 19mmOD fit into a 14mm hole?can get the sleeve into the bushing by itself, but can't get the combo to go into the panhard rod, nor the sleeve into the bushing once the bushing is in the panhard rod
Edit: I came across this at Harbor Frieght http://www.harborfreight.com/6-ton-a-fr ... -1666.html
Would this work better, maybe it can drive the metal sleeve through. It is reasonablely priced, with discount coupon + shipping it comes to $66, which is alot cheaper than what the local shop wanted to charge me, @ $20 a bushing which would = $160 and less expensive than getting new ones.
1970 Fiat Spider 124 Sport aka "Pesto"
2002 Mazda Protege5
2013 Buddy 170i
2002 Mazda Protege5
2013 Buddy 170i
- Broadsword
- Posts: 111
- Joined: Fri Apr 18, 2014 8:17 am
- Your car is a: 1970 124 Spider
- Location: Melbourne, Australia
Re: Rear Trailing Arm Bushings....with pix.
I have improvised with many workshop tools for various tasks, likening my efforts to MacGiver, but you cannot beat the old saying "use the right tool for the job".70spider wrote:
Edit: I came across this at Harbor Frieght http://www.harborfreight.com/6-ton-a-fr ... -1666.html
I purchased a bench press a few months ago and it is fantastic.
I could not imagine removing the front end suspension bushes without it; similarly inserting the new ones.
At that price you won't be disappointed.
Will be faster, so leaves more time for other tasks or the golf course?
-
- Posts: 614
- Joined: Thu Jul 05, 2012 7:06 pm
- Your car is a: 1972 124 Spider
Re: Rear Trailing Arm Bushings....with pix.
Must be fate.... Pat just put the HF mailer with coupons on my nightstand.....
No, she doesn't lurk here,......
Neil
No, she doesn't lurk here,......
Neil
Neil O'Connor
Madison, WI
72 FIAT 124 Spider
12 Jeep Grand Cherokee Overland Summit
14 Ram 1500 Laramie Longhorn Eco-Diesel
ex-71 FIAT 124 Coupe
and a host of Audi's, Saabs, VW's, MOPAR's, Fords, and a Bimmer....
Madison, WI
72 FIAT 124 Spider
12 Jeep Grand Cherokee Overland Summit
14 Ram 1500 Laramie Longhorn Eco-Diesel
ex-71 FIAT 124 Coupe
and a host of Audi's, Saabs, VW's, MOPAR's, Fords, and a Bimmer....
- 70spider
- Posts: 676
- Joined: Fri Mar 14, 2014 3:05 pm
- Your car is a: 1970 Fiat spider
- Location: N.E. New Mexico
Re: Rear Trailing Arm Bushings....with pix.
I just ordered mine, there is a coupon code to save 20% on retailmenot.Pat just put the HF mailer with coupons on my nightstand
1970 Fiat Spider 124 Sport aka "Pesto"
2002 Mazda Protege5
2013 Buddy 170i
2002 Mazda Protege5
2013 Buddy 170i
- 70spider
- Posts: 676
- Joined: Fri Mar 14, 2014 3:05 pm
- Your car is a: 1970 Fiat spider
- Location: N.E. New Mexico
Re: Rear Trailing Arm Bushings....with pix.
So with the press getting here sometime late next week, I was wondering on the order in which to assemble the trailing arm? I was thinking of putting the metal sleeve into the bush first, my reasoning is it would allow the bushing to "stretch" better therfore easier to insert, then press the bushing/metal sleeve assembly into the eyelet of the trailing arm. Any thoughts on this?
1970 Fiat Spider 124 Sport aka "Pesto"
2002 Mazda Protege5
2013 Buddy 170i
2002 Mazda Protege5
2013 Buddy 170i