My Affair with Celeste
Her Name: Celeste (heavenly, celestial, blue in Italian)
Specs: 1969 Fiat 124 Spider, VIN 124AS0013311, mfg. date unknown, color: French Blue (color code # 426), engine 124AC000 (1438)
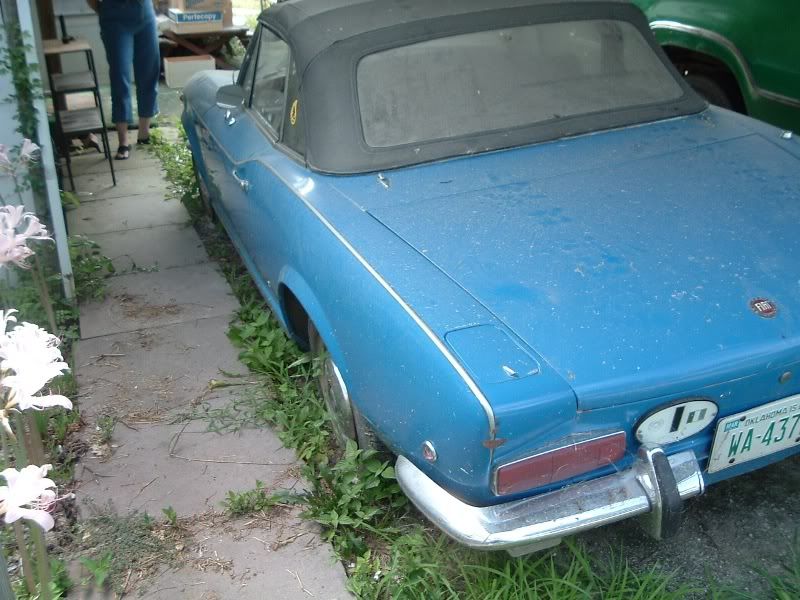
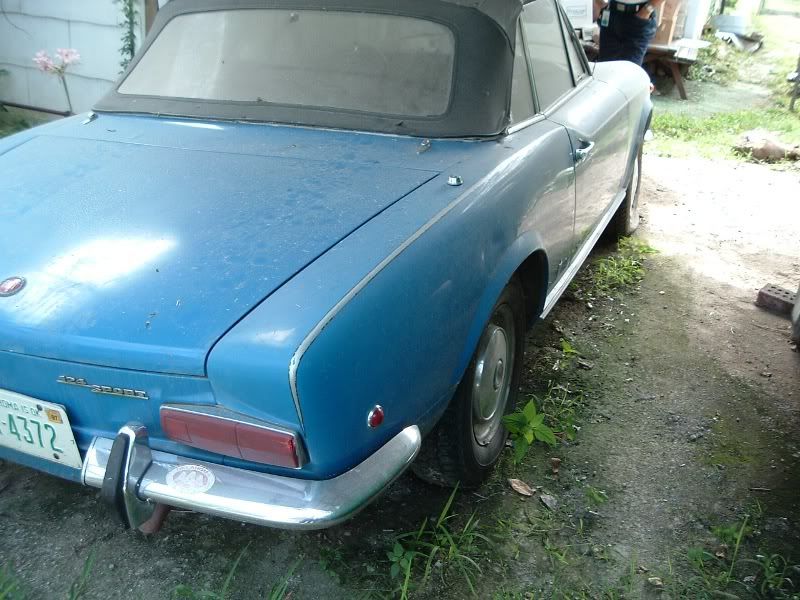
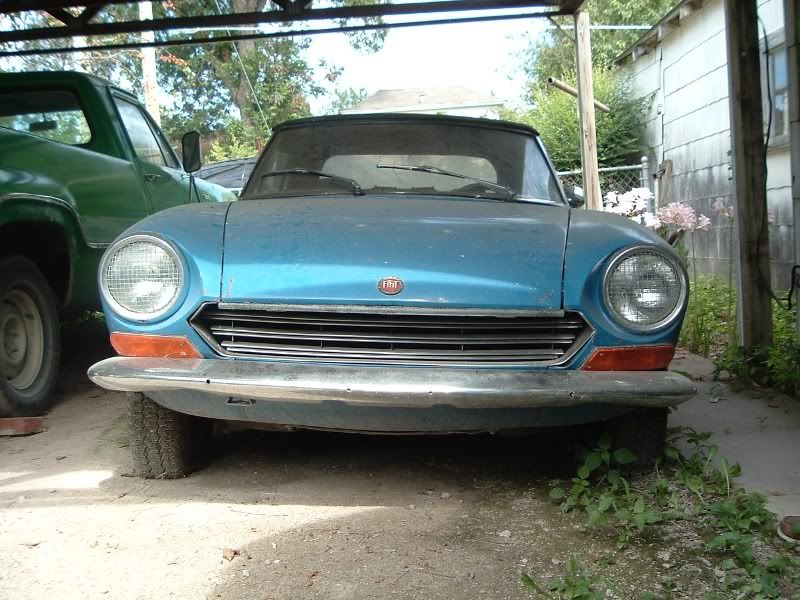
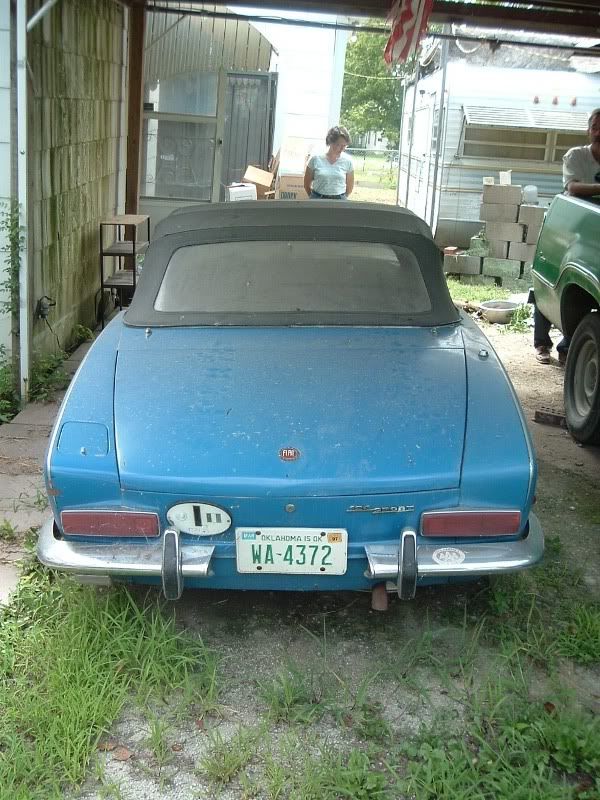
Background: This car was purchased August 6, 2004. (Hard to believe that was 7 years ago.) The details are fuzzy now, but I remember finding her on the internet, possibly thru the Roamin’ Chariots. We drove from northwest Arkansas to Bartlesville OK (about an hour north of Tulsa) and this is what we found:
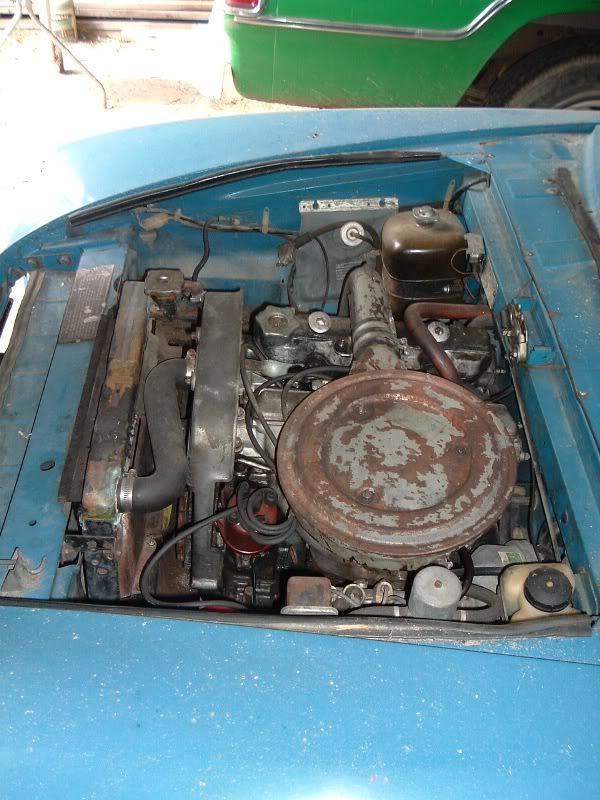
and, of course, that sweet little 1438:
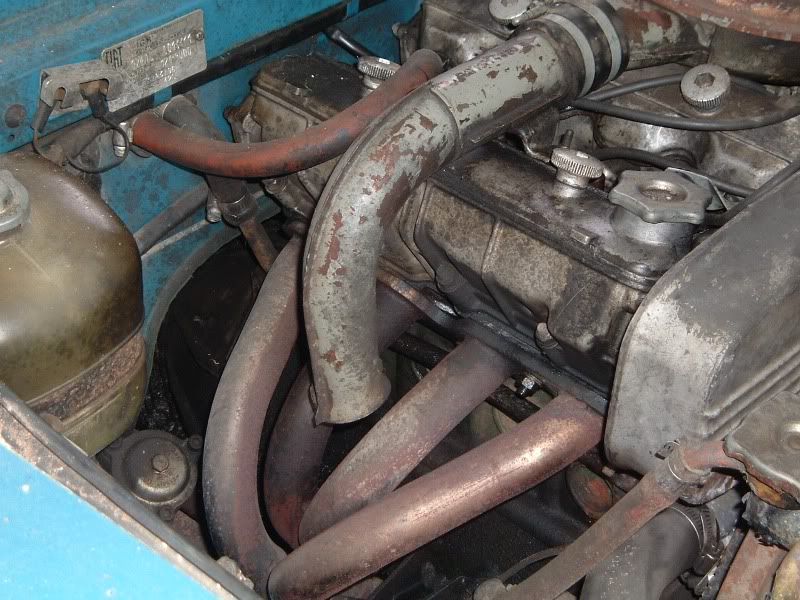
with the factory exhaust header:
She had some unique things;
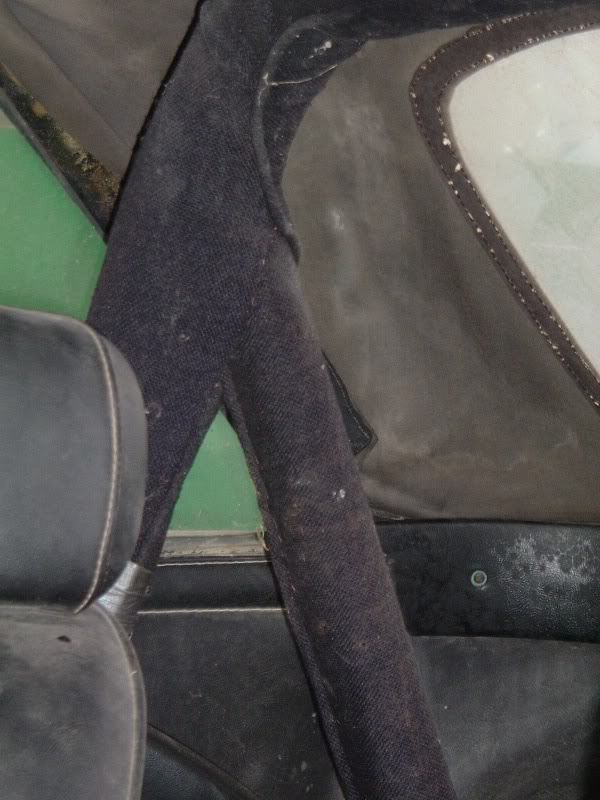
A rollbar
Homemade headlight guards
AM/FM radio
Aftermarked steering wheel
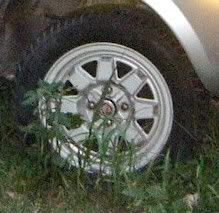
Original Hubcaps
and the original tool kit:
And some bad points, mostly typical of the species:
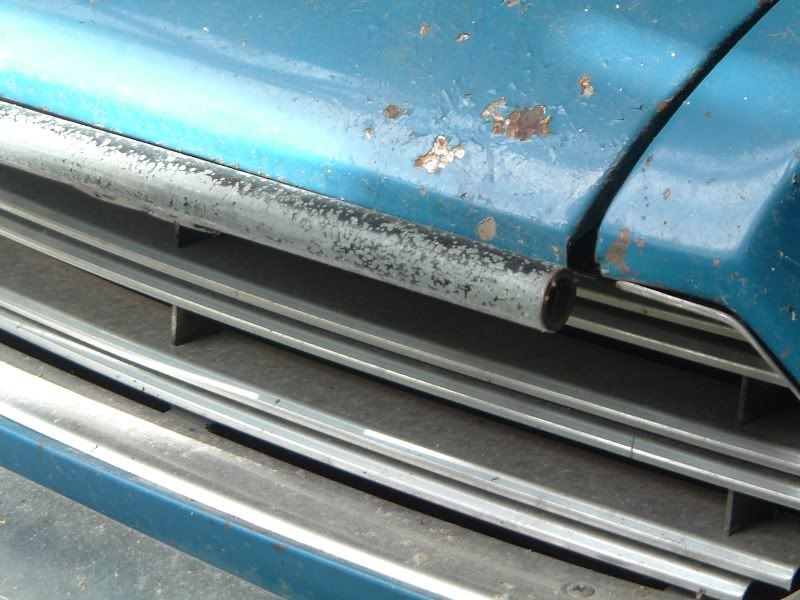
Surface rust
Note the homemade edge guard on the hood, interesting
A dent in a hard place to fix
Holes in the rockers
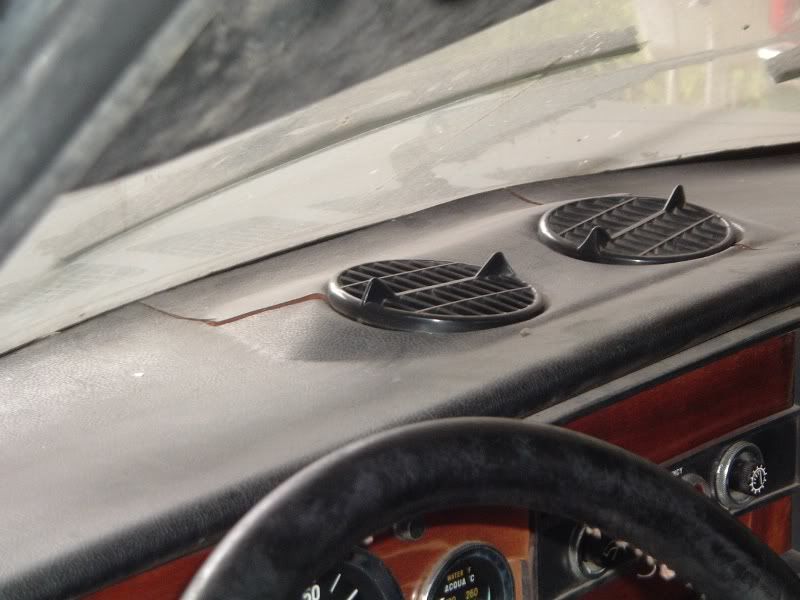
Dried out wooden dash
With cracks in the vinyl
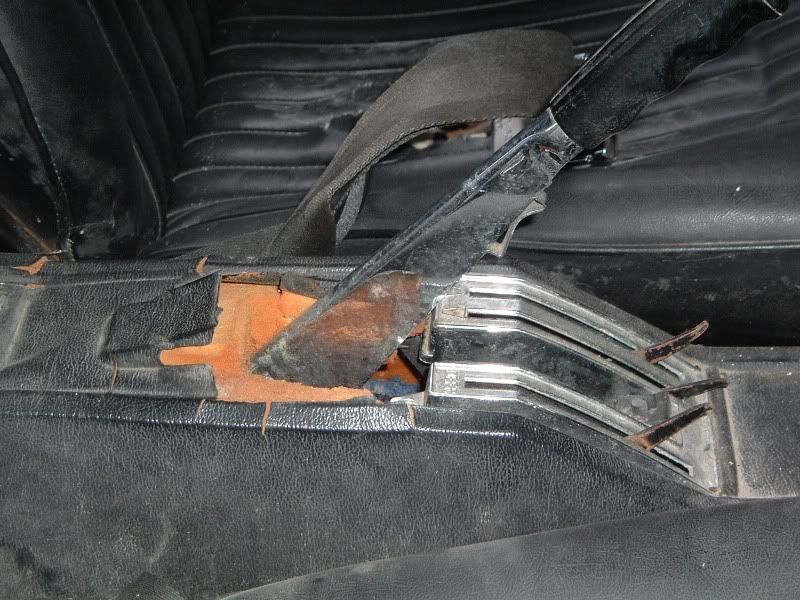
Cracked and weathered e-brake housing
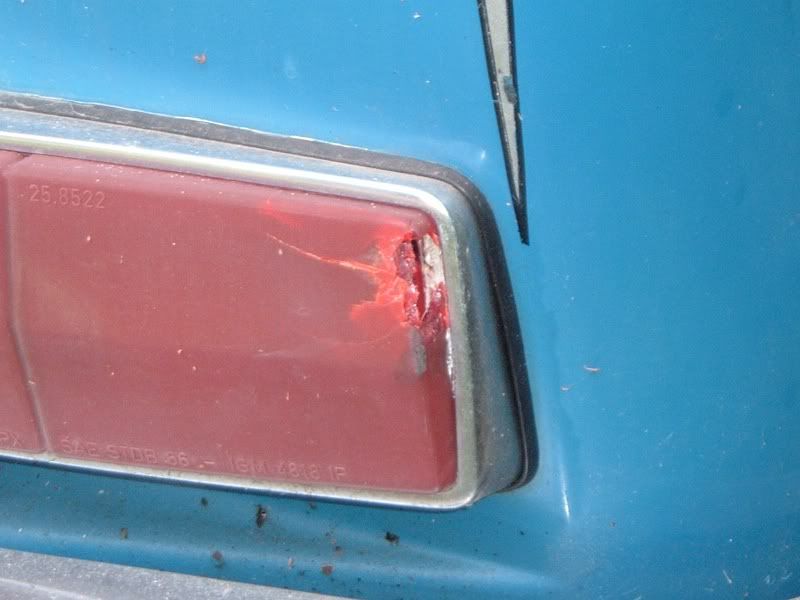
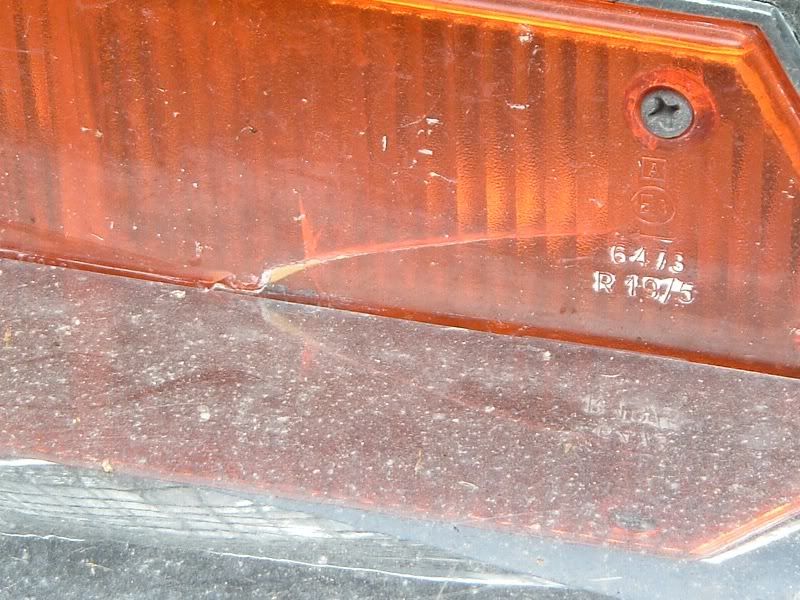
Cracked (and now very hard to find) lenses
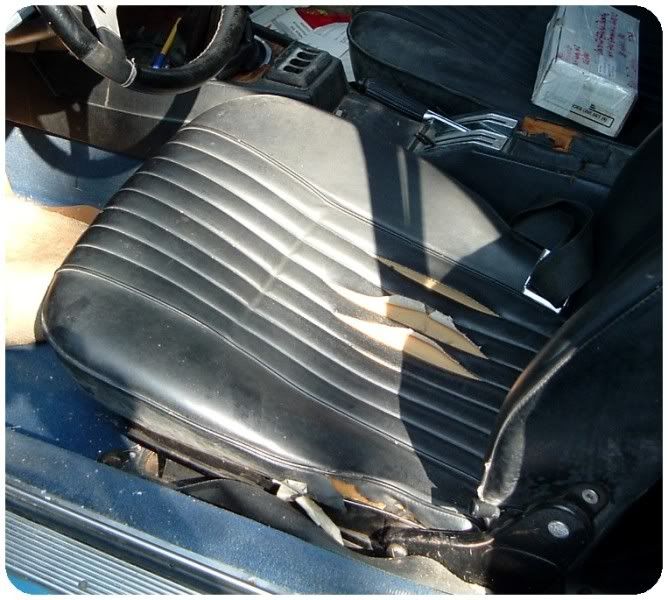
Tears in the driver’s seat
Temporary fixes on the door panels
and other minor issues.
I don’t even remember how much I paid, too much, but the guy was emotionally invested in it, and I really wanted an early Spider (and money was a little easier to come by back then.) I think we negotiated to about $2 grand. I knew it was too much money, but I'd been looking for an early Spider in good body condition for a LONG time. I do remember it being hard to get the thing loaded on the trailer we had borrowed on the flat ground of Oklahoma, but we did get it loaded in the dark and brought it home.
The guy I bought it from was the 2nd owner. He had bought it in the early 70s from his girlfriend's father's Chrysler dealership where someone had traded it in on a new Chrysler. She gave him the aftermarket steering wheel for a Christmas gift. He drove it after that until job changes, relocations, marriage and children made the car impractical. He left it with his folks and his mom took it out occasionally to go buy groceries and let the sackers drool over her convertible. Then one day it wouldn't start. He tried on a couple of trips home to fix it, but life took over and it sat under their carport until I came to give it a new home.
Once home, she got a bath and I got a kick out of cleaning out the glovebox and trunk and finding all sorts of interesting bits. Eventually, she found her way into a tin barn I was turning into a shop and for the next several years sat on wheel dollies, gathering dust. Eventually the shop became my woodworking shop and the accumulation of tools and wood required more space so Celeste got kicked out the door. A few days or weeks later we got a rare hailstorm and Celeste took a beating along with the other six Spiders sitting around the place. I thought I was going to be sick. You see, other than the aftermarket parts, she’s about 98% original with only 87,352 original miles.
I think I’ve been waiting until I really felt that I knew enough and had the requisite skills to really put the old girl back on the road. I now realize that if I wait for that, there’s a chance my children will do the work after I’m gone! So, a few days ago I hooked her to the truck and pulled her to the garage, and here she sits (after a quick bath):
Every time I look very close, the list of “to-do”s grows. But for starters, I’m going to get the engine running again. After that, fluids/filters change, new belts & hoses, thorough inspection underneath and fixing what is apparently needed. From there???? I definitely have to deal with some surface rust and one bad dent in a rear corner that I have no idea how to fix. So, I’m building my list and will post progress here so that others can learn from my mistakes.
More to follow….
Specs: 1969 Fiat 124 Spider, VIN 124AS0013311, mfg. date unknown, color: French Blue (color code # 426), engine 124AC000 (1438)
Background: This car was purchased August 6, 2004. (Hard to believe that was 7 years ago.) The details are fuzzy now, but I remember finding her on the internet, possibly thru the Roamin’ Chariots. We drove from northwest Arkansas to Bartlesville OK (about an hour north of Tulsa) and this is what we found:
and, of course, that sweet little 1438:
with the factory exhaust header:
She had some unique things;
A rollbar
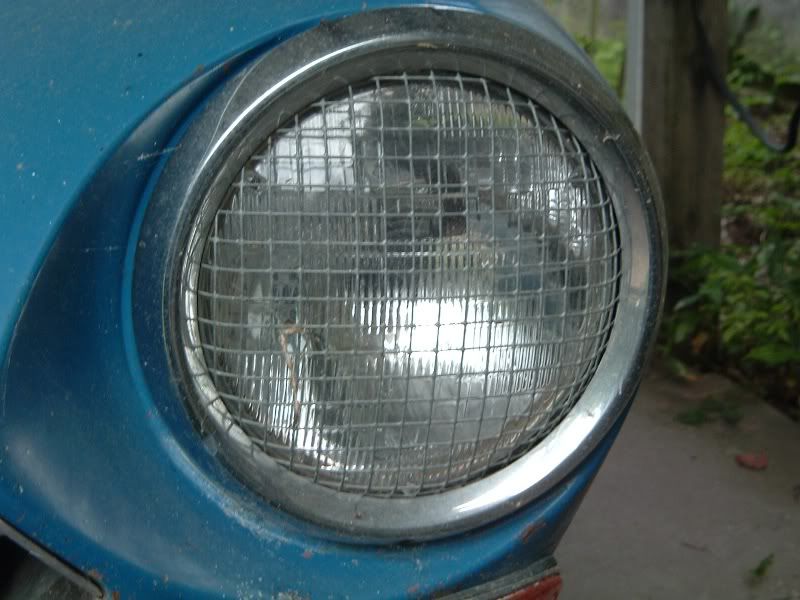
Homemade headlight guards
AM/FM radio
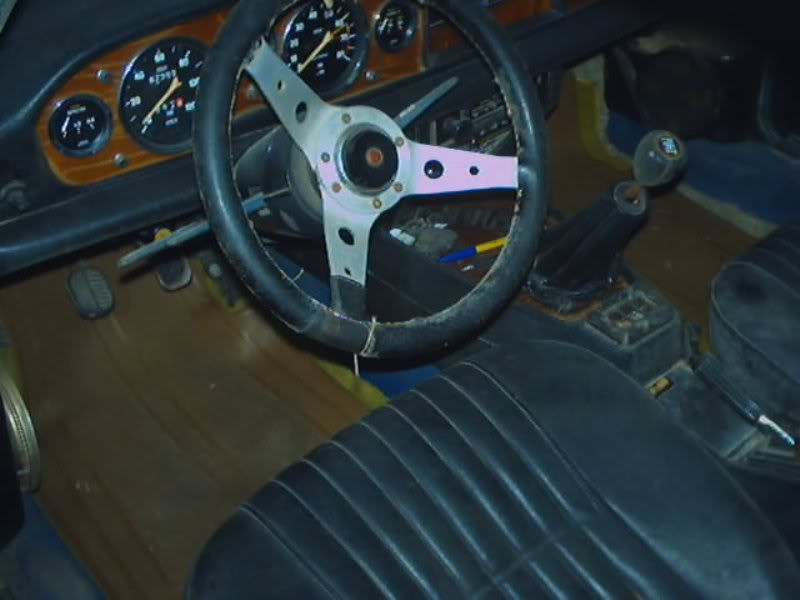
Aftermarked steering wheel
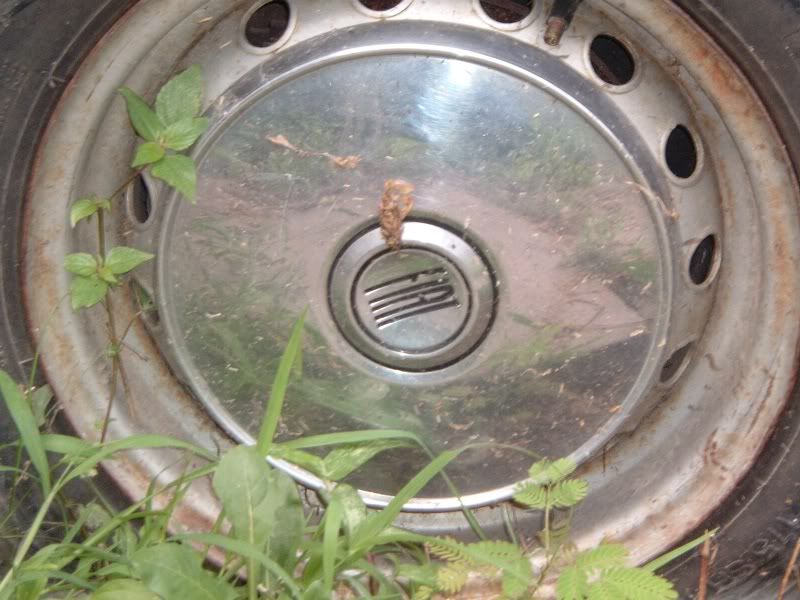
Original Hubcaps
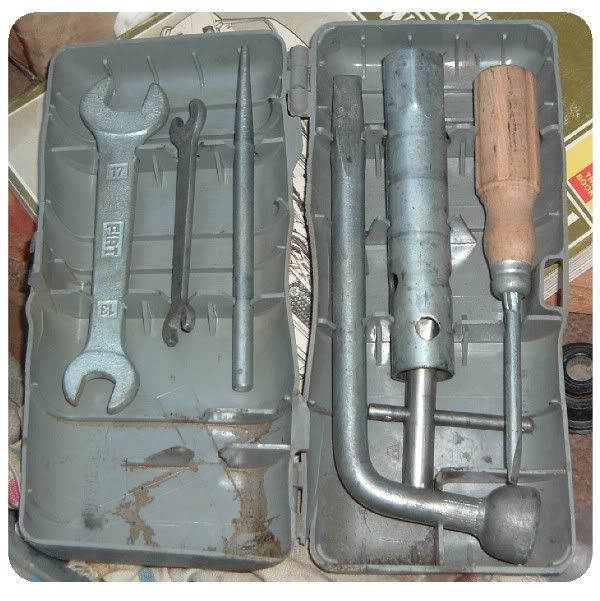
and the original tool kit:
And some bad points, mostly typical of the species:
Surface rust
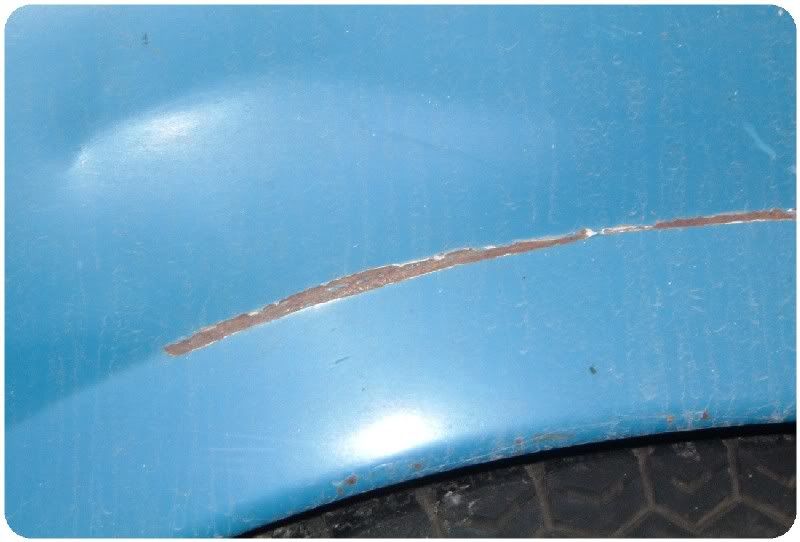
Note the homemade edge guard on the hood, interesting
A dent in a hard place to fix
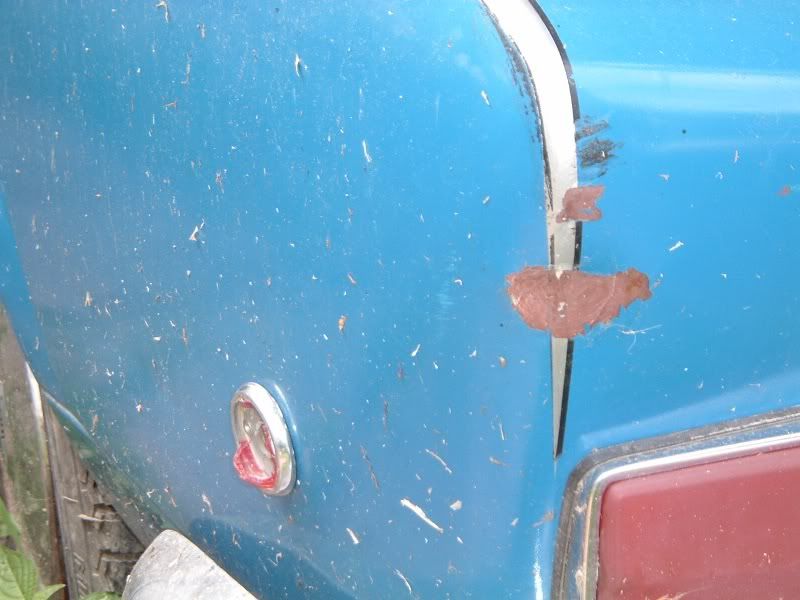
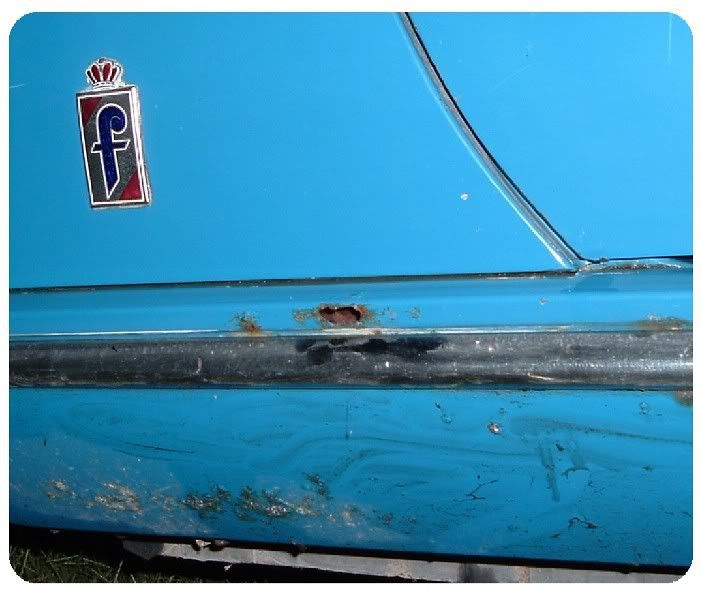
Holes in the rockers
Dried out wooden dash
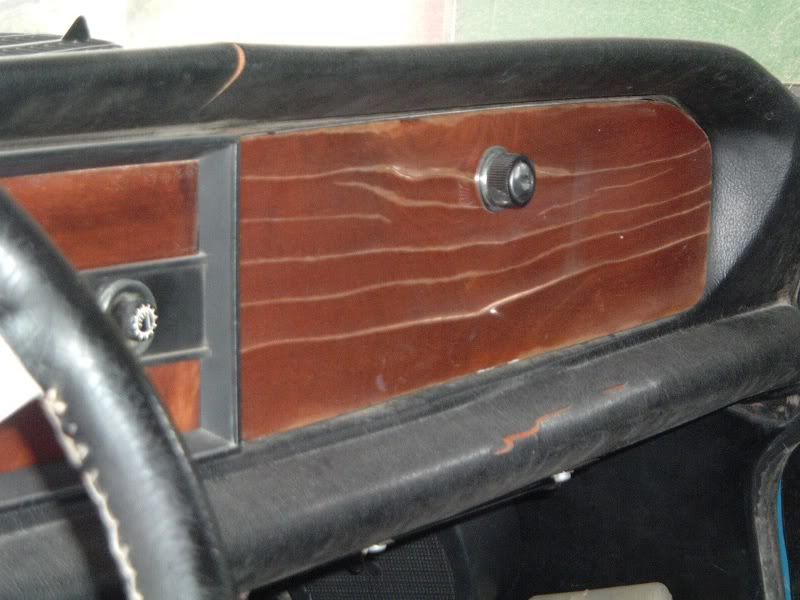
With cracks in the vinyl
Cracked and weathered e-brake housing
Cracked (and now very hard to find) lenses
Tears in the driver’s seat
Temporary fixes on the door panels
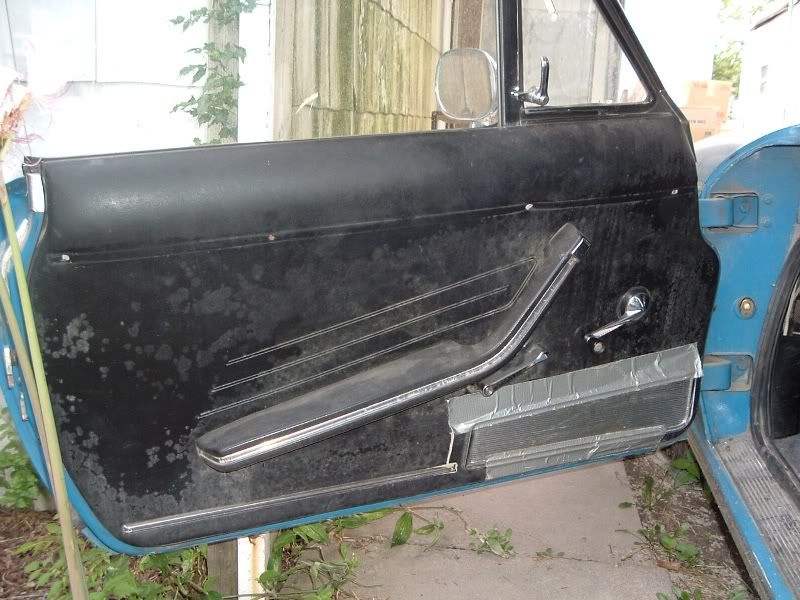
and other minor issues.
I don’t even remember how much I paid, too much, but the guy was emotionally invested in it, and I really wanted an early Spider (and money was a little easier to come by back then.) I think we negotiated to about $2 grand. I knew it was too much money, but I'd been looking for an early Spider in good body condition for a LONG time. I do remember it being hard to get the thing loaded on the trailer we had borrowed on the flat ground of Oklahoma, but we did get it loaded in the dark and brought it home.
The guy I bought it from was the 2nd owner. He had bought it in the early 70s from his girlfriend's father's Chrysler dealership where someone had traded it in on a new Chrysler. She gave him the aftermarket steering wheel for a Christmas gift. He drove it after that until job changes, relocations, marriage and children made the car impractical. He left it with his folks and his mom took it out occasionally to go buy groceries and let the sackers drool over her convertible. Then one day it wouldn't start. He tried on a couple of trips home to fix it, but life took over and it sat under their carport until I came to give it a new home.
Once home, she got a bath and I got a kick out of cleaning out the glovebox and trunk and finding all sorts of interesting bits. Eventually, she found her way into a tin barn I was turning into a shop and for the next several years sat on wheel dollies, gathering dust. Eventually the shop became my woodworking shop and the accumulation of tools and wood required more space so Celeste got kicked out the door. A few days or weeks later we got a rare hailstorm and Celeste took a beating along with the other six Spiders sitting around the place. I thought I was going to be sick. You see, other than the aftermarket parts, she’s about 98% original with only 87,352 original miles.
I think I’ve been waiting until I really felt that I knew enough and had the requisite skills to really put the old girl back on the road. I now realize that if I wait for that, there’s a chance my children will do the work after I’m gone! So, a few days ago I hooked her to the truck and pulled her to the garage, and here she sits (after a quick bath):
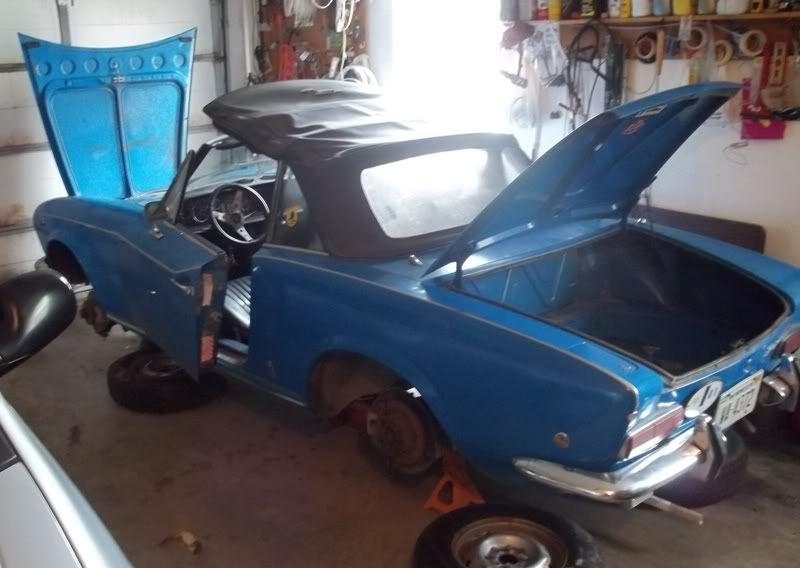
Every time I look very close, the list of “to-do”s grows. But for starters, I’m going to get the engine running again. After that, fluids/filters change, new belts & hoses, thorough inspection underneath and fixing what is apparently needed. From there???? I definitely have to deal with some surface rust and one bad dent in a rear corner that I have no idea how to fix. So, I’m building my list and will post progress here so that others can learn from my mistakes.
More to follow….
Re: My Affair with Celeste (Part II)
Part of the fun and adventure is not knowing what little surprise you will encounter next, and this applies in even the simplest of tasks on Fiats.
While I am still debating whether I want to restore, renovate or just revive this little darling, I do know that the first thing is to get the engine running as any subsequent work will depend on how it's heart is beating.
So, I've pulled the plugs and dumped a little Mystery oil in the tops of each cylinder. Then I put i a new battery, positive cable first. When I slipped the ground cable on the engine started turning over! oops! So now I'm pulling wiring diagrams and an article on how to rebuild the ignition switch as well as fixing to crawl under her and make sure nothing is shorting between the posts on the starter itself.
Not really what I thought I'd be doing first but it's really hard to work on an engine when it's spinning.....
-
- Posts: 1088
- Joined: Mon Aug 15, 2011 1:12 pm
- Your car is a: 1972 Fiat 124 spider
- Location: White Oak Tx
Re: My Affair with Celeste
It sounds like it will be a fun project. It doesn't look any worse than what mine did when I brought it home. Good luck and keep us posted on the progress. There is all the help you will ever need here,but with all the other spiders in your life I'm thinking you will be just fine. Welcome aboard.
Dennis Modisette
1972 124 Spider
2003 Chevrolet Z71
2007 GMC Yucon
1972 124 Spider
2003 Chevrolet Z71
2007 GMC Yucon
Re: My Affair with Celeste - PO stuff
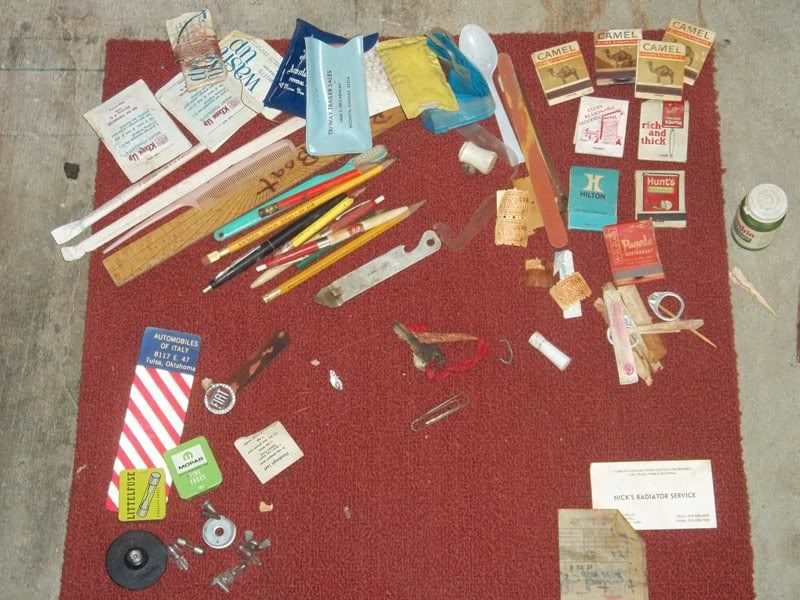
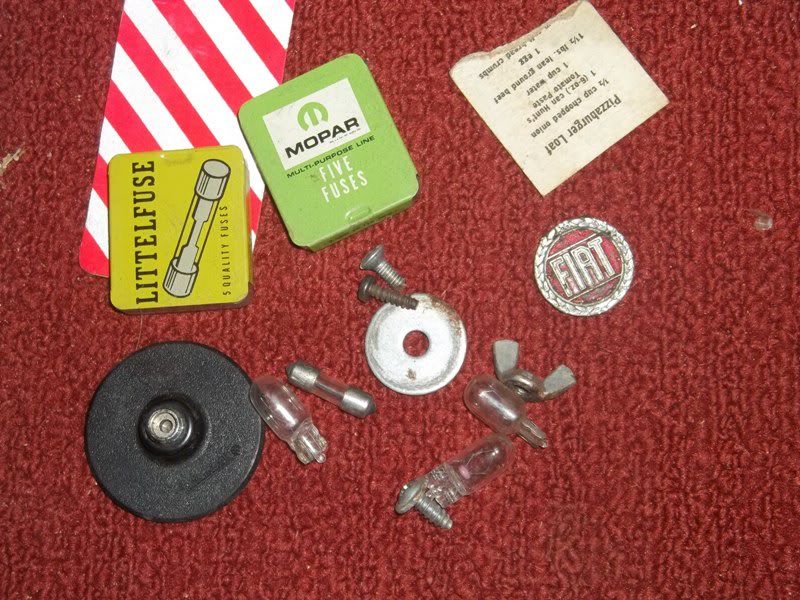
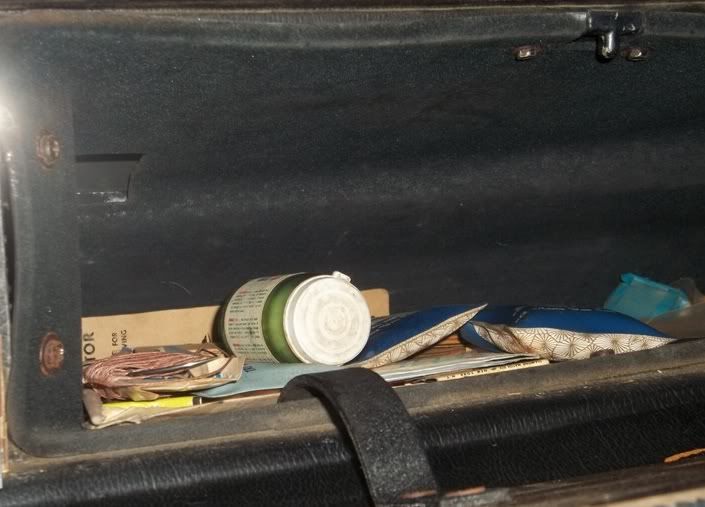
I really thought I had cleaned out the car when I brought it home. I remember finding all kinds of stuff in the trunk. I was taking misc. pics awhile ago and opened the glovebox:
this is what I found:
the car related stuff, note the little Fiat emblem. Wonder where it came from and where it goes?
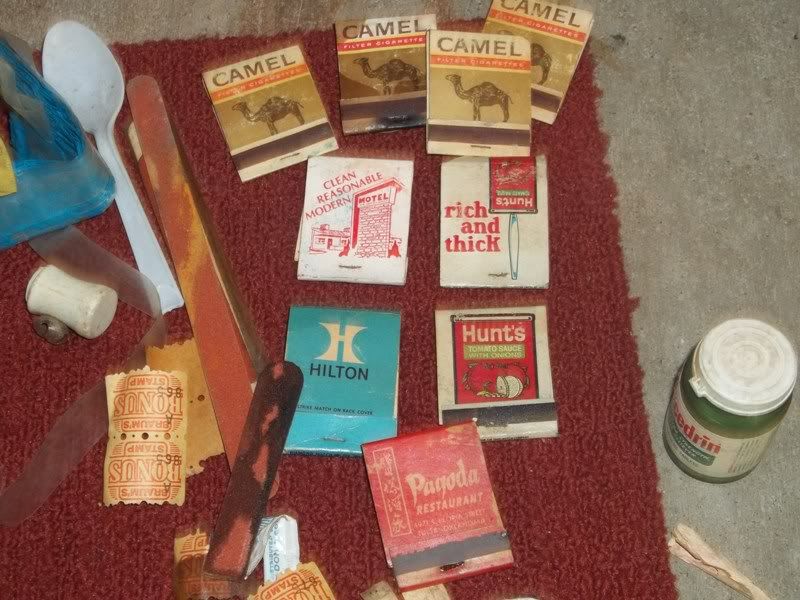
and I'm wondering if these would be of any value to a collector of such:
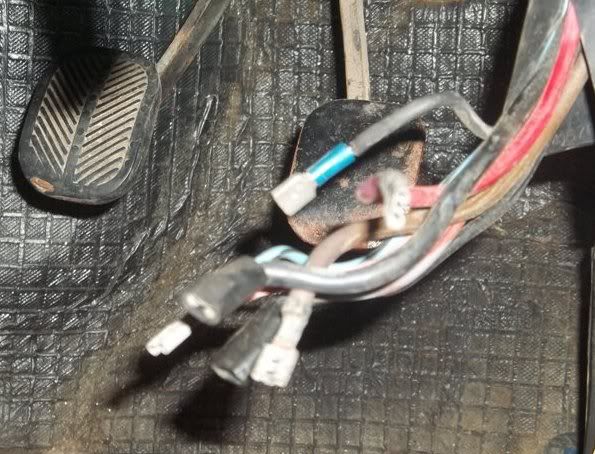
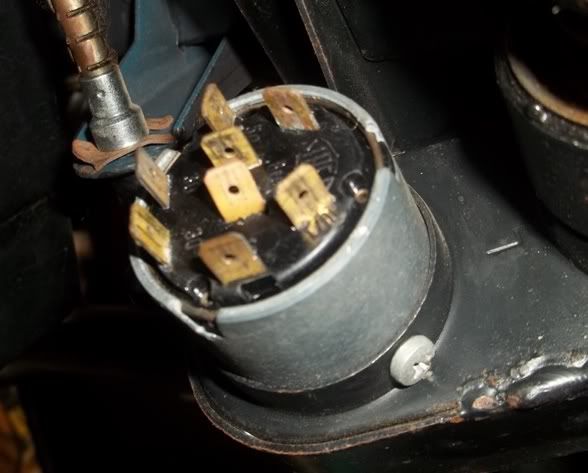
But the whole reason for taking pics was the ignition wiring. I need to figure out where all of these
fit onto this
Anyone got a clear diagram of such??
- 4uall
- Posts: 4145
- Joined: Mon Sep 26, 2011 12:09 pm
- Your car is a: 1980 Fiat Pininfarina Spider 2000 F.I.
- Location: Ottawa, Ontario, Canada
Re: My Affair with Celeste
this http://www.artigue.com/fiat/ and this http://www.google.ca/#hl=en&sclient=psy ... 80&bih=843 should help
Jay
Fiona
1980 FI 2000 Spider
ITZEBTZE
https://goo.gl/photos/eNKaX7hrXhBu9fmp6
FINN (FN-2187)
2014 Jeep Wrangler Sport
MYTHERPY
Fiona
1980 FI 2000 Spider
ITZEBTZE
https://goo.gl/photos/eNKaX7hrXhBu9fmp6
FINN (FN-2187)
2014 Jeep Wrangler Sport
MYTHERPY
Celeste 09-02-12
I've come to a decision. The debate (in my head) was over restore, renovate or renewal. I've come to the conclusion that a genuine restoration is beyond my expertise and budget and could never really pay off. I also don't want to settle for just getting it running and fixing things as they break. I already do that with the other '69. And there are some things on other model years that I thought were an improvement as well as weak points in the design on the '69. SOoooo, bottom line this is my car and I'm gonna do it Sinatra style, i.e my way.
When I first stuck the battery on the car, it started turning over even though the ignition was off. I banged on the solenoid and pulled the wiring off the back of the ignition. Then I plugged them back in to match the other '69 and apparently whatever was sticking is now OK. However, with the key in full OFF position I get the alternator light and the emergency flasher indicator to light up. Turning the key between OFF and ON rectifies this so that the battery doesn't run down, but I know at some point I'll have to address this ignition switch in a more permanent way. This will be done before the car goes back on the road.
I cleaned up the old ignition components as best I could, checked continuity in the wireset and stuffed in some brand new old stock Marelli plugs, charged the battery, shot the carb with starter fluid and turned the key. The engine turns easily, but doesn't fire up. In fact, it sounds like it's not getting fire. I clipped a timing light on the coil-dizzy lead and it seems intermittent at best, and the coil warms up. Still, the engine turns over, the starter turns the engine, and there is hope.
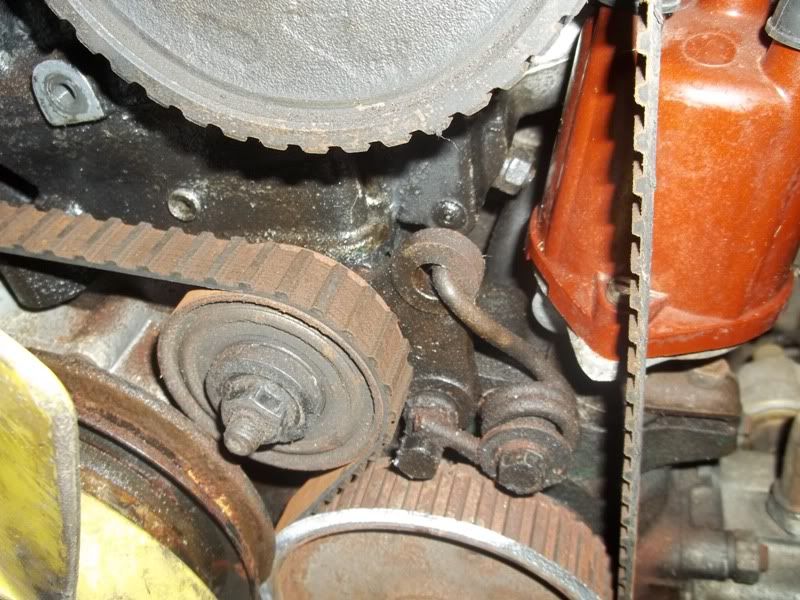
However, I've abandoned my initial plan of just getting it running and then replacing stuff, renewing stuff, repairing stuff. With the realization that it isn't going to start running easily, I've decided to take the more thorough approach. First off, the timing cover, in order to see where the cam pulley holes line up in relation to the pointers, and to have a good, clear view of the main pulley so I can clean it and make the timing mark more visible. This also allows me to visually inspect the belts and hoses. I intend to replace them all anyway, so might as well start now.
Now I've got to order the stuff I need for an initial tuning from my favorite vendor and wait a couple of days. Meanwhile I can do some of those things that aren't mechanically necessary but sure make for a much sharper looking car when it's all done. Now I'm trying to decide between repainting the breather the original grey, shiny black or a deep blue. And I might pull the cam covers and polish them up because that sure looks nice. The original 2-pc fan shroud is due for a deep cleaning, prepping and repaint. Plus, maybe I can clean up the engine somewhat.
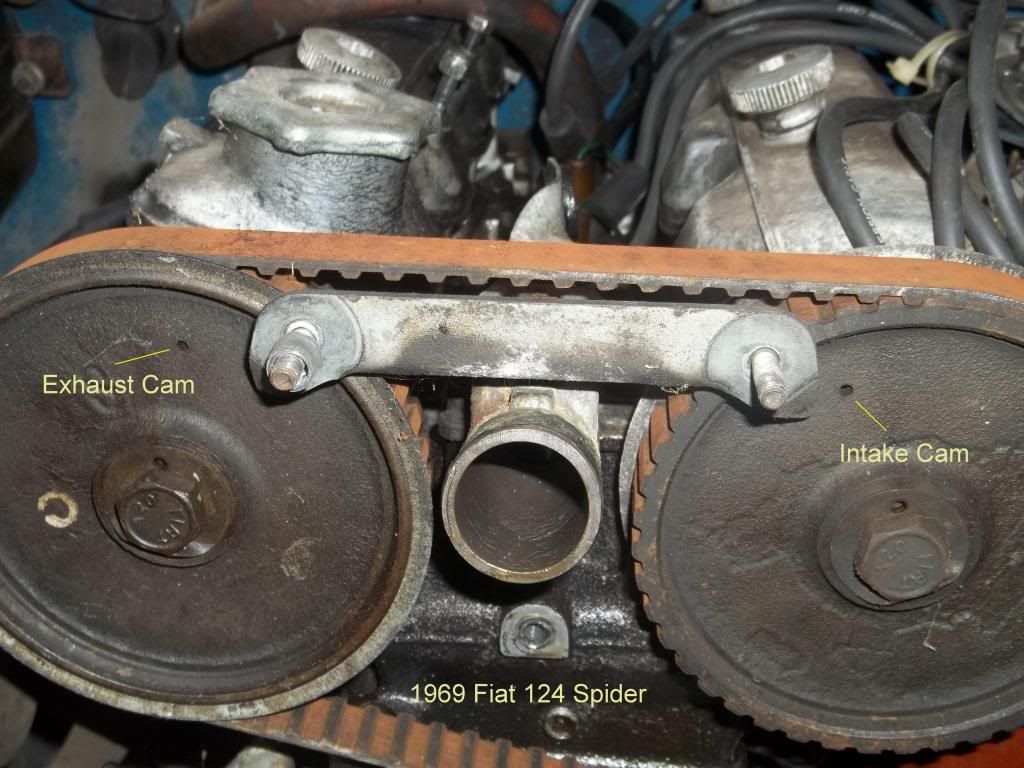
When I pulled the timing cover, here's how the timing holes lined up (NOT) on the pointers. This is, at least, a starting point for getting her running again. <EDIT> The original shows both cams with both holes about equally off the mark. Don't know why the photobucket paste isn't showing the full pic. They are downsized to 800x600 on photobucket (can be seen at http://s1015.photobucket.com/albums/af2 ... 0Oklahoma/ )
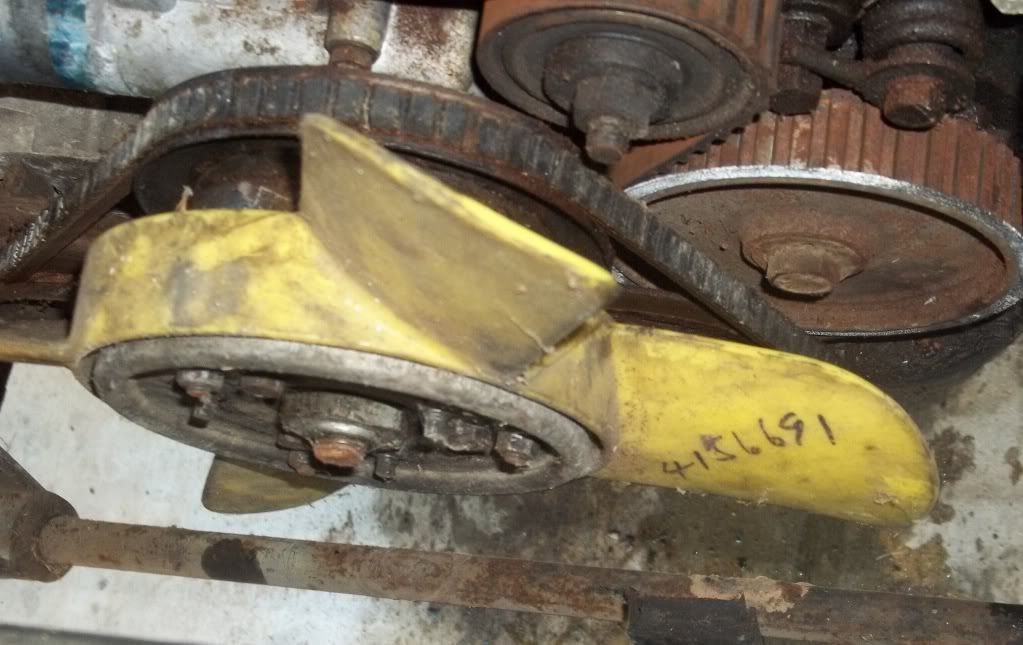
And it looks as though the cooling fan has been replaced at some point. Which brings up another decision, whether to stick with the engine driven fan or convert to the more efficient electro-fan (of which I have about 5 hanging in the shop). Note the penned number on the blade.
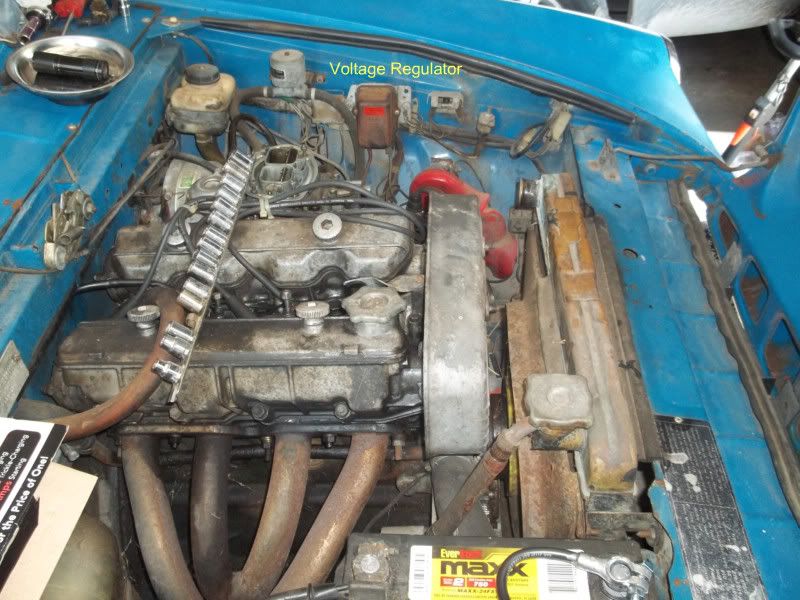
I hate electrical. It is just difficult for me to translate from an electrical diagram to the stuff hanging on the car. This big square thing got warm while cranking the engine in an attempt to pump out all the old gas left in the bottom of the tank and lines after hand pumping out most of the old gas. I think this is the voltage regulator, but wouldn't mind someone telling me for sure.
Speaking of the old gas; it was almost dark purple and stank like nothing I can recall. And there was enough rust in what I hand pumped that I'm beginning to consider pulling the tank and learning how to clean one out. Any thoughts on how much of a project this would be?
Re: My Affair with Celeste
Looks like a nice project you have.
Yes, the voltage regulator is correctly identified.
Yes, the cam wheel marks aren't aligned properly, and I'd also question if the cranshaft alignment (Top dead center) and aux shaft timing are where they should be either. All 4 need to be aligned properly, as well as the distributor, in order for the engine to run. Your engine may crank and run if you take care of aligning the cams, crankshaft, and distributor.
By turning the engine with the timing belt not timed correctly, there is risk of bending the valves. Double that risk if you are able to get it running, and the old timing belt gives up the ghost. The first thing I would do is get a new timing belt, then properly align the engine timing (carefully turning the engine and cams to avoid bending valves), and properly aligning the distributor, and try to run the engine again. If you can get it running, you can check compression, check carburation, exhaust, cooling system, and other engine-related things before cleaning it up to enjoy it or starting your rebuild.
Alvon
-
- Posts: 5745
- Joined: Fri May 16, 2008 5:06 pm
- Your car is a: 1969 124 AS spider
Re: My Affair with Celeste
Will be sharp when u are done
Jim
East Grand Forks MN
1970 Fiat Spider BS1 ( FOR SALE
1969 124 AS Spider
2017 Abrath
2018 Alfa Romeo 4c Spider
East Grand Forks MN
1970 Fiat Spider BS1 ( FOR SALE
1969 124 AS Spider
2017 Abrath
2018 Alfa Romeo 4c Spider
Celeste 09-03-12 Timing
As the previous picture showed, the timing is way out of wack so no wonder it won't run. Duh!
Since my intent is to replace all the consumables and bring the periodic maintenance up-to-date, I have removed the radiator and hoses along with the metal timing cover (which I like so much more than those yellow plastic ones). I've set the timing mark to 10° BTDC for static timing. Next is removing the old timing belt. I understand that means loosening the tensioner bearing, which is spring-loaded. My question is ... how do I loosen that up without it flying apart? Or can I somehow pry the end of the spring out of its hole? And, if so, how do I ever get it back in there?
Then I'll be asking about how to loosen the cam pulleys and reset them without screwing something else up.
Ben
Sometimes I just have to think about it a bit
Well, duh! Loosen the bolt on the tensioner and the one on the cam plate holding the spring, pry the tensioner to the left to release tension, tighten it down enough to hold, slide off old belt. Sometimes I make things much harder than they really are.
Then I was thinking I'd have to pull a pulley or two off the front to get the timing belt off. Thought about it, walked away for awhile, came back and fished it out, not easily, but I did get it off without removing any hardware. Not sure I remember how well enough to get the new one one. Guess we'll see.
As of right now it is sitting with the plugs out, the timing mark at 0° TDC, the auxiliary at approx. 34° clockwise from high noon, and the two cams timing holes lines up with the pointers. Now all I need is to replace the timing belt, coil, points, condensor, rotor, wires and plugs and see if she'll fire up.
-
- Posts: 5745
- Joined: Fri May 16, 2008 5:06 pm
- Your car is a: 1969 124 AS spider
Re: My Affair with Celeste
u can let me take that car off your hands . i have a tail lens
Jim
East Grand Forks MN
1970 Fiat Spider BS1 ( FOR SALE
1969 124 AS Spider
2017 Abrath
2018 Alfa Romeo 4c Spider
East Grand Forks MN
1970 Fiat Spider BS1 ( FOR SALE
1969 124 AS Spider
2017 Abrath
2018 Alfa Romeo 4c Spider
Re: My Affair with Celeste
Yeah, forgot to put it on the list. The one on there is only 43 years old with 87K miles on it!!Divers wrote:You might want to change the tensioner bearing.
-
- Posts: 5745
- Joined: Fri May 16, 2008 5:06 pm
- Your car is a: 1969 124 AS spider
Re: My Affair with Celeste
soon it will look like this.
Jim
East Grand Forks MN
1970 Fiat Spider BS1 ( FOR SALE
1969 124 AS Spider
2017 Abrath
2018 Alfa Romeo 4c Spider
East Grand Forks MN
1970 Fiat Spider BS1 ( FOR SALE
1969 124 AS Spider
2017 Abrath
2018 Alfa Romeo 4c Spider
Re: My Affair with Celeste
I WISH!! However, beyond the obvious that it is blue instead of red, HAHA, it has a rollbar, the paint is shot, and I'm debating about factory steel wheels versus something else I have laying around.fiat218 wrote:soon it will look like this.
I've even got some fake spoked wheel hubcaps around here somewhere!!