Page 14 of 16
Re: 1978 rolling restoration
Posted: Mon Jul 09, 2012 10:22 pm
by DocGraphics
Thanks guys, it did turn out nice!
I am just using a jigsaw & tin snips to cut & my vice & light hammering as a brake to bend (sometimes pliers or a cold chisel to put in bends that won't work in the vice).
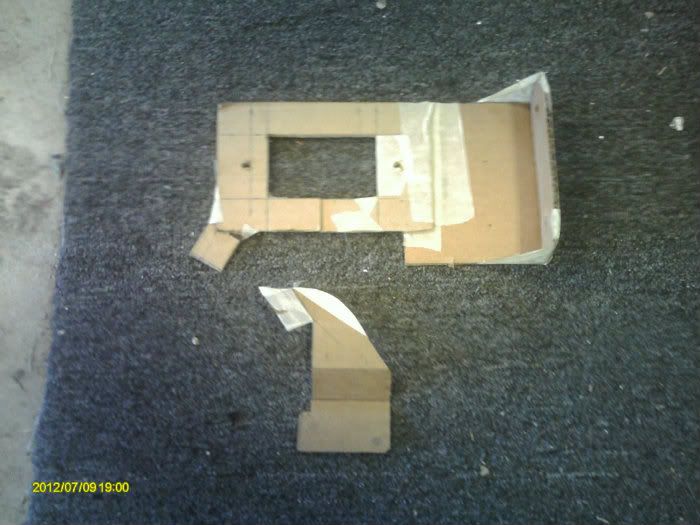
I usually make a cardboard pattern of the pieces I am making that have any bends then flatten that out to cut & bent the metal back to the right shape.
Here's a pic for the card board pattern I made for the bracket & the one I made for my blinker light mounts. You can cut and tape the card board to get it all to fit right before cutting any metal.
Re: 1978 rolling restoration
Posted: Sun Jul 15, 2012 12:21 am
by DocGraphics
Got the coil pack mounted & wired today, just move it over 1 bolt & added a new one to the other side. I also made a dedicated ground wire for it.
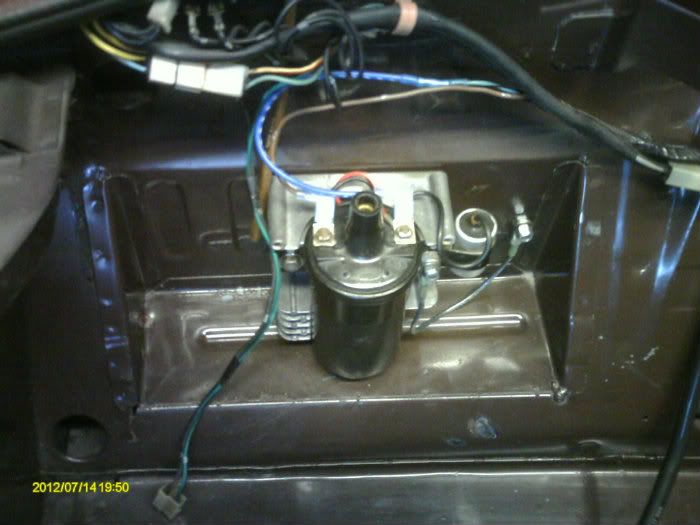
Next I added another block ground wire to where the old air pump bracket bolted to the block. I used a 19" double ended battery cable.
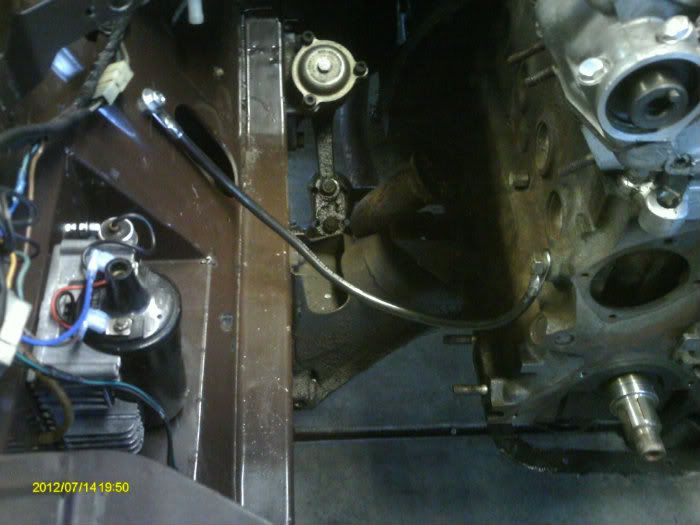
Also replaced some of the wire connectors & repaired a few frayed wires & got the cam seals replaced
So I wish I would think a little more before ordering parts as I had to put in a 3rd order to Autoricambi in the last two weeks, somehow I forget to order a pan gasket & a couple other gaskets, boy shipping adds up on the repeated small orders.
That & every time I go to work on something & don't have the needed parts it's another set-back in the timeline.
Re: 1978 rolling restoration
Posted: Sun Jul 15, 2012 9:46 pm
by 124JOE
Nice job on those as well
I was told to put the ground wire near the starter
Re: 1978 rolling restoration
Posted: Sun Jul 15, 2012 10:23 pm
by DocGraphics
There is already a ground wire there on mine, goes from the frame to one of the cover bolts on the bottom of the bell housing, factory.
I did notice there is a threaded boss at the bottom of the front end of the starter body itself, I might make another one for there too.
Re: 1978 rolling restoration
Posted: Sun Jul 15, 2012 10:40 pm
by 124JOE
My ground by the starter was striped
I have a second by the alt
Re: 1978 rolling restoration
Posted: Sat Jul 28, 2012 11:38 pm
by DocGraphics
Been a busy week, got the engine all back together except for the exhaust & radiator.
Hopefully tomorrow will see her running again....YEA!
Here's a couple pics of my progress,
Took fan assy apart & painted it all & the radiator,
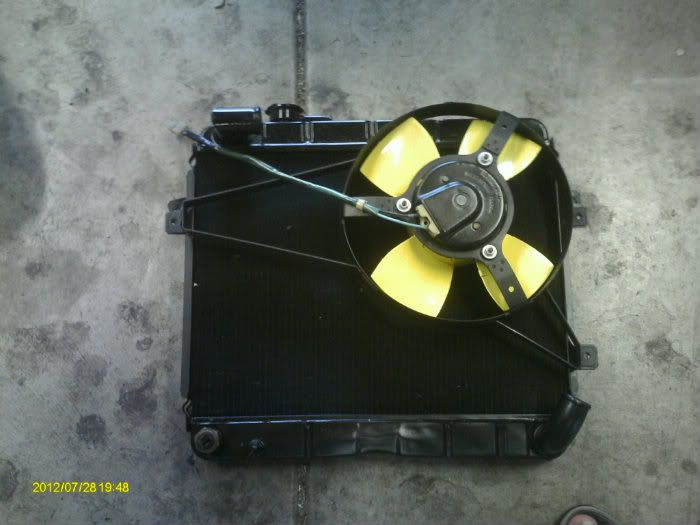
Removed all the old exhaust, still very solid except for a crack in the weld on one of the resonators, I painted it all with black header paint. The new 4-2-1 header down pipe has already been painted silver exhaust paint, it was cut off the donor vehicle like 6" short so I got a piece of 1.75" tail pipe to span the gap & make it all fit like it should, plus bought an exhaust hanger for in the middle between the resonators (nothing there when I bought it) & installed new correct rubber hangers for the muffler (no more coat hanger)
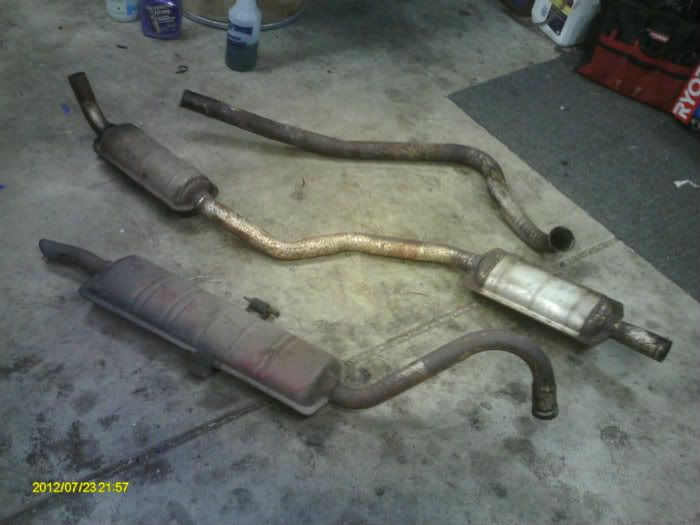
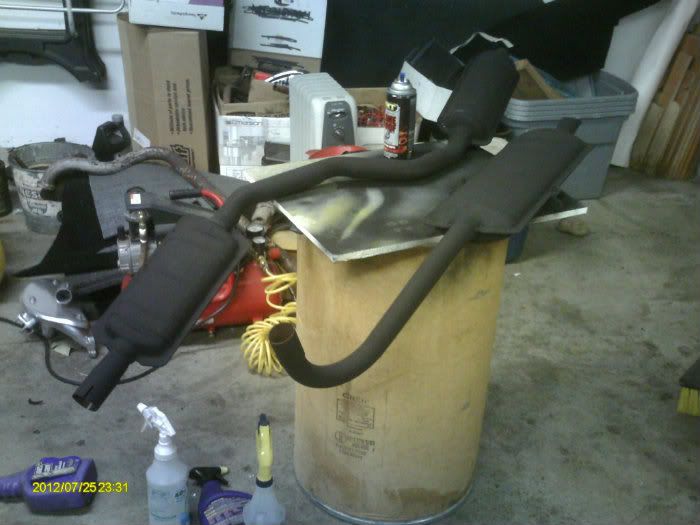
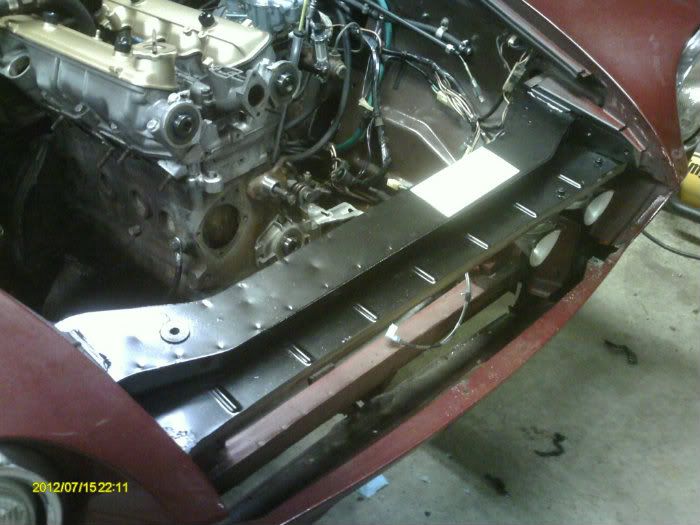
The front cross brace by the radiator was half original brown paint (like the engine compartment) & half burgundy over spray (like the body) so I painted it satin black, much better,
& here's a few pics of the engine with all the gears pulleys, timing belt & such all back together,
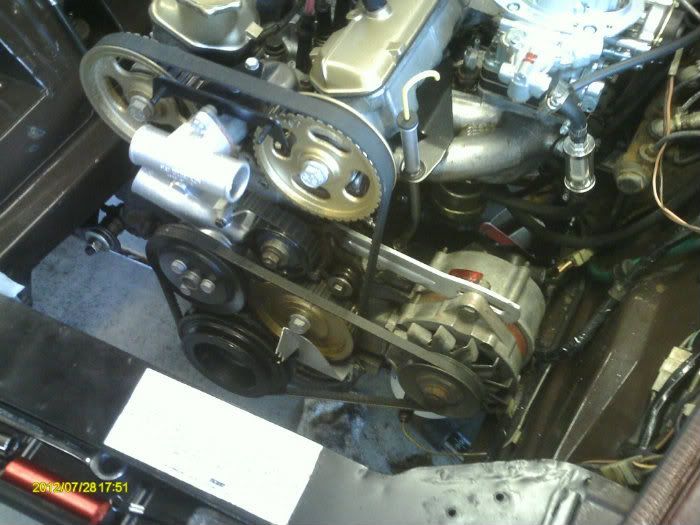
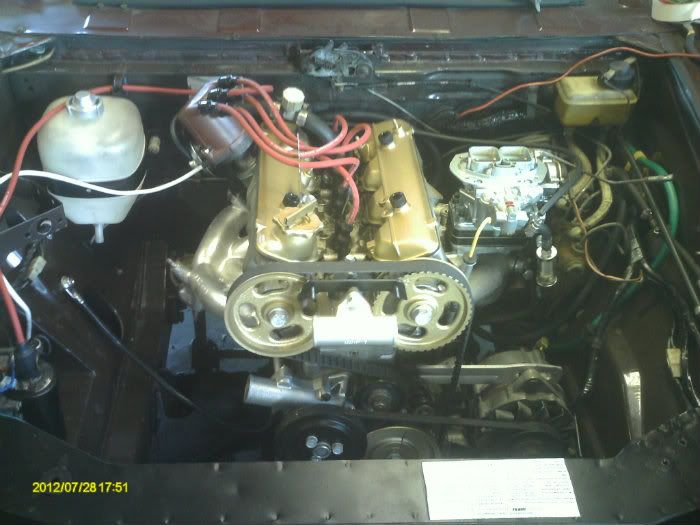
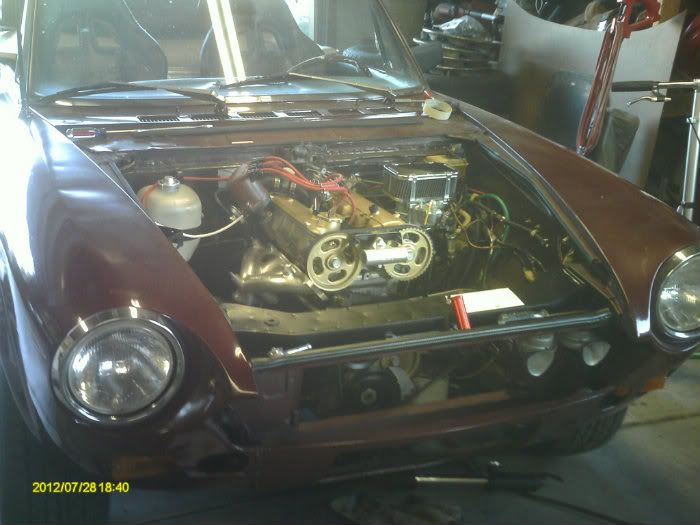
It is looking so much better than the old dirty rats nest I had & love the gold covers & gears.
I can't wait to fire her up & take a long awaited drive, been apart for almost 2 months of on again/off again driving weather. Plus very eager to see how the upgrades effect the overall HP.
The funny thing here is it was the first week in August last year when I got her (&me) on the road the first time, must be an omen of great things to come.
Re: 1978 rolling restoration
Posted: Sun Jul 29, 2012 4:45 pm
by DocGraphics
SHE LIVES !!!!!!!!
Cranked her over for a while without the power hooked up to the coil to circulate the oil & get fuel to the carb.
Hooked up the power & VROOOOOM!!!!!
Static timing was dead on 0* TDC so moved that to 10* & man does she run nice.
Very load though, I only have the header on right now.
I'll post up more soon when I have a little time to do it right.
Re: 1978 rolling restoration
Posted: Mon Jul 30, 2012 3:10 am
by DocGraphics
Alright I have time to type it right now.
So I got her all back together less the exhaust (only header installed) & she fired right up.
Before I put the coals to her I removed the + lead to the coil & cranked her over about 10 times for about 10 seconds each to get the oil circulated & fuel to the carb, dribbled a little gas into the carb, hooked up + to coil & she lit up.
She fired right up & ran real smooth, checked the timing & I had her statically at exactly 0* BTDC so I bumped her up to 10* BTDC (vac adv disconnected) & let her run thru 3 cycles of the fan & to let the new paint burn off exhaust manifold.
I must say that a TC Fiat motor running with only the manifold & down pipe sounds frickin' wicked! Harleyish even.
I do need to pull the radiator again & torque the main crank nut, got it tightened but not torqued as there is no resistance to torque it with the plugs out.
I tried putting it in gear & having my girl stand on the brake but then the crank would just turn a bit further without torquing the nut & then flex back, I think the guibo allowed this & didn't want to push it..
>What do you all suggest for actually torquing the crank nut on ????
I set the timing at 10* BTDC with the vac advance disconnected which brought up the RPM's & smoothed the idle nicely but when I hooked the vac adv back up it moved the ign. timing to like 18* BTDC at idle (900 RPM).
>Should I set it back to 10* WITH the vac adv connected or is this normal ?????? (1800 w/ electronic ignition)
Anyhow feels great to get her back breathing again & will be on the road soon.
Here's a little video of her starting up after the upgrades, a bit loud but runs sweet!
Click on pic to see her run...loudly!
Re: 1978 rolling restoration
Posted: Mon Jul 30, 2012 6:22 am
by dmwhiteoak
Good job. Sounds nice, just a little loud. Must you run with the cat on the exaust?
Re: 1978 rolling restoration
Posted: Mon Jul 30, 2012 8:29 am
by RRoller123
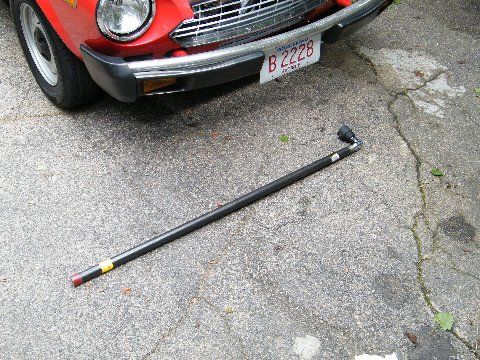
I torqued the crank nut with the help of a chain wrench on the pulley. My son on one side of the car holding the CW with a 4 foot extension and I on the other with the TW also on a 4 foot extension. Otherwise, everything would just turn no matter what I did.
Re: 1978 rolling restoration
Posted: Mon Jul 30, 2012 11:14 am
by majicwrench
Yup Don you need a chain wrench, is a must-have tool. Harbor freight, a lot of rental places have em. And you shouldn't need 4ft extensions, crank nut not all THAT tight!
FYI pulling coil wire and cranking engine, is not really helping anything. SO many things in an engine count on oil splash/spray for lube that you are better off getting it running at a decent RPM to lube everything.
The vacuum advance is gonna advance the timing when hooked up, that's what it does. Set timing with it disconected just like you did. Some engines idle better with the added advance, some engines don't like it. Not sure how Fiat was set up from factory. I assume your idles well with the V advance working at idle?? If so, great.
Summer's almost over.......
Keith
Re: 1978 rolling restoration
Posted: Mon Jul 30, 2012 11:38 am
by RRoller123
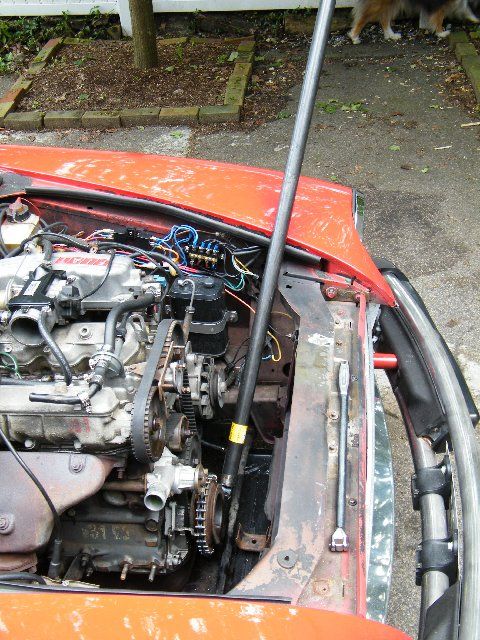
The extensions were to get the darned thing OFF! LOL. But 181 ft-lbs is tremendous, and well beyond my wrench limit, so we torqued it up to the limit (I think my wrench goes up to 160 or so) and then smidged it some more to be sure we got the torque up around there. Doing that with a standard 24" wrench would have been a nightmare, and it gets your back up out of the engine compartment which makes it a LOT easier, as you can use your body weight to lean into it. Highly advised to use the extension. An 8 foot Black Iron pipe from HD cut in half works great and does both CW and TW extensions for about 10 bucks I think it was.
If you get the HF chain wrenches, buy 2, as they are just a little too short. At $5.99 it is no big deal. They are in the plumbing supplies section. You can link them together pretty easily as the links can be removed from the chain section.
Re: 1978 rolling restoration
Posted: Mon Jul 30, 2012 12:08 pm
by majicwrench
Wow, is it really 181lbs?? I didn't think it was that high. So yes, get a pipe! I put locknut on most all crank bolts as well.
Re: 1978 rolling restoration
Posted: Mon Jul 30, 2012 12:17 pm
by RRoller123
Good idea, I wish I had done that. I wonder what would happen if the crank nut came off while tooling along at 70? That would be an interesting dilemma!
Re: 1978 rolling restoration
Posted: Mon Jul 30, 2012 9:31 pm
by DocGraphics
Got the crank nut tightened just fine....160 on the torque wrench & a little more.
I bought a harbor freight chain wrench (they only had one) & put it on the very front pulley of the crank & it gripped just great to torque things up.
I had both wrenches pointing almost straight up & was fairly easy to just pull apart (body builder style

) on the two till TW clicked & then a bit more.
Timing wise I will leave her where she is at for now & play with it once she is all the way on the road & I can butt-dyno the timing setting.
Thanks for all the help with this & everything else!
Love this forum & the wonderful member who lend their expertise.


