Finally. Wanted a Spider..more details!
-
wizard124
- Posts: 752
- Joined: Mon Oct 29, 2012 9:27 pm
- Your car is a: 1980 124 spider FI
- Location: Sheridan, WY exSan Rafael, CA
Re: Finally. Wanted a Spider..more details!
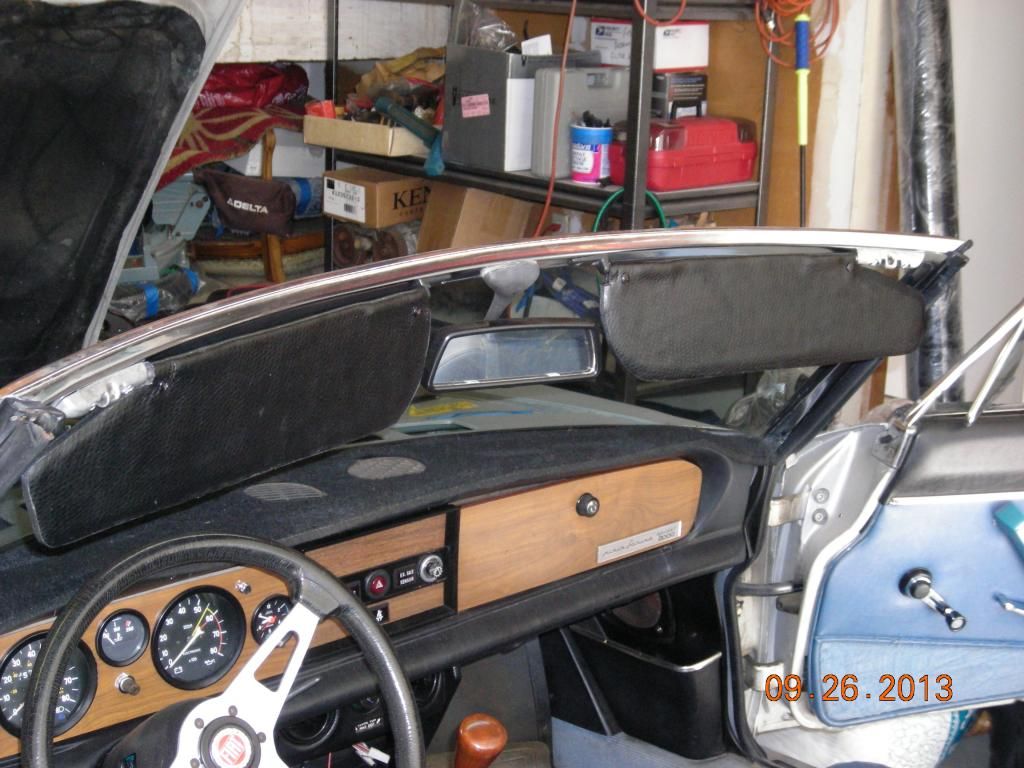
I got around to completing my home made visors  The how to is here: http://ww.fiatspider.com/f08/viewtopic. ... 9&start=15


'80 spider FI, SnugTop hardtop
http://s940.photobucket.com/user/a7ewiz ... t=3&page=1
http://s940.photobucket.com/user/a7ewiz ... t=3&page=1
-
wizard124
- Posts: 752
- Joined: Mon Oct 29, 2012 9:27 pm
- Your car is a: 1980 124 spider FI
- Location: Sheridan, WY exSan Rafael, CA
Re:Rear Brake caliper re-build.
My left rear brake caliper has been leaking for a while. I got to this yesterday. I finished it this morning. The re-build isn't really very difficult; many threads and references to this job. But, pictures help us to understand so here are a few:
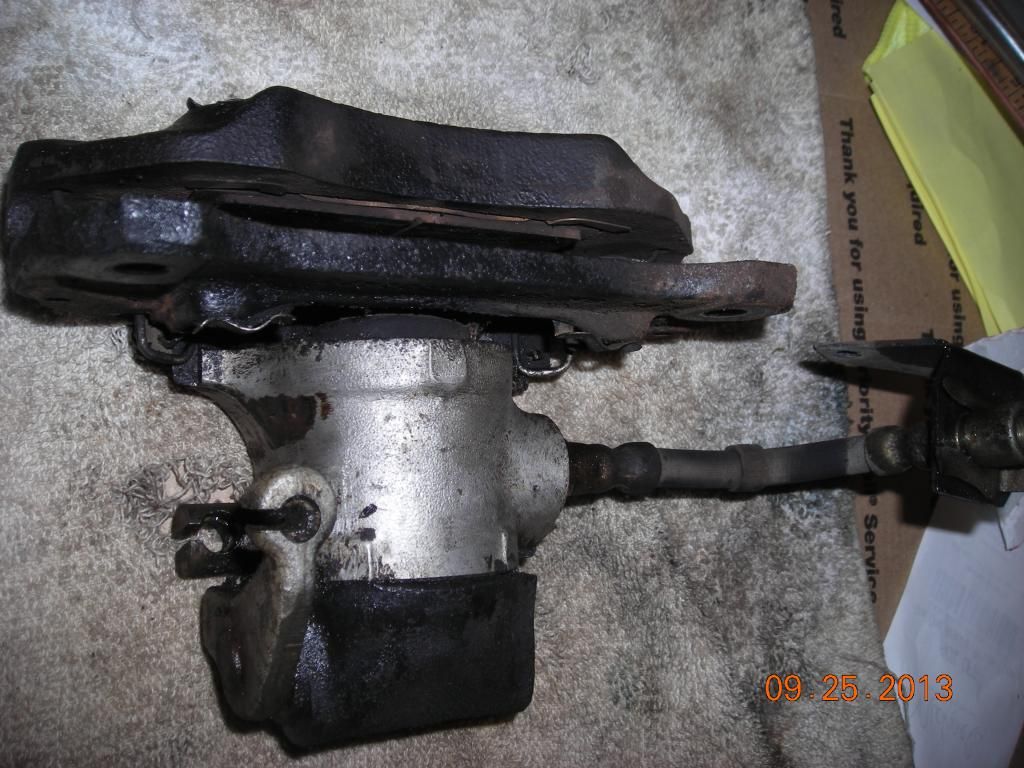
The trick is cutting down the end of a C clamp to fit. I used a Dremel cutting wheel. This one came from Home Depot, less than $10 as I recall:
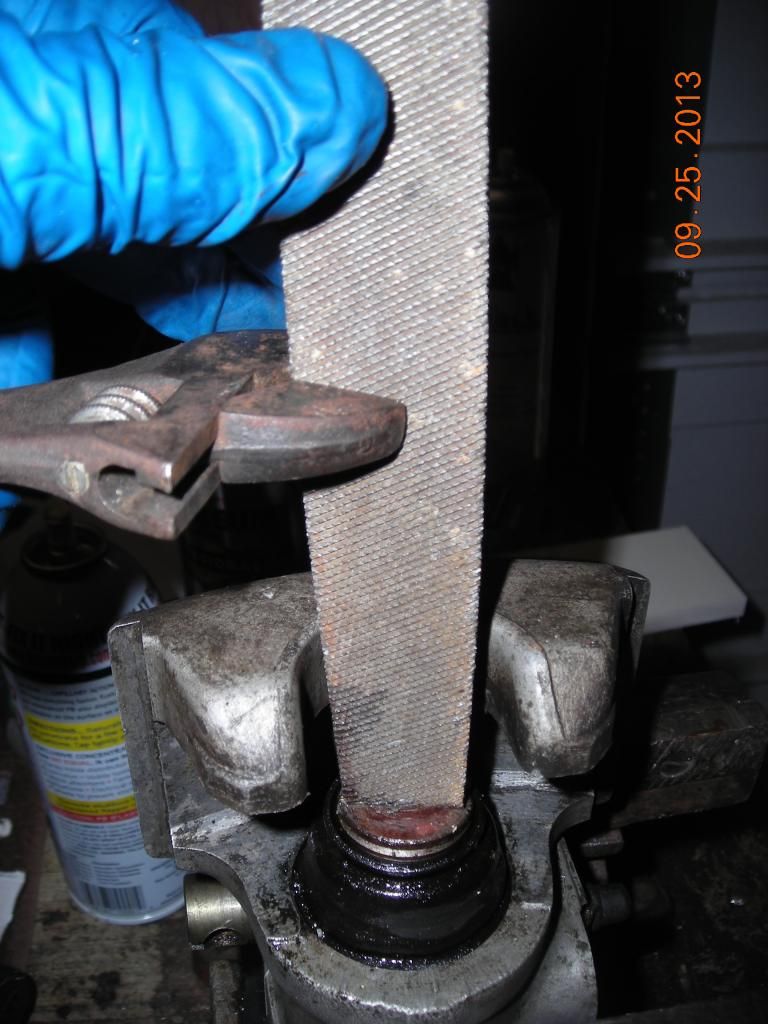
A fat file used as a screwdriver to remove the piston off a threaded shaft. Both calipers are standard threads. Once the piston is removed, the task is to remove this same threaded shaft by working on its other end under the rubber boot:
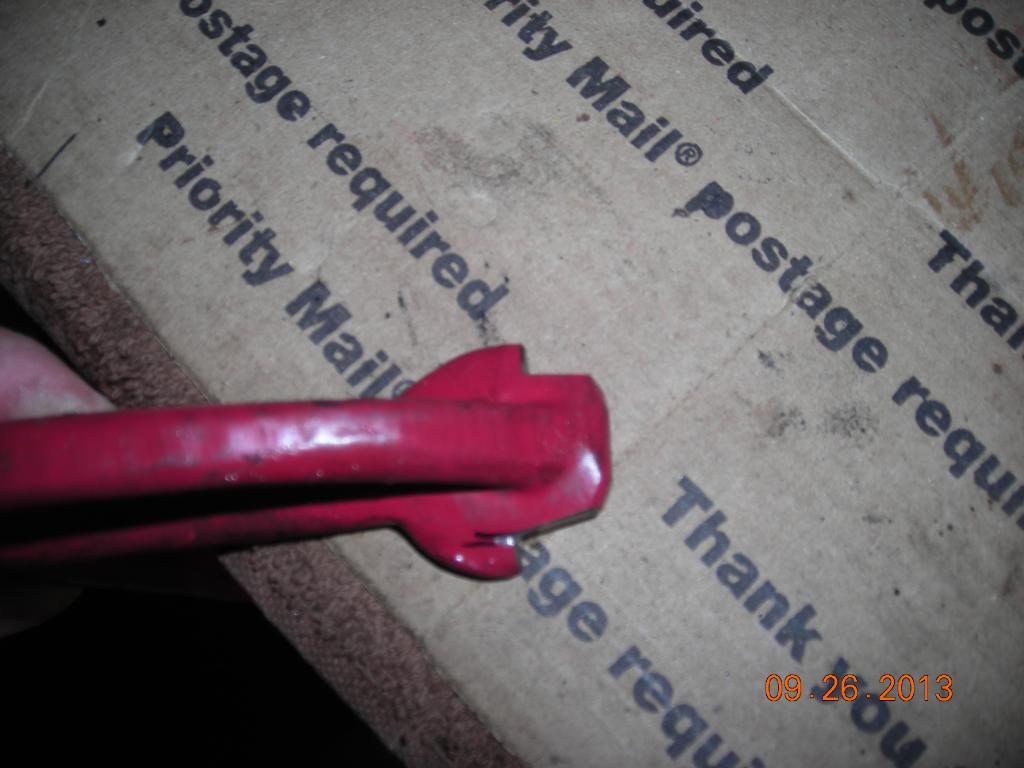
As you pull back on the rubber boot, the threaded shaft it held tight against the parking brake actuator by a series of spring washers. They are in series like this ()()(). The C clamp is used to flatten them so that the actuator can be removed after the retaining circlip is removed. There is a small key which will fall away during this process. It is not symmetrical so be careful to observe its orientation so that you can reinstall it correctly (I assume it makes a difference. I'd hate to find out the hard way ) Take note of the spring washers also. So, the notched end of the C clamp is placed on the small extended end of the threaded shaft shown in the photo.
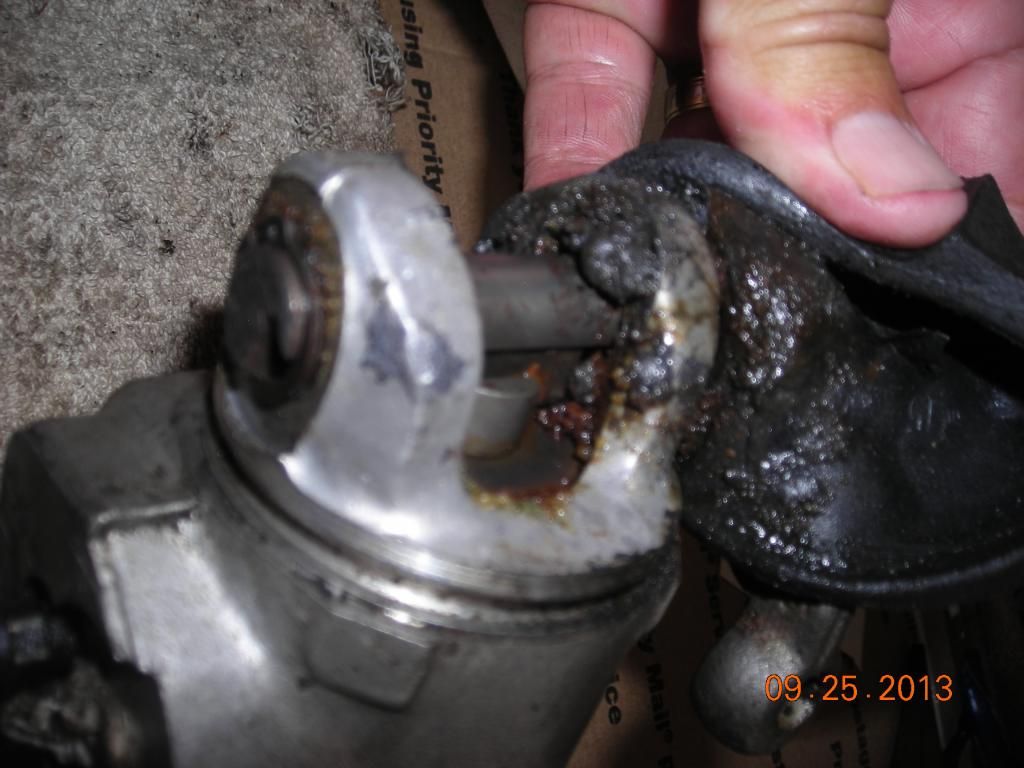
Once the actuator is slid free, the shaft can be pulled out. There is a small o-ring on the threaded shaft and a rubber seal inside the actuator cylinder. Clean everything well, inspect the surfaces and re-assemble. I used wheel bearing grease on the spring washers and shaft and on the new seals and where the boot sits. I also used a long wire tie to better seat the edge of the rubber boot. I installed the piston dirt seal by sliding it up onto the piston. After screwing in the piston a ways, I worked the caliper edge into its groove with a small screwdriver. Once the piston is fully screwed in, the seal slides over the piston crown on its own.

The trick is cutting down the end of a C clamp to fit. I used a Dremel cutting wheel. This one came from Home Depot, less than $10 as I recall:

A fat file used as a screwdriver to remove the piston off a threaded shaft. Both calipers are standard threads. Once the piston is removed, the task is to remove this same threaded shaft by working on its other end under the rubber boot:

As you pull back on the rubber boot, the threaded shaft it held tight against the parking brake actuator by a series of spring washers. They are in series like this ()()(). The C clamp is used to flatten them so that the actuator can be removed after the retaining circlip is removed. There is a small key which will fall away during this process. It is not symmetrical so be careful to observe its orientation so that you can reinstall it correctly (I assume it makes a difference. I'd hate to find out the hard way

Once the actuator is slid free, the shaft can be pulled out. There is a small o-ring on the threaded shaft and a rubber seal inside the actuator cylinder. Clean everything well, inspect the surfaces and re-assemble. I used wheel bearing grease on the spring washers and shaft and on the new seals and where the boot sits. I also used a long wire tie to better seat the edge of the rubber boot. I installed the piston dirt seal by sliding it up onto the piston. After screwing in the piston a ways, I worked the caliper edge into its groove with a small screwdriver. Once the piston is fully screwed in, the seal slides over the piston crown on its own.
'80 spider FI, SnugTop hardtop
http://s940.photobucket.com/user/a7ewiz ... t=3&page=1
http://s940.photobucket.com/user/a7ewiz ... t=3&page=1
-
wizard124
- Posts: 752
- Joined: Mon Oct 29, 2012 9:27 pm
- Your car is a: 1980 124 spider FI
- Location: Sheridan, WY exSan Rafael, CA
Lambda Sensor
Although I posted my sensor woes in their own thread, I'll add a pic here. I'm using this thread to chronicle the progress.
In short: Broke off the sensor at the threads. I pulled a spare exhaust manifold off the shelf. New sensor installed with anti-seize, painted heat shield. Good to go
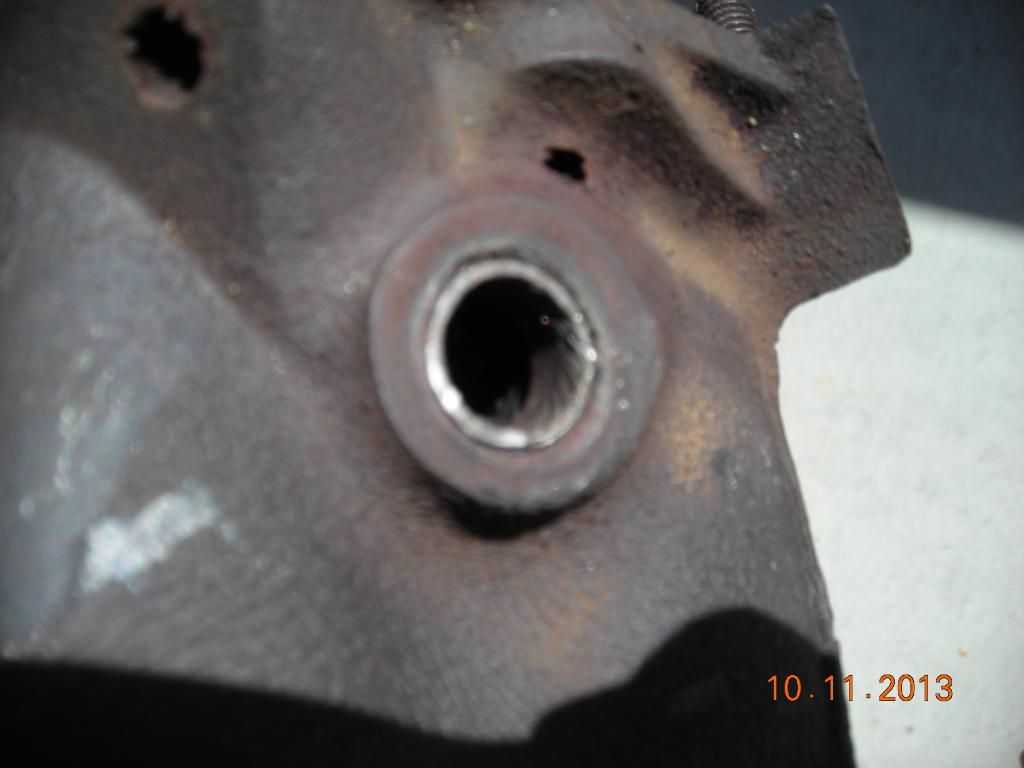
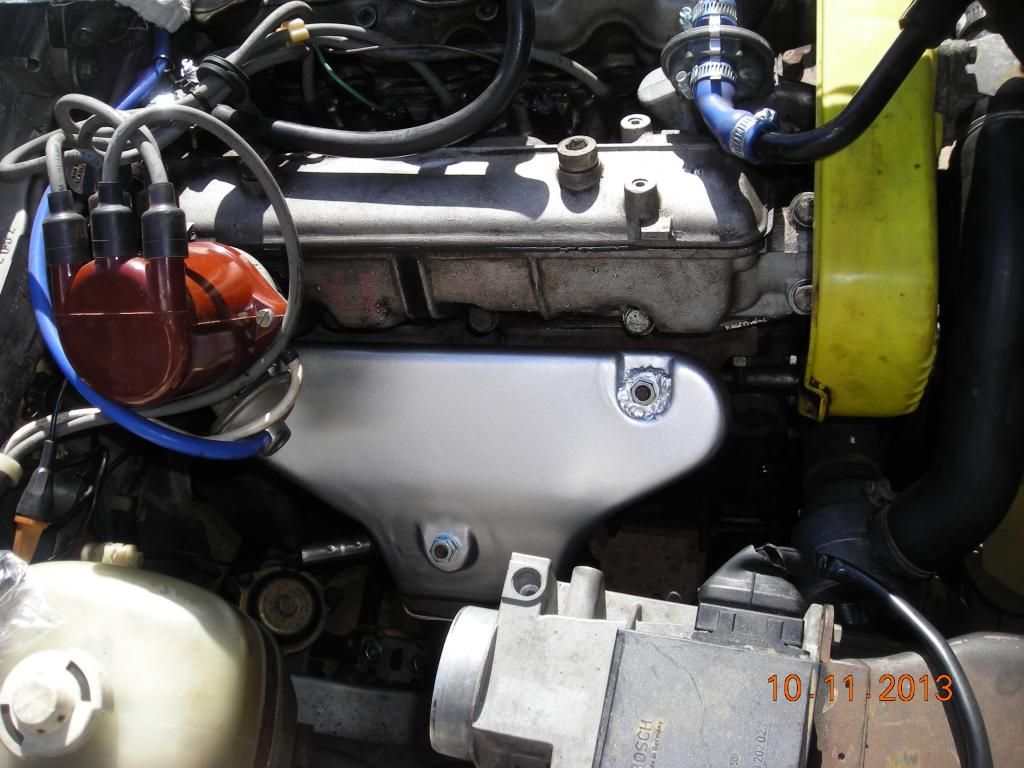
In short: Broke off the sensor at the threads. I pulled a spare exhaust manifold off the shelf. New sensor installed with anti-seize, painted heat shield. Good to go


'80 spider FI, SnugTop hardtop
http://s940.photobucket.com/user/a7ewiz ... t=3&page=1
http://s940.photobucket.com/user/a7ewiz ... t=3&page=1
-
wizard124
- Posts: 752
- Joined: Mon Oct 29, 2012 9:27 pm
- Your car is a: 1980 124 spider FI
- Location: Sheridan, WY exSan Rafael, CA
Stripped head threads.
Back when I was re-installing the exhaust manifold, I felt the #2 nut give. I couldn't torque it much so I decided to leave it be and hope for the best. I noticed smoke and fumes coming from the gasket area that had worsened over these past couple of weeks. I learned from a different thread that this stud can leak oil. Upon closer inspection this was evident and a slight bubbling around the edge of the gasket was also observed.
Tore into this problem over the past 2 days. The stud was wobbly loose in the head and removed easily. I suppose I was lucky in that the stud was not broken off in the head.
Here is my fix:
1) I ran a tap into the head (1.25 x 8mm) to clean it. Blew it clean with compressed air and sprayed an acetone based carb cleaner fluid into the hole.
2) I used a different stud that had deeper threads to provide a bite on any undamaged threads.
3) I used JB Weld hi strength epoxy. I dabbed some in the hole with a small screwdriver and on the threads of the stud.
4) I threaded in the stud until it felt just snug, not wanting to strip any more head threads. I let it set up for 24 hours.
Success! The stud stayed tight. I need to drive the car for a while to burn off the residual oil in the gasket and re-inspect.
'80 spider FI, SnugTop hardtop
http://s940.photobucket.com/user/a7ewiz ... t=3&page=1
http://s940.photobucket.com/user/a7ewiz ... t=3&page=1
-
vandor
- Posts: 3996
- Joined: Sat May 23, 2009 1:23 pm
- Your car is a: 1971 124 Spider
- Location: Texas, USA
Re: Finally. Wanted a Spider..more details!
It should work, however because of the JB weld you will not be able to remove that stud. Hopefully you won't have to.
A more common repair would be to heli-coil the hole, ie drill it out to a larger size, tap it, and then insert a heli-coil, which looks a bit like a small coil spring. Once inserted the inside of the heli-coil provides the needed threads for the stud.
A more common repair would be to heli-coil the hole, ie drill it out to a larger size, tap it, and then insert a heli-coil, which looks a bit like a small coil spring. Once inserted the inside of the heli-coil provides the needed threads for the stud.
Csaba
'71 124 Spider, much modified
'17 124 Abarth, silver
http://italiancarclub.com/csaba/
Co-owner of the best dang Fiat parts place in town
'71 124 Spider, much modified
'17 124 Abarth, silver
http://italiancarclub.com/csaba/
Co-owner of the best dang Fiat parts place in town
-
wizard124
- Posts: 752
- Joined: Mon Oct 29, 2012 9:27 pm
- Your car is a: 1980 124 spider FI
- Location: Sheridan, WY exSan Rafael, CA
Re: Finally. Wanted a Spider..more details!
Csaba,vandor wrote:It should work, however because of the JB weld you will not be able to remove that stud. Hopefully you won't have to.
A more common repair would be to heli-coil the hole, ie drill it out to a larger size, tap it, and then insert a heli-coil, which looks a bit like a small coil spring. Once inserted the inside of the heli-coil provides the needed threads for the stud.
I looked on Utube to check out the HeliCoil process, never having done it. I don't think I had the clearance to do the job well without pulling the head.
'80 spider FI, SnugTop hardtop
http://s940.photobucket.com/user/a7ewiz ... t=3&page=1
http://s940.photobucket.com/user/a7ewiz ... t=3&page=1
-
wizard124
- Posts: 752
- Joined: Mon Oct 29, 2012 9:27 pm
- Your car is a: 1980 124 spider FI
- Location: Sheridan, WY exSan Rafael, CA
AFM bad connection!
Back on page 1, I mentioned that when I wrapped the torn wire boot, at the AFM, with electrical tape , it caused the car to idle poorly and barely run. Though I removed the tape and it ran fine, this problem had become intermittent as of late.
I pulled the plug at the AFM. This is what I found:
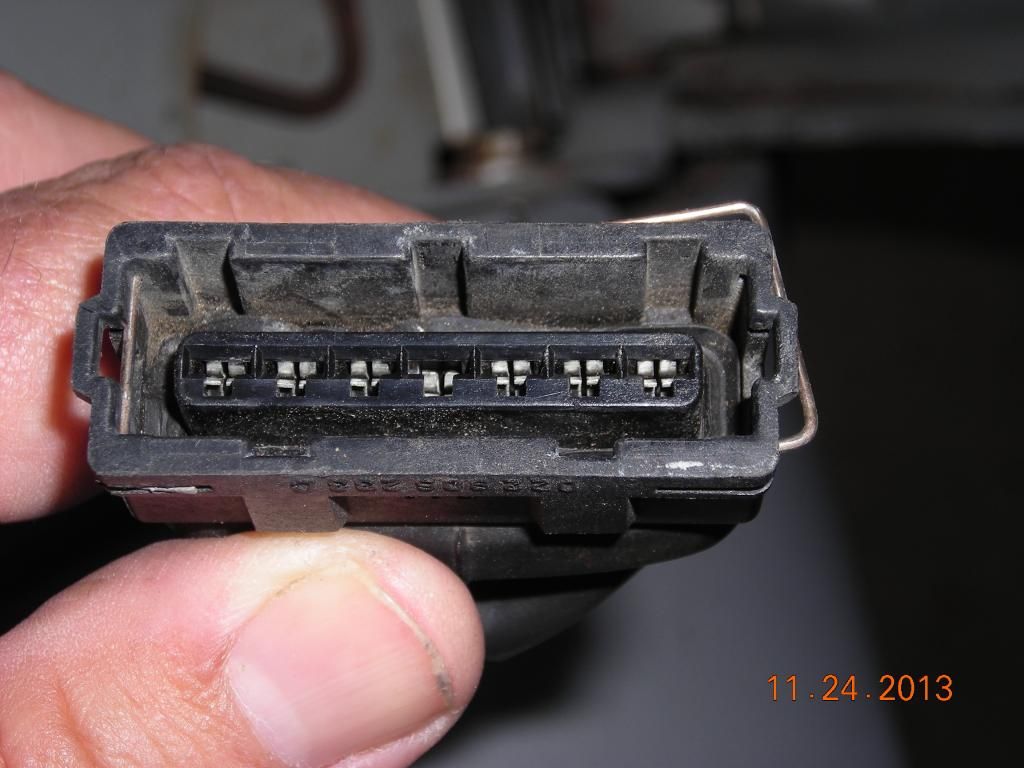
I was able to re-seat the plug properly, I removed a portion of the torn cover and secured the wires with a couple of wire ties, then wrapped it up with electrical tape.
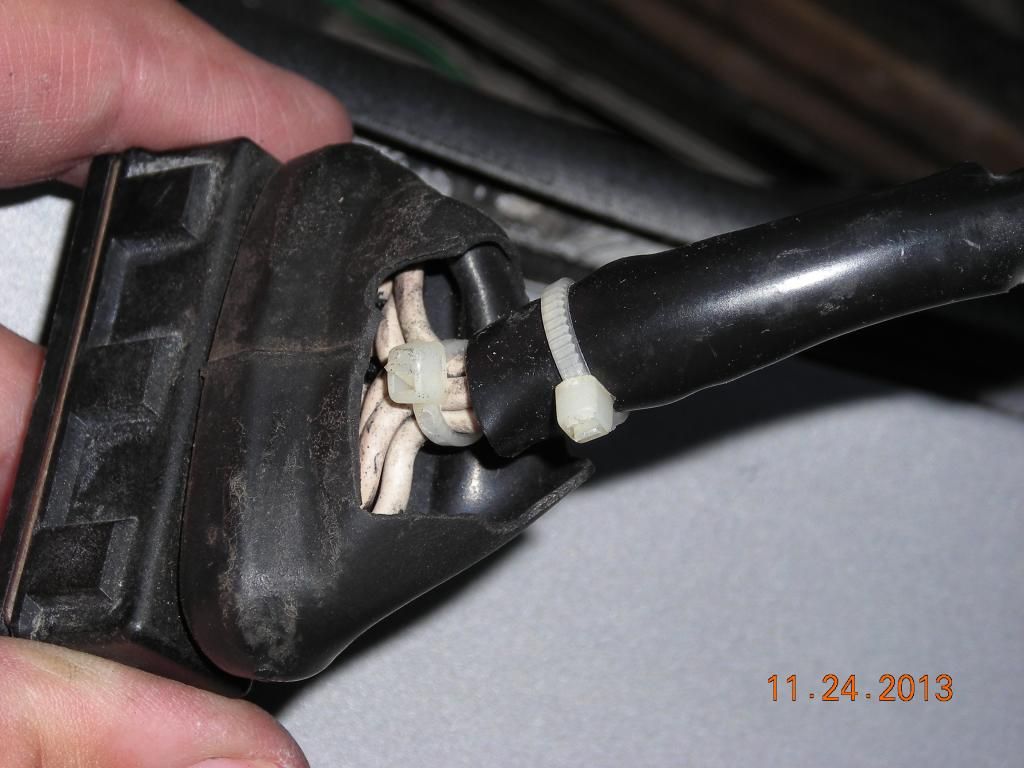
Back together with no issues.
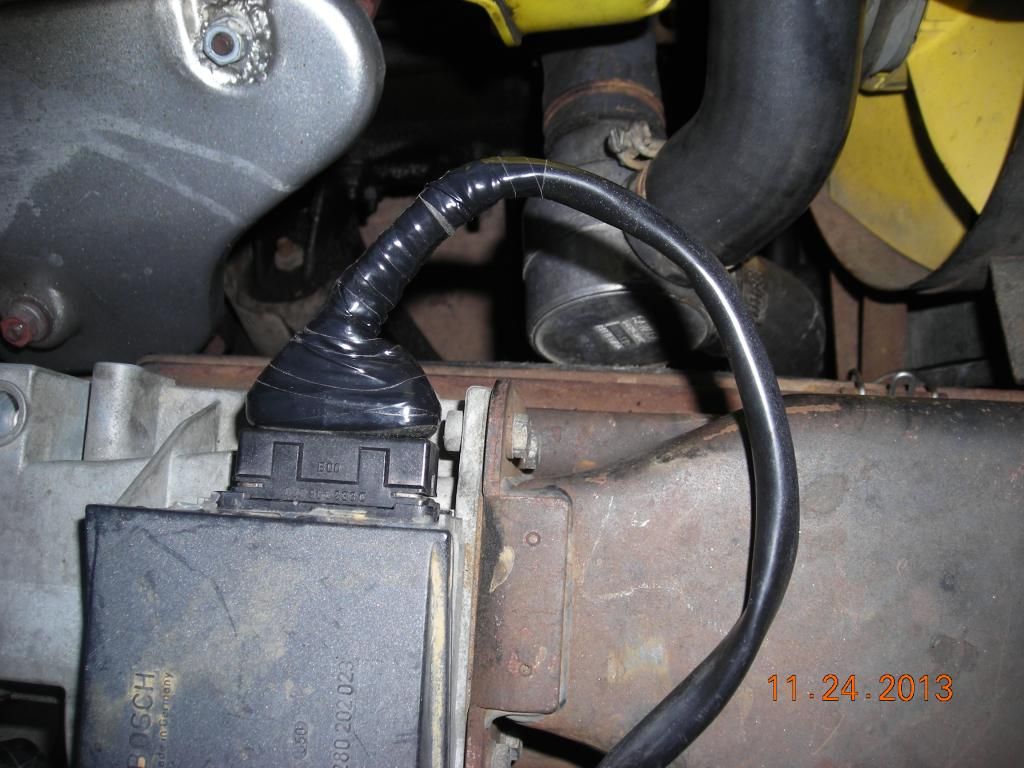
I think that as the old wire cover became stiff over the years, vibration had caused that connector to pull back within the plug causing an intermittent contact to develop. This would be a tough nut to crack and diagnose if starting from scratch
I pulled the plug at the AFM. This is what I found:

I was able to re-seat the plug properly, I removed a portion of the torn cover and secured the wires with a couple of wire ties, then wrapped it up with electrical tape.

Back together with no issues.

I think that as the old wire cover became stiff over the years, vibration had caused that connector to pull back within the plug causing an intermittent contact to develop. This would be a tough nut to crack and diagnose if starting from scratch
'80 spider FI, SnugTop hardtop
http://s940.photobucket.com/user/a7ewiz ... t=3&page=1
http://s940.photobucket.com/user/a7ewiz ... t=3&page=1
-
wizard124
- Posts: 752
- Joined: Mon Oct 29, 2012 9:27 pm
- Your car is a: 1980 124 spider FI
- Location: Sheridan, WY exSan Rafael, CA
Re: Finally. Wanted a Spider..more details!
I have spent the last few weeks replacing the timing belt, front aux shaft and crankshaft seals. I swapped out the cam pulleys for thinner, lighter ones I found in my parts stash. Cleaning and painting some components.
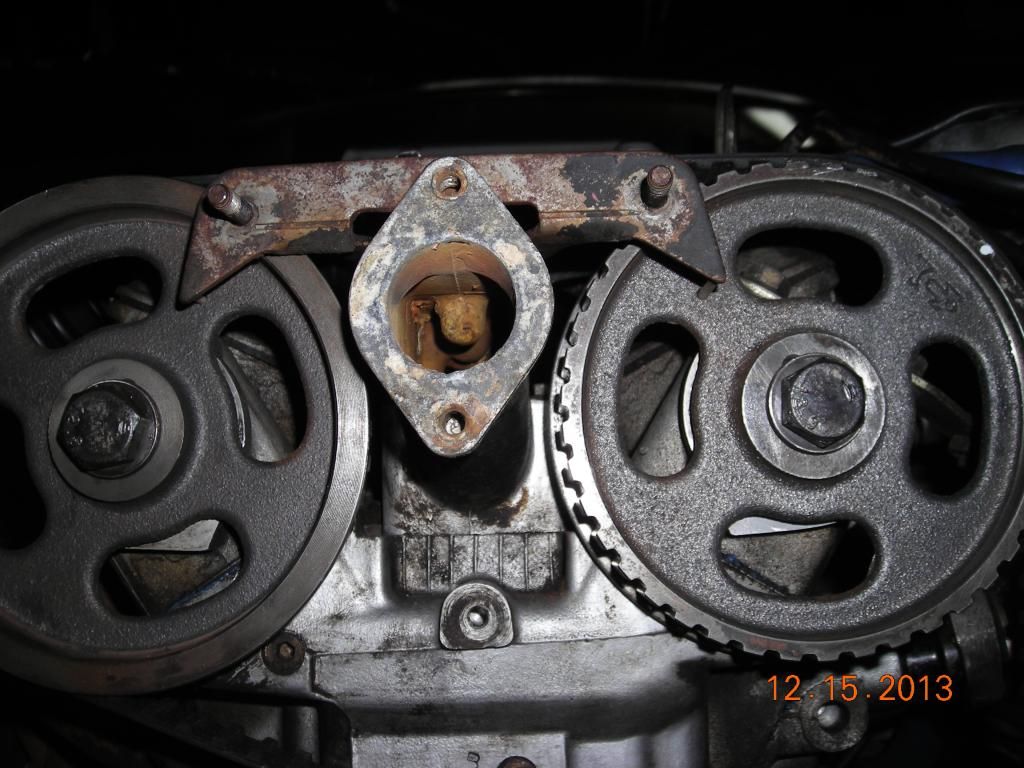
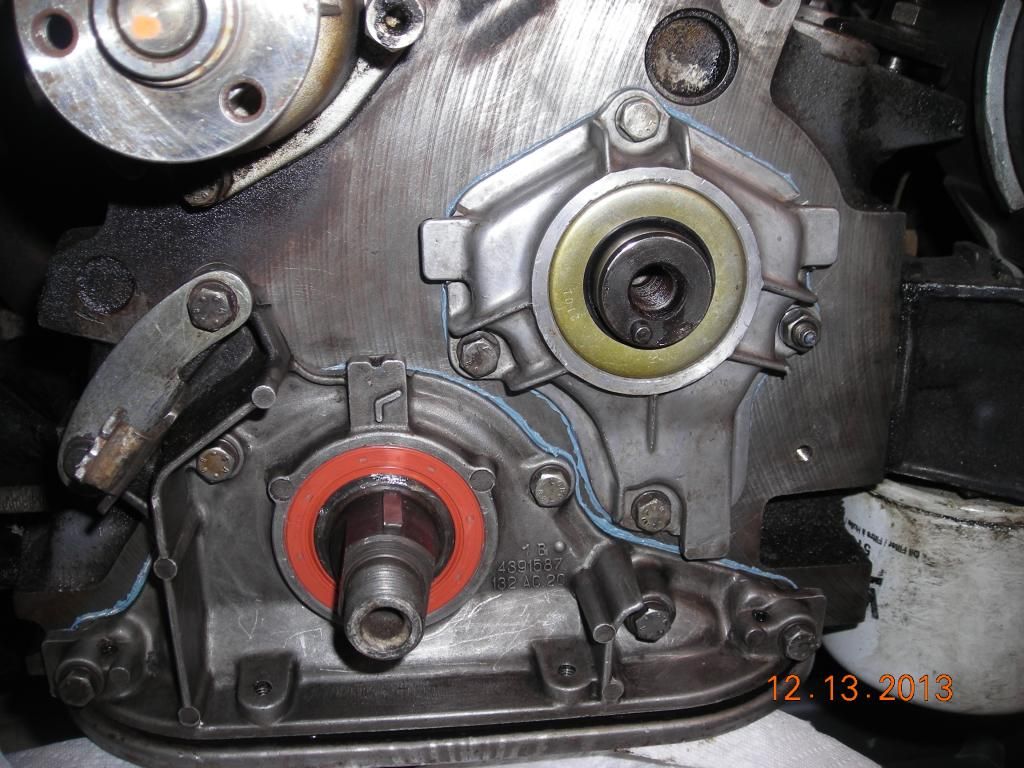
Before:
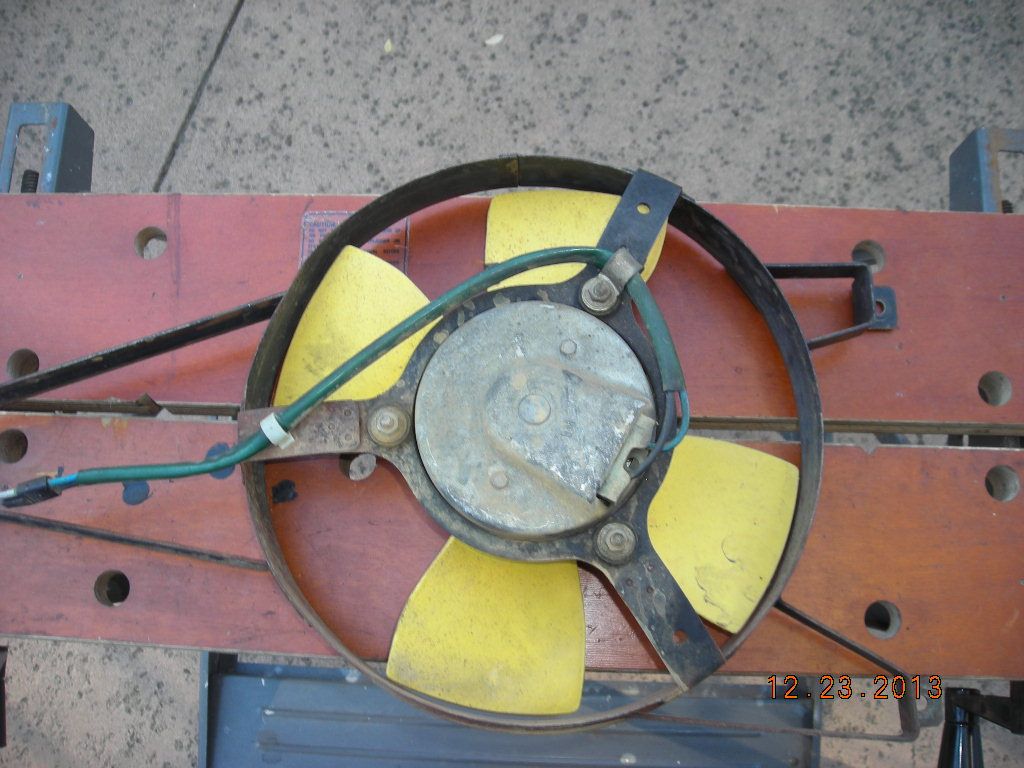
After:
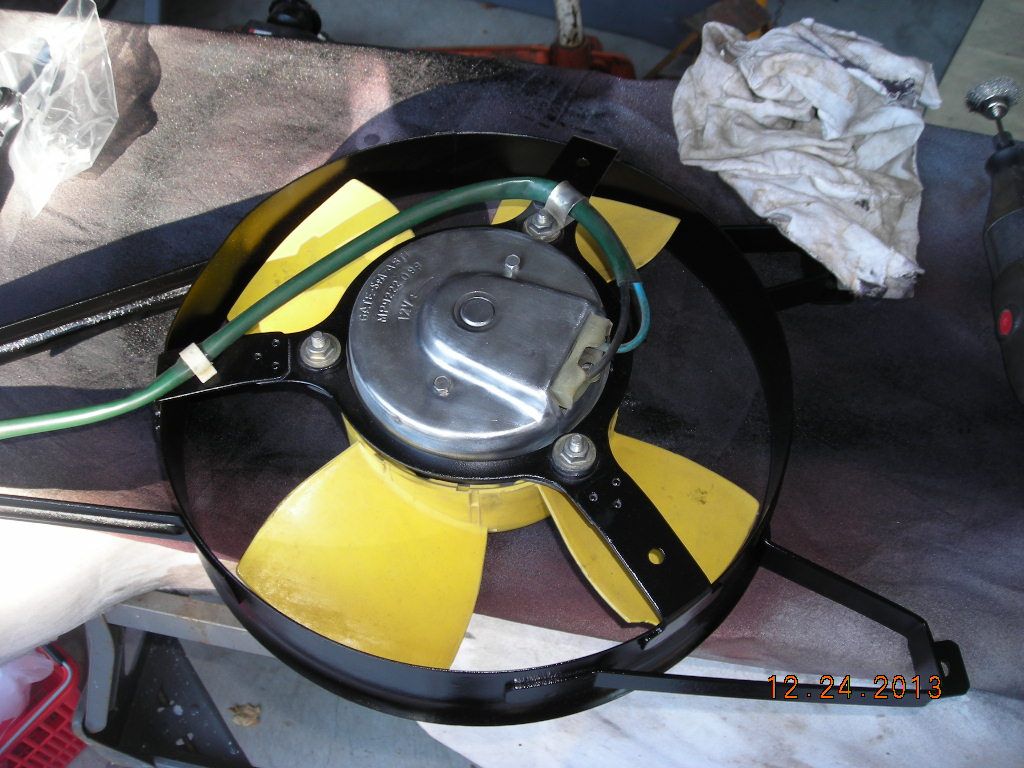


Before:

After:

'80 spider FI, SnugTop hardtop
http://s940.photobucket.com/user/a7ewiz ... t=3&page=1
http://s940.photobucket.com/user/a7ewiz ... t=3&page=1
-
wizard124
- Posts: 752
- Joined: Mon Oct 29, 2012 9:27 pm
- Your car is a: 1980 124 spider FI
- Location: Sheridan, WY exSan Rafael, CA
Re: Finally. Wanted a Spider..more details!
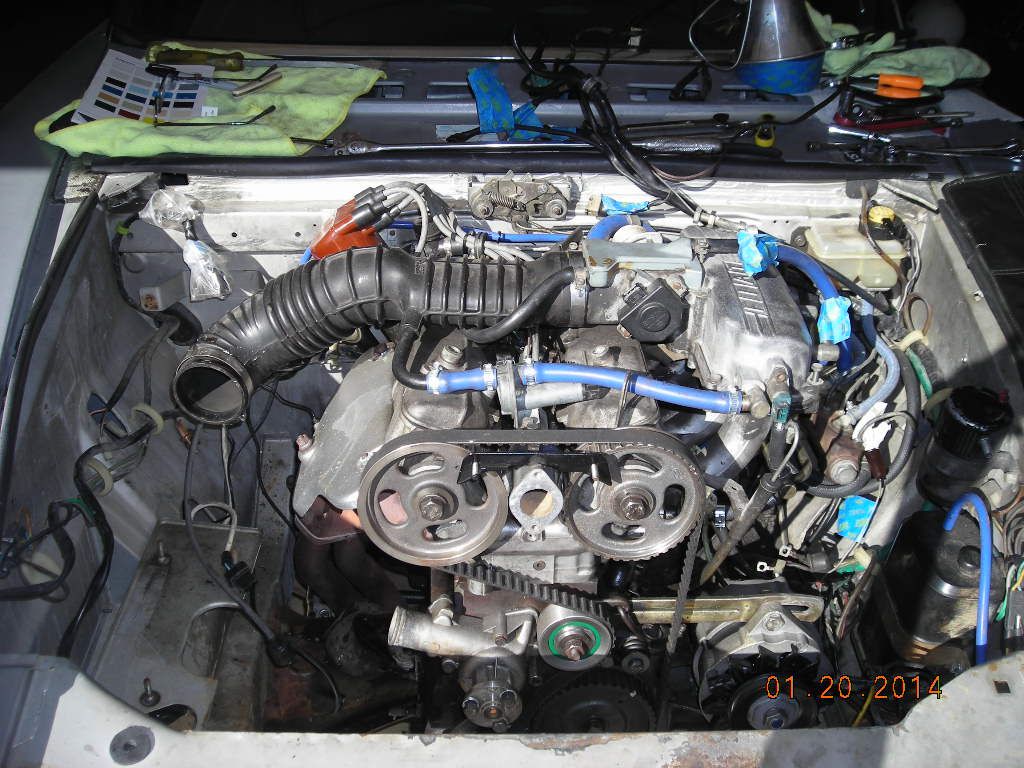
I had been sitting on the fence regarding pulling my engine and transmission. Finally decided to do it. Some of the jobs I'll be doing include replacing the oil pan and rear crank seals, clutch plate and throw out bearing, tearing into the tranny to replace syncros.....and wherever project creep may take me. I'll be cleaning and painting the engine bay.
I spent some time this afternoon in the prep work. I removed the FI plugs (labels and pictures) and support clamps and have that wire harness pulled back against the fire wall. Removed the wires to the alternator and starter. Removed 2 vacuum lines (brake booster and charcoal canister). The throttle cable slips right off after undoing 1 nut. I only need to remove the 2 fuel lines on the drivers side.
I had previously removed and painted the air box. Removed the wires to the coil and unbolted the coil mounting plate. Removed the radiator overflow tank ( I discovered a lot of crud in the bottom). Disconnected the exhaust down pipe. Both engine mounting nuts loosened easily.
I had one surprise I pulled off the cap at the oil pressure sender and oil dripped out. Add one item to the shopping list.
I spent some time this afternoon in the prep work. I removed the FI plugs (labels and pictures) and support clamps and have that wire harness pulled back against the fire wall. Removed the wires to the alternator and starter. Removed 2 vacuum lines (brake booster and charcoal canister). The throttle cable slips right off after undoing 1 nut. I only need to remove the 2 fuel lines on the drivers side.
I had previously removed and painted the air box. Removed the wires to the coil and unbolted the coil mounting plate. Removed the radiator overflow tank ( I discovered a lot of crud in the bottom). Disconnected the exhaust down pipe. Both engine mounting nuts loosened easily.
I had one surprise
'80 spider FI, SnugTop hardtop
http://s940.photobucket.com/user/a7ewiz ... t=3&page=1
http://s940.photobucket.com/user/a7ewiz ... t=3&page=1
- courtenay
- Patron 2020

- Posts: 1321
- Joined: Mon Nov 30, 2009 11:41 pm
- Your car is a: 1980 Spider 2000
- Location: Courtenay, BC, Canada
Re: Finally. Wanted a Spider..more details!
Another ambitious project, Wizard. Hopefully you will provide the same kind of photo documentation you have provided in past as you work your way through it. You are providing the rest of us with some great tutorials!
Bruce Shearer
'80 Spider Fi
'10 Volvo XC70
'06 GMC 1 Ton PU
'72 Spider a long, long time ago
'80 Spider Fi
'10 Volvo XC70
'06 GMC 1 Ton PU
'72 Spider a long, long time ago
-
wizard124
- Posts: 752
- Joined: Mon Oct 29, 2012 9:27 pm
- Your car is a: 1980 124 spider FI
- Location: Sheridan, WY exSan Rafael, CA
Re: Finally. Wanted a Spider..more details!
Thanks for the compliments!courtenay wrote:Another ambitious project, Wizard. Hopefully you will provide the same kind of photo documentation you have provided in past as you work your way through it. You are providing the rest of us with some great tutorials!
'80 spider FI, SnugTop hardtop
http://s940.photobucket.com/user/a7ewiz ... t=3&page=1
http://s940.photobucket.com/user/a7ewiz ... t=3&page=1
-
wizard124
- Posts: 752
- Joined: Mon Oct 29, 2012 9:27 pm
- Your car is a: 1980 124 spider FI
- Location: Sheridan, WY exSan Rafael, CA
Re: Finally. Wanted a Spider..more details!
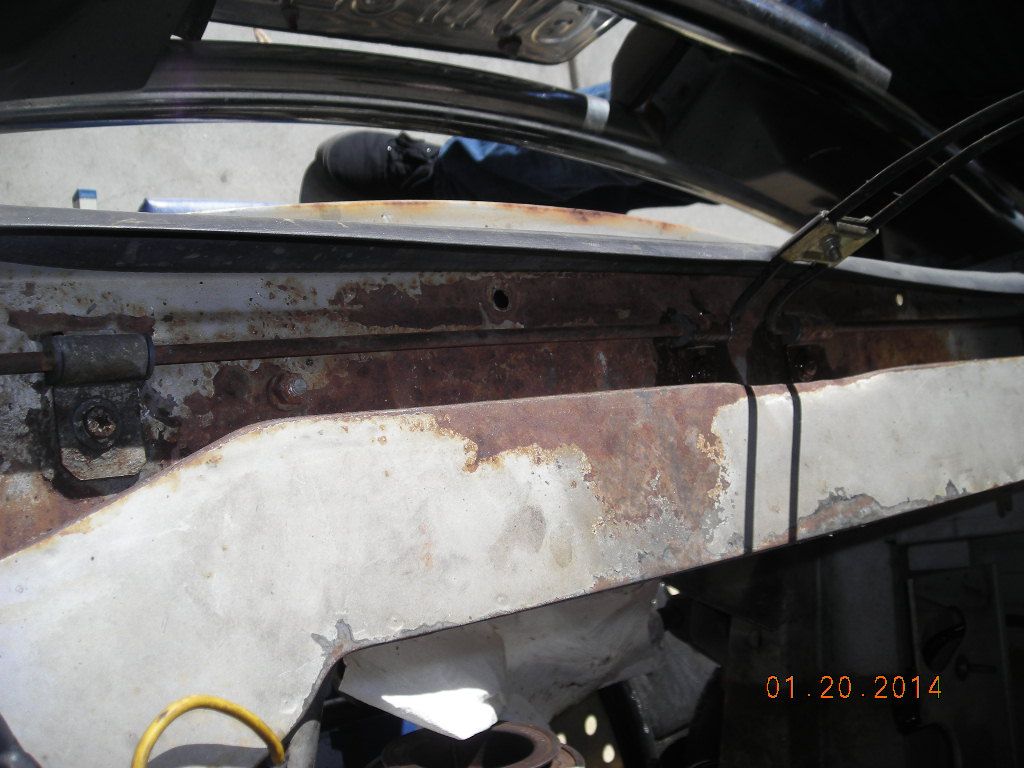
More tasks accomplished today. Removed the hood and hold up spring. Drained the oil and transmission lube. Got the clutch cable. Removed the exhaust bracket that connects to the tranny. Drained the engine block and disconnected the heater hoses at the fire wall. Pulled the sensor leads on the head. I think all I have left to do is disconnect the drive shaft, remove the shift lever, pull the speedo cable, and remove a bracket. My plan is to pull it mid-week 


'80 spider FI, SnugTop hardtop
http://s940.photobucket.com/user/a7ewiz ... t=3&page=1
http://s940.photobucket.com/user/a7ewiz ... t=3&page=1
-
wizard124
- Posts: 752
- Joined: Mon Oct 29, 2012 9:27 pm
- Your car is a: 1980 124 spider FI
- Location: Sheridan, WY exSan Rafael, CA
$20 Engine Stand
I pulled the engine and transmission yesterday. I rushed around this morning buying some items to make an engine stand prior to returning the rented engine hoist. A small furniture dolly from Harbor Freight and 8 feet of 2x6 and some long screws. Simple.
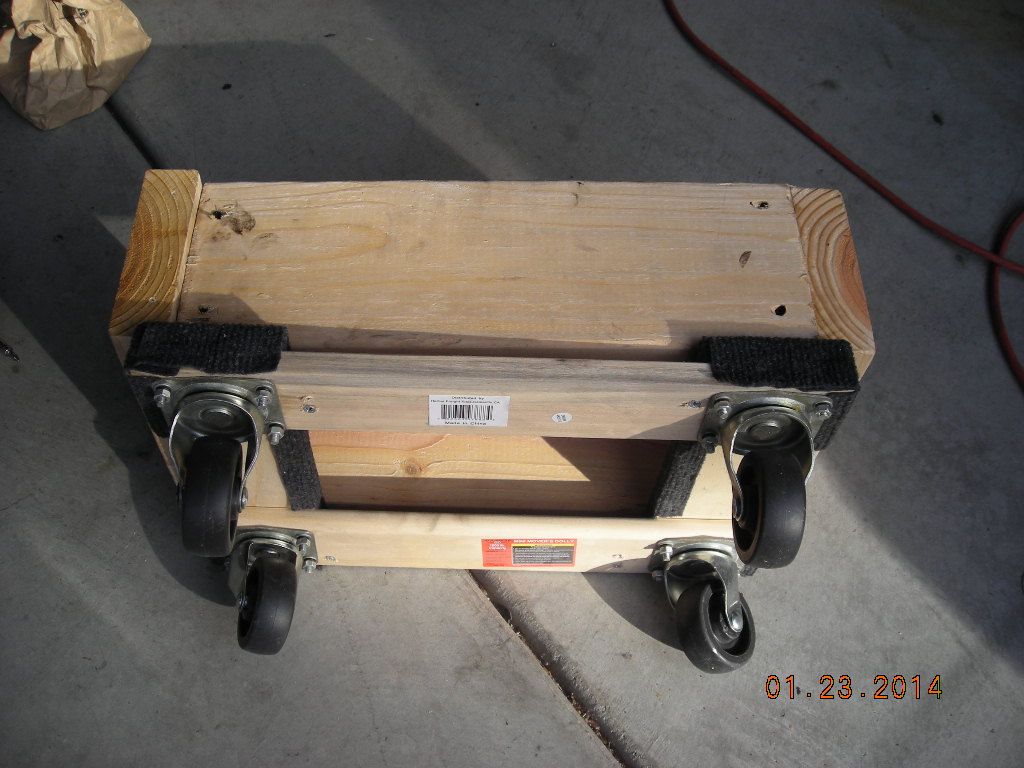
I spent the afternoon with some Simple Green and an assortment of brushes cleaning the greasy engine. I sat on a step stool while I scrubbed. The height of the engine was very satisfactory. Very pleased with the stand
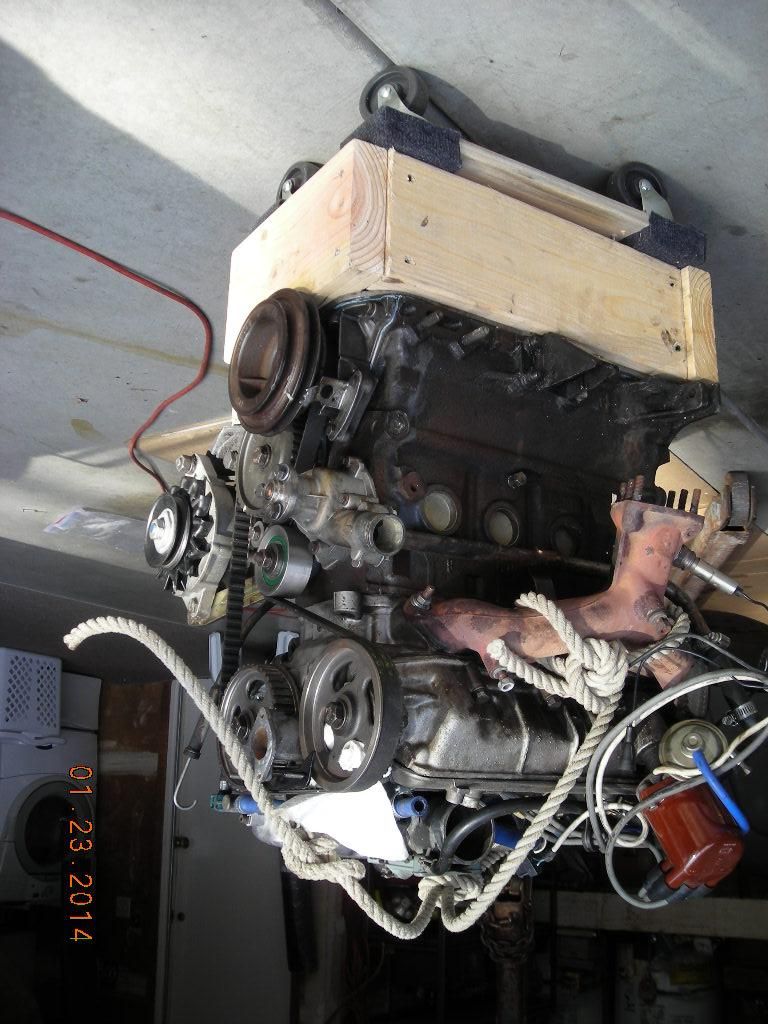
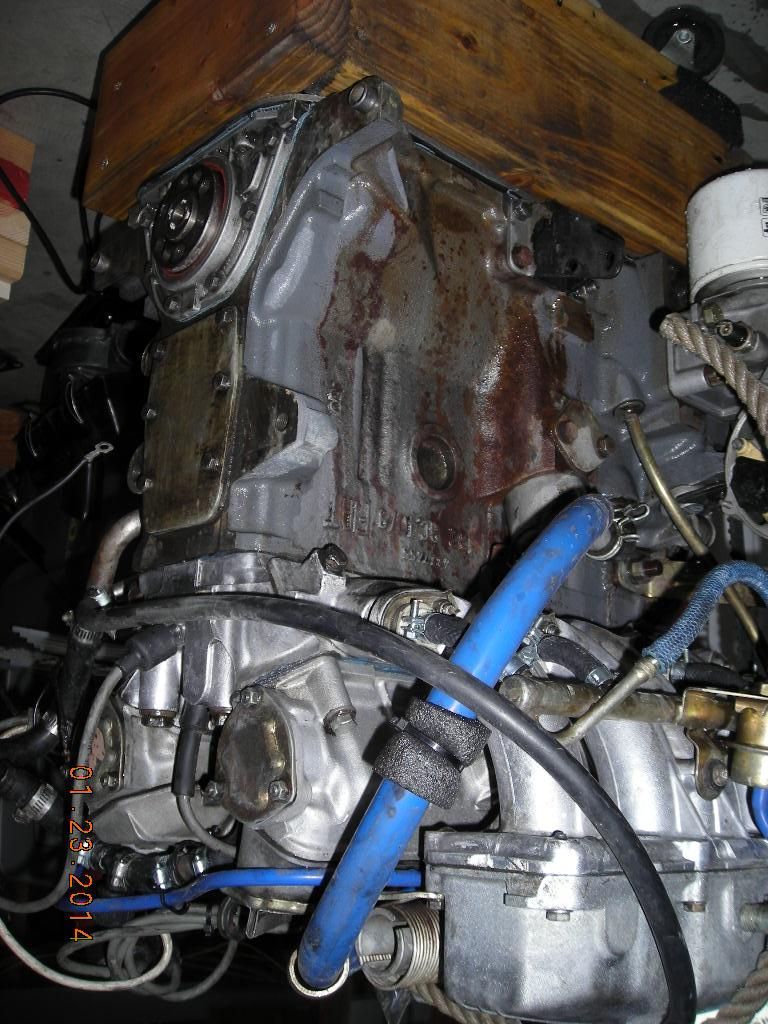
There is a painted block under that filth after all

I spent the afternoon with some Simple Green and an assortment of brushes cleaning the greasy engine. I sat on a step stool while I scrubbed. The height of the engine was very satisfactory. Very pleased with the stand

There is a painted block under that filth after all

'80 spider FI, SnugTop hardtop
http://s940.photobucket.com/user/a7ewiz ... t=3&page=1
http://s940.photobucket.com/user/a7ewiz ... t=3&page=1
-
wizard124
- Posts: 752
- Joined: Mon Oct 29, 2012 9:27 pm
- Your car is a: 1980 124 spider FI
- Location: Sheridan, WY exSan Rafael, CA
Re: Finally. Wanted a Spider..more details!
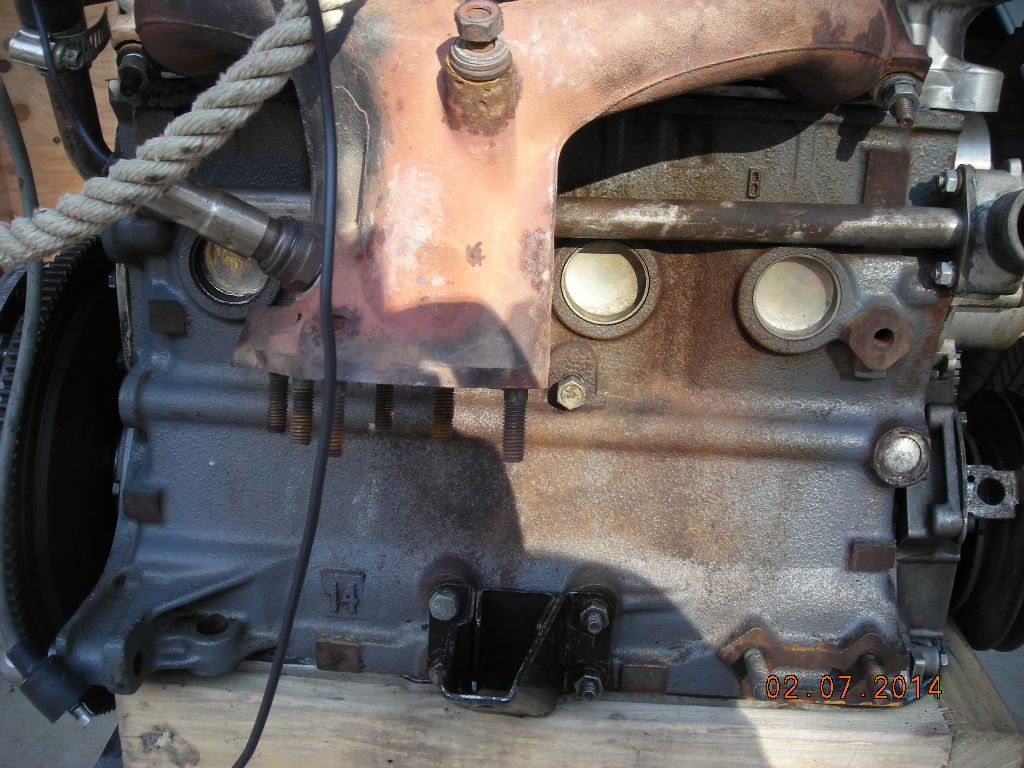
Back to the job with the arrival of new parts. Yesterday, changed out the pilot bearing. Installed a new clutch disk and pressure plate. Most of todays effort was wire brushing and alcohol wiping the block; then masking off the pieces/areas I didn't want oversprayed. I used Duplicolor Engine (500F) Enamel in New Ford Gray.
From this:
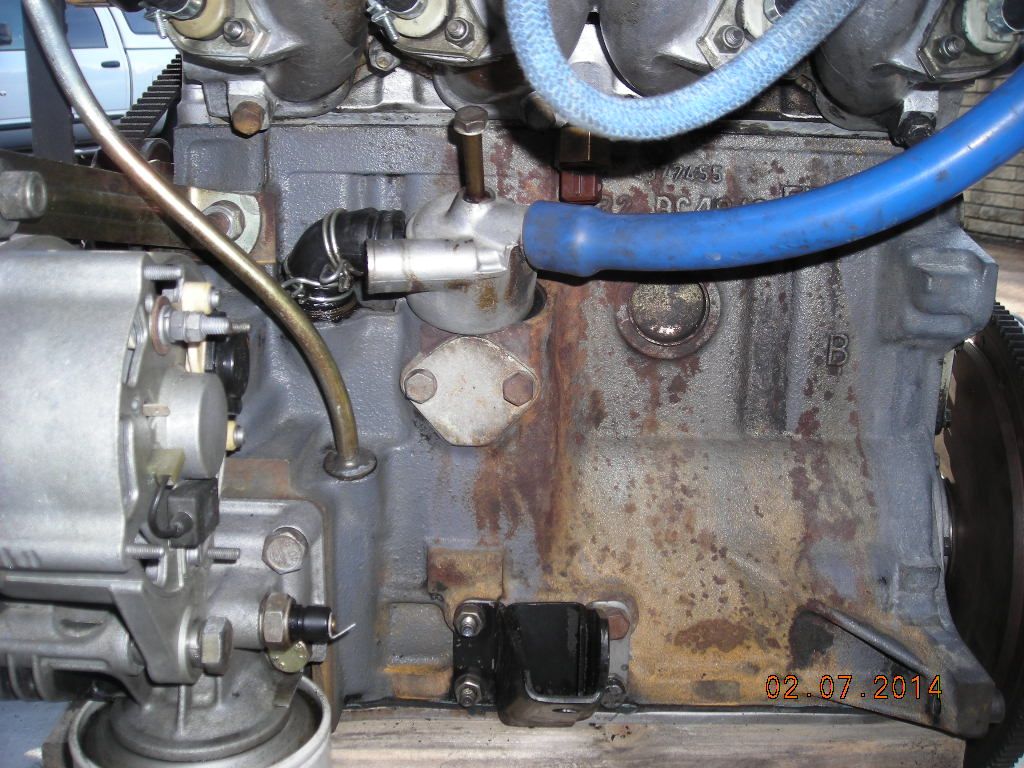
To this:
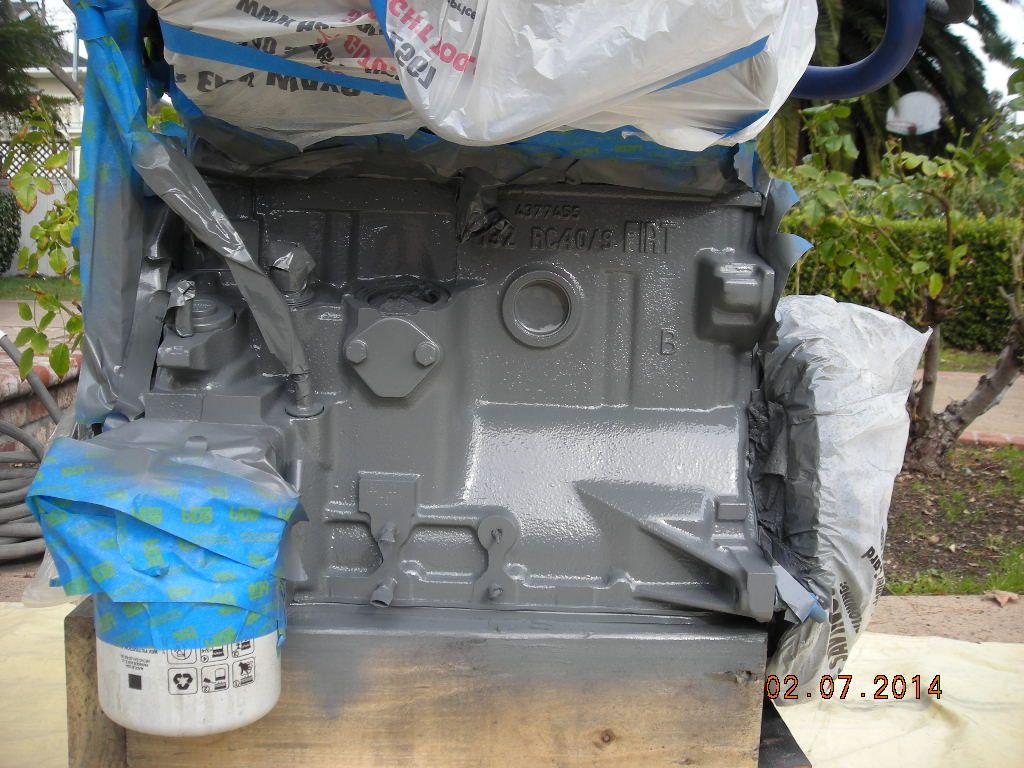
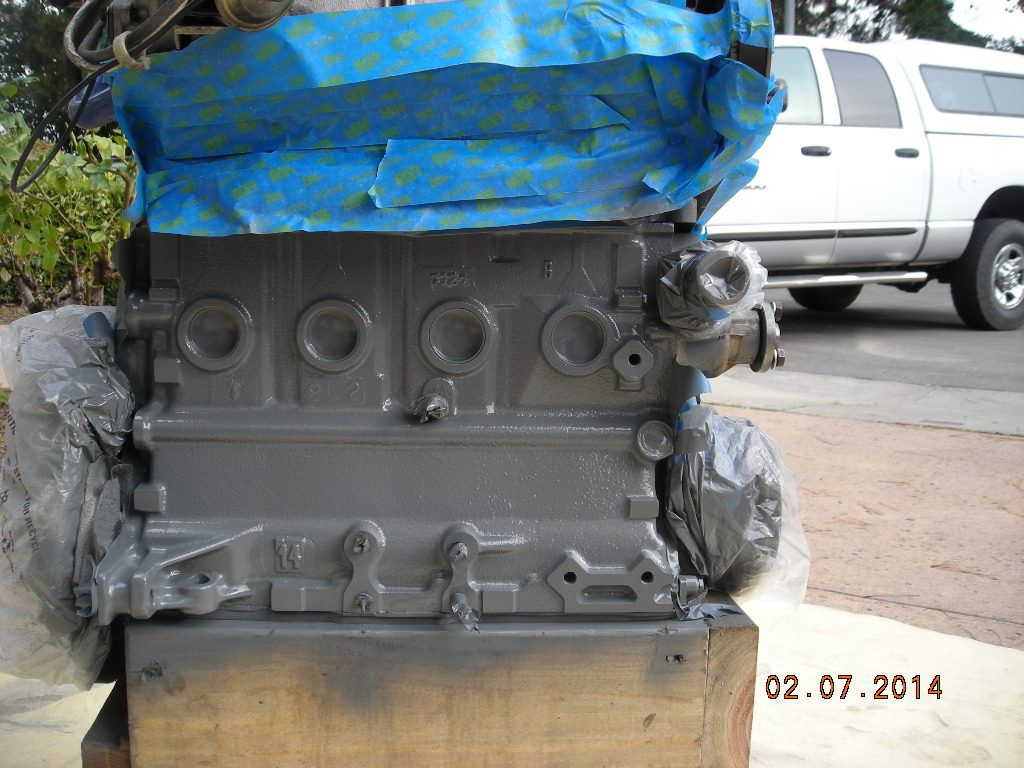
From this:


To this:


'80 spider FI, SnugTop hardtop
http://s940.photobucket.com/user/a7ewiz ... t=3&page=1
http://s940.photobucket.com/user/a7ewiz ... t=3&page=1
-
vandor
- Posts: 3996
- Joined: Sat May 23, 2009 1:23 pm
- Your car is a: 1971 124 Spider
- Location: Texas, USA
Re: Finally. Wanted a Spider..more details!
I would suggest replacing the freeze plugs while the engine is out of the car.
Csaba
'71 124 Spider, much modified
'17 124 Abarth, silver
http://italiancarclub.com/csaba/
Co-owner of the best dang Fiat parts place in town
'71 124 Spider, much modified
'17 124 Abarth, silver
http://italiancarclub.com/csaba/
Co-owner of the best dang Fiat parts place in town