How to make custom bumperettes

What sets your Spider apart from the rest?
Post Reply
azygoustoyou

How to make custom bumperettes

Post by azygoustoyou »

Image
Image
Image
Hi all,
I haven't noticed anyone showing any way to make your own bumberettes. So I figured I would show you one way you could. I know there is a lot of interest in getting cheap ones. I got some MDF and thought I would cut some shapes of what I want the bumperette to look like and glue them together. Then cover it with fiberglass to seal and protect them. I'm also giving it a thought of making a mold and making them out of rubber. But that's undecided.

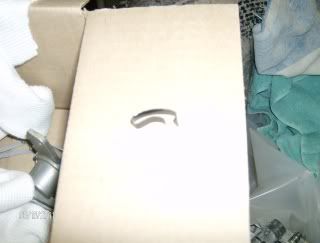
First, you want to figure out what you want the bumpers to look like and where you want them on the car. I wanted a different shape than all of the other bumpers. Take a piece of cardboard and cut out the shape you came up with.
Here is what I came up with.
Image
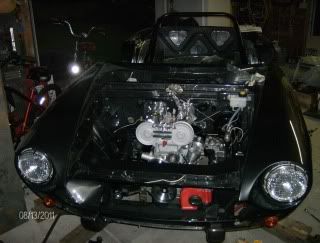
Now that you have the shape you desire. You have to figure out how wide you want the bumper to be. I figured to make mine wide and go with 6 pieces. I also decided to put the bumerettes underneath the inside corvette lights. I think I'm going to use the original bumper hole to install my reverse lights. These bumpers are pretty much just for looks. So I'm going to install them with a couple of studs. If I make them out of fiberglass, they will be pretty light.
Before I start cutting all the pieces needed to make one bumperette. You want to make sure of the angle of the area your putting them against is the same where it rests along the car no matter how wide you go. If it isn't, you will have to make several pieces of carboard shapes to make it fit nicely on the car. Mine was the same. No one wants a bumpers that doesn't lay nicely next to the car. So take your piece of cardboard and trace it on the MDF and cut it out. No matter what shape you want. Always cut at least 3/8" larger than needed. The back of the car isn't square. So your pieces won't be glued exactly next to each other. We will be sanding it down later.
Image
Now take the first piece and set it along the car where the edge is going to sit. Use some tape as a reference. If the piece looks good and is perfectly cut, go back and cut the second shape. Make it 3/8" larger than the first. The only part that needs to exact is the back that lays next to the car.
Image
As your making your pieces. Go back to the car and put them on to make sure they fit nicely.
Here is one I was messing with a while back. I cut a hole into it to see if I thought I wanted my reverse lights inside it. I didn't like it. This is the shape I'm going with though.
Image
I will finish this post as I get it done within a few days. Hopes this helps someone. :P :P :P
Don't pay attention to the date on the pic's. Apparently it is wrong.
Last edited by azygoustoyou on Sun Jul 18, 2010 12:35 pm, edited 2 times in total.
Foster48x

Re: How to make custom bumperettes

Post by Foster48x »

I've been patiently waiting since last summer for you to finish this project... try not to get side tracked with see-saws and totem poles this time :mrgreen: The world is waiting for the Brady "insert some catchy phrase" Bumperette's to hit the market! :mrgreen:

Rick
azygoustoyou

Re: How to make custom bumperettes

Post by azygoustoyou »

Make sure you number the pieces. If your lucky, all you'll have to do is reverse the order for the other side. I'm not that lucky.
Image
Here's what the outside piece looked like on the opposite side and this is how different they are on my car. If I wasn't so anal. :roll:
The outside pieces have to be almost perfect for a tight look. And of course all the tops and bottoms. This is why you have to make sure the backs all line up.
Image
Image
To find the line of the back for the other side. Just make an extra from the first piece you've made and put it on the car and draw a line on it of the new side. Try to hold your pencil even across the body. Cut it out and make any adjustments. This other side was a pain in the :shock: I will have to make about three different shapes for the pass. side.
Image
Make sure you don't mix up each side. You might want to mark them drivers side or pass. side.
More to come soon.
azygoustoyou

Re: How to make custom bumperettes

Post by azygoustoyou »

Due to the curvature of the back, you can see why you won't be gluing them next to each other exactly. Now that we have both sets completed. Set each side on and make a mark at the top and bottom to where you want the bumper to start and stop.
Image
Image
I circled on this piece the important areas you want to make sure you have as close to perfect as can be. Other areas don't matter with the center pieces. It's the end pieces you want the whole piece really close to the body. The square area doesn't have to be close at all. Just make sure you make it large enough. You won't want to have to chisel it out later. I doubt too many people put their bumperettes where I'm putting mine anyways.
Image
If you have a hand sander like this. It helps when you have to just take off small areas to even out your piece. For the next step you will need some glue and clamps. You have to add clue to the center of each piece and place it on the car. While holding it straight. Add your clamps.
Image
azygoustoyou

Re: How to make custom bumperettes

Post by azygoustoyou »

Make sure you have your pieces in the correct order. Lay the bottom piece down. Grab the next piece in order and add glue until covered. Do this to all your pieces. Carefully pick up the bumper and place it on the car. Make sure you align them at the top and add a clamp. Go to the bottom and align them there. Add a clamp. It's easy to have on lift up. If you make a mistake and either cut one too short or it lifts. Don't worry. You can always add some bondo later to even it out. As you can see in the bottom pic. The second piece from the left might be just a little thin at the bottom. After everything dries overnight. You can shape it. Take your piece of cardboard of the shape you had in the beginning and use a marker to draw it on the outside pieces. Don't forget about your marks you made on the pieces where to start and stop the top and bottom of the bumper.
Image
Image
Image
Image
You will need a square, table vise and belt sander to do the next steps. Unless you have a table sander. Which I don't. I clamp the belt sander upside down in the vise and hold the bumper in my hand to shave it down. I'll show the rest either tomorrow or Monday. :P
azygoustoyou

Re: How to make custom bumperettes

Post by azygoustoyou »

Now that we let the bumpers dry overnight. It's time to give them their shape. First you want to take the template and redraw it on both sides so we have a reference when sanding. Try to use a reference point when doing this. I used the indentation that is in the back of the bumper.
Image
Like I said before, I use a belt sander to take down the access MDF with 36 grit. I put it in the vise and tighten it just enough to hold it. You don't want to break your sander handle. I also use a clamp to hold it down from the back. You should have some kind of mask when sanding. You won't want to breathe the dust. Don't forget your safety glasses. I had a piece of the belt come off and who knows. Anything could happen.
Image
I like working on the high side first. It's good to try to get the piece kind of uniformed. Just make sure you always use a steady force and not push to hard. I did once and the belt sander came out of the vise. That's why I now use the clamp.
You can hold the bumper any direction you feel comfortable. Just watch out for your fingers. Once I get most of the high parts down. I start working at the top a little. I never go to the line right away. Leave room for error. I'll work on one side and get it close to the line. Then work on the other side doing the same. If the center is high. Don't be afraid to take it down some. Just like the sides- Don't go down too much.
Image
Image
Once you get the sides close. Feather in the center getting it all even. Work at the top to get both sides exact and do the same at the bottom. Don't do too much on the bottom yet though. Take the bumper to the car and see if you think it may need taken down more on one side. I don't about you, :P but I think these are going to look so cool.
Image
Image
Image
Image
Now that the bumper is where I want it. I'll use the orbital hand sander to finish it off.
To find the shape you really want is trial and error. If you give yourself maybe 1/2" of extra wood from your template. You'll have plenty to play around with the shape when sanding. You might find it needs to be thicker or thinner in one spot. Who wants to keep making these things because they can't figure the shape out. If you want to mess around with different shapes. Take some cardboard and draw two of the same shapes and make a cardboard bumper. That's what I did to find this shape.You could leave the bumpers with sharp edges if you like. I like the softer corners like this old bumper I made.
Image
azygoustoyou

Re: How to make custom bumperettes

Post by azygoustoyou »

Almost done and they are looking good. I almost forgot to mention to use your square and hold it against the side and run it along the edge to make sure the bumper is square. Especially the top and bottom. Those ares would be most noticeable on the car. Also put the bumpers together to see if one might be longer so you can shorten it to match the other.
Image
Image
Image
Here is a pic of what you can look forward to for sure. So clean up any tools or items before sanding that you don't want dusty.
All I have to do now is round off the corners which will help hide any small imperfections. Then I think I'm going to cover them in Fiberglass. So there is still some sanding to do. Here's a couple more pic's of what these will look like on the car. It's hard taking pic's when the car is on the rotisserie.
Image
Image
Image
User avatar
kmead
Posts: 1069
Joined: Sat Aug 02, 2008 9:24 pm
Your car is a: 1969 850 SC 1970 124 SC 85 X19
Location: Grand Rapids, MI

Re: How to make custom bumperettes

Post by kmead »

A nice how to.Good to see the process.

Looking forward to the end result.
Karl

1969 Fiat 850 Sports Coupe
1970 Fiat 124 Sports Coupe
1985 Bertone X1/9
Fiat88

Re: How to make custom bumperettes

Post by Fiat88 »

Dude, that looks like a lot of work but starting to look good! Really like the corvette style lights too. :mrgreen:
azygoustoyou

Re: How to make custom bumperettes

Post by azygoustoyou »

I agree. This is somewhat time consuming. I have about two days just in the backs. Doing it this way may give you a way to acquire your own style of bumberettes on the cheap. I think I may make a mold out of these eventually and just make them out of fiberglass. I know I would have to do the back of the bumpers differently so they could be installed over the bumper holes.

I got everything shaped nicely. I figure I'd throw some primer sealer from Rustoleum on them to help with the absorbtion of the fiberglass.
Here's a good link to read up on putting fiberglass over wood. http://newboatbuilders.com/docs/fiberglassoverwood.pdf
Here is a nice side view of the back.
Image
Image
Image
bwilson27

Re: How to make custom bumperettes

Post by bwilson27 »

Those are going to look really good when they're finished. I'd bet even better than those Abarth-style ones going for $400 on Ebay. If you had a mold, you could make $ selling them at a fraction those guys are asking.
jefftegeder

Re: How to make custom bumperettes

Post by jefftegeder »

Was impressed with your work and how these are turning out,
azygoustoyou wrote:Image
Now I see you have good taste in beer too ;)
azygoustoyou

Re: How to make custom bumperettes

Post by azygoustoyou »

I couldn't find the same color primer and ended up getting the gray. The paint did a good job. It pretty much sealed the bumperettes. I mixed 3 oz. of resin and hardener. For every oz. it specified 12 drops of hardener. I wasn't sure how much of the stuff I needed. I could have gotten away with just 1 1/2oz. of the stuff. It's about 95 degrees here today. So it took no time in hardening. I lost about 2 1/2 oz.'s in the cup. Still I was able to get all but one side of each coated with just enough resin to cover the piece. The wife would beat me if I took this in the house. I think that's what I'll have to do to get the fiber cloth and resin to harden at a slower rate. Remember directions in the link earlier said not to mess with the amount of hardener thinking it will cure slower. I'm using Lacquer thinner to clean the brush and squeegee. This is going to take several steps and you'll need about ten plastic cups and a few stirrers.
Here's a couple pic's.
Image
Image
Last edited by azygoustoyou on Tue Jul 06, 2010 9:54 am, edited 2 times in total.
azygoustoyou

Re: How to make custom bumperettes

Post by azygoustoyou »

I put about three thin coats on the bumpers to make sure they are sealed. I let them dry overnight. I'm going to cover the backs first. I cut out some fiber cloth the same size as the back and two little slivers to fit into the recessed holes to help eliminate any trapped bubbles. Just lay the two sliver pieces into the recessed holes and cover the two small bumpers to help with time. It only takes about 12 minutes for the hardener to work. I mixed 2 oz. of resin (24 drops of hardener). After mixed with you paint stirrer. Use your brush and wet the recessed areas on the back bumpers and then lay the fiber cloth over the back. Start at the bottom and work your way up. Don't use brush strokes. Just dab at the cloth. Soak all of the fiber cloth. Take your squeegee and make sure there are no air bubbles or lifting of the cloth. Make sure you don't drag the cloth. Do only one bumper at a time. Make sure you have enough resin on the cloth to cover it. You don't want too much or too little. Too little will give you a screen effect. you don't want any runs either. I forgot about that part then noticed a few runs. I already cleaned the brush. So I took the stirring stick and gently rubbed them. The hardener already begun to work. They did lift up though. I want to state I'm no professional with this stuff. I am a beginner. So don't be afraid to try to make your own. I'll let these dry most of the day. I got up early to do this. It is about 80 degrees out now and going to 100 today.
Image
Image
Image
azygoustoyou

Re: How to make custom bumperettes

Post by azygoustoyou »

I sanded the two front bumperettes slightly. I took two different approaches to covering them. The backs were already done. I cut a piece of cloth to cover the first in one shot. I cut three separate pieces to cover the second one. I don't know, maybe I'm rushing or something. It was difficult to the first one and the second was just as hard with about the same result. I will have to trim off the parts that didn't stick. Mostly toward the bottoms. I don't like working with this stuff. If your good at using fiberglass. You shouldn't have any problems making your bumperettes. I'll let these dry and take a break.
Image
Image
Post Reply