Floor panels (pics)
-
offshore
Floor panels (pics)
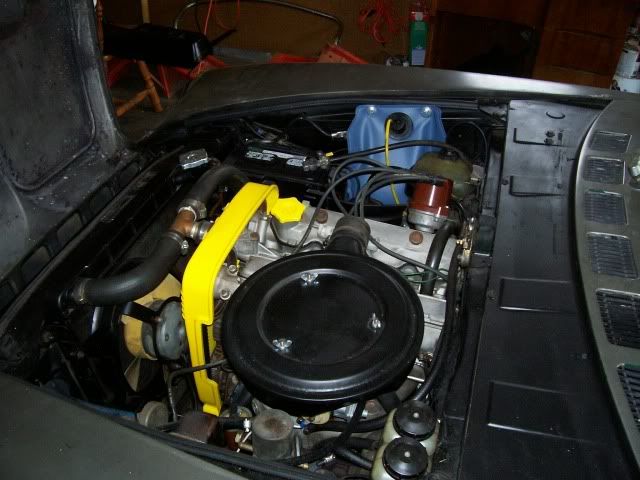
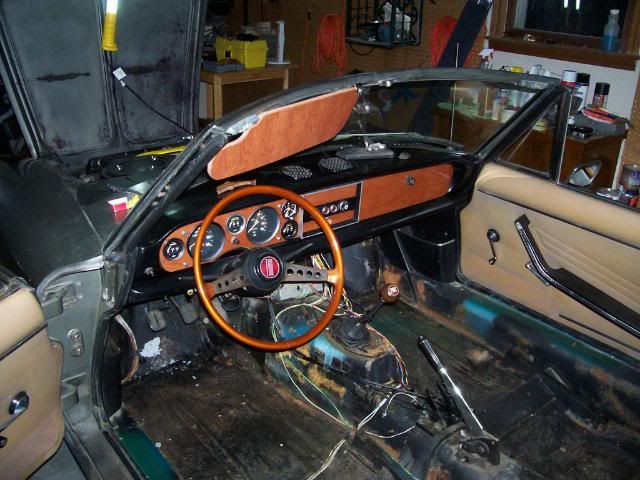
I have finished the engine bay (sanding, rust protecting and painting) and now I am moving on to the interior. I pulled the wood dash out and made new pieces, cleaned all the electrical wiring and put it back together (new clock from Nick, Thanks). The dash is not perfect, but I can live with it for now (learned a lot making it).
My question: I pulled the seats, carpet, and sound/heat shield padding out. After I pull everything out I started to wire brush some surface rust off and ended up with a small hole right below the brake pedal. So, I decided to remove what I think is a rubber coating using a screwdriver and chisel. I started working removing the coating right behind the front seat. The good news is the panel looks good no rust. The only rust (surface)I can see is where there was no coating around the edges.
The bad news is...it is taking me for ever. I should be done in a year at this rate and my back is killing me.
If anyone knows of a better way to do this I would appreciate any help.
Last edited by offshore on Sun May 16, 2010 6:18 pm, edited 1 time in total.
-
Mathew26
Re: Floor panels
Right-angle grinder with the twisted wire brush attachment. You will need to go lightly as you can really go to far if you're not careful.
Matt
Matt
-
MJSSpider2K
Re: Floor panels
I used a propane torch and a 2" scraper to ermove as much as possible, heat the rubber with the torch and once it softens up then use the scraper to remove it in big chunks. Once most of it was removed I then used a brush on mastic and adhesive remover with a wire wheel to remove all the residue. What you are left with is clean metal ready to be cleaned and coated.
-
offshore
Re: Floor panels update (pics of progress)
I chipped away the rubber coating and I am in the process of sanding/repairing the rust. The floor panels lookd good except on the driver side under the brake pedal. I have a small hole/place that has rusted through. After I got all of the rubber coating up I started with a wire brush, wire wheel ( on drill), and a grider to remove the rust. Still in progress. This is were I need help. I was going to use the products I ordered from Eastwood (rust converter and Encapsulator) and then paint. As for the rusted through place, I am not sure. I am not a welder. Any ideas?
I have included some pics of the progess so far. Also, some pics of the motor and wood dash work after cleaning/replacing parts and painting.

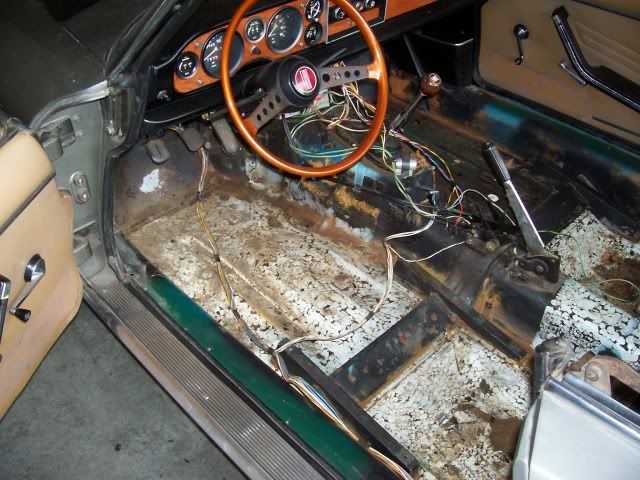
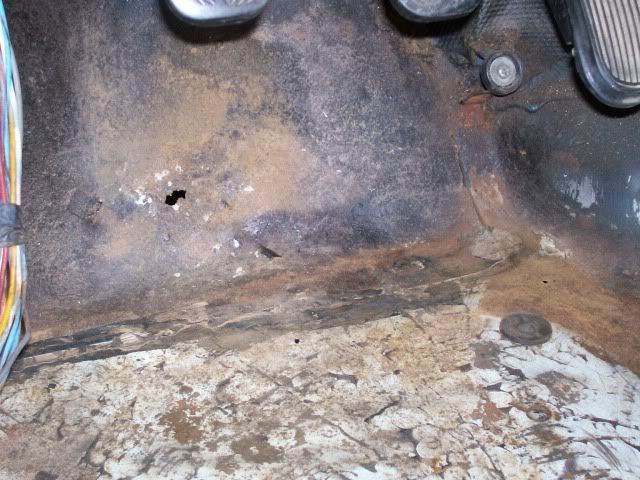
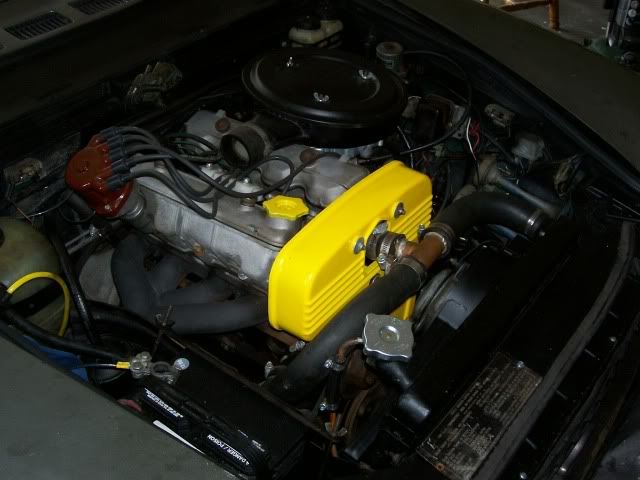
I have included some pics of the progess so far. Also, some pics of the motor and wood dash work after cleaning/replacing parts and painting.


Last edited by offshore on Sat May 15, 2010 10:28 pm, edited 1 time in total.
-
2ndwind
- Posts: 548
- Joined: Tue Oct 27, 2009 10:17 pm
- Your car is a: 1982 Spider
- Location: Cincinnati OH
Re: Floor panels (pics)
Looking good. I love that engine bay.
On the small hole, you have many choices. It depends on the level of restoration you want. Ideally, you would cut out the offending area a little larger, back to good metal, and weld in a patch. You may have to take it to a decent body shop to get it done right. You should cut it out a little larger to get to good metal no matter what method you use.
On a daily driver you can pop-rivet in another piece of metal and fiberglass the bottom side (using the stranded stuff in a can) to keep the water out. Be sure to grind off the undercoating in that area first. Then you can re-undercoat the area. Some have been known to fiberglass-only a hole this size. Oddly, it is not correct or pretty but lasts a long time.
Steve
1982 Red Spider 2000
1919 Old Town Sailing Canoe
1982 Red Spider 2000
1919 Old Town Sailing Canoe
-
katsi
Re: Floor panels (pics)
How was it arround the drain plugs? If that was it, really lucky. nice 
-
offshore
Re: Floor panels (pics)
Just some surface rust around a few of the drain plugs.
So far: Sanded and use the rust converter from Eastewoods.
My plan: Next- 1.) I was thing about using a primer from the master series (is use on boats)
2.) Then put down the Ice and water shield from Lowes
3.) Then put down a sound and heat barrier (from website Auto Trim)
4.) Then carpet
Is there anything else I should do or a better way to do it?
What is the best thing to do with the drain plugs and the triangle holes?
-
emosfiat
Re: Floor panels (pics)
You could look into "POR 15". I have been told it is one of the best to coat and seal the floors.
- wachuko
- Posts: 1175
- Joined: Thu Feb 04, 2010 10:56 pm
- Your car is a: 1981 Fiat 2000 Spider
- Location: Orlando, FL USA
- Contact:
Re: Floor panels (pics)
+1 That is what I am using, it is like putting a coat of liquid ceramic on the metal. First time I have used it and really like the results.emosfiat wrote:You could look into "POR 15". I have been told it is one of the best to coat and seal the floors.
Drive Safe!
Wachuko
1981 Fiat Spider Progress thread
1967 912 Progress Thread
1981 911 SC Coupe RS Transformation
1983 911 SC Coupe RSR Transformation
1991 964 C4 Cabriolet Progress Thread
2012 BMW X5 xDrive35d
2015 FIAT Abarth
Wachuko
1981 Fiat Spider Progress thread
1967 912 Progress Thread
1981 911 SC Coupe RS Transformation
1983 911 SC Coupe RSR Transformation
1991 964 C4 Cabriolet Progress Thread
2012 BMW X5 xDrive35d
2015 FIAT Abarth
-
Danno
Re: Floor panels (pics)
man, those pics bring back memories. I didn't have much rust, but there was a little. i did the converter and then I used that rubberized spray. a solid covering is very important if you use the rubberized stuff, because if there is any way for moisture to get under it then you run the risk of trapping moisture against the metal, and that's a big no-no. POR-15 is the safe way to go, but I don't think I'd do mine any differently.
here's a couple of pictures after cleaning that crap off of the floor with a before and after of the rubberized stuff.

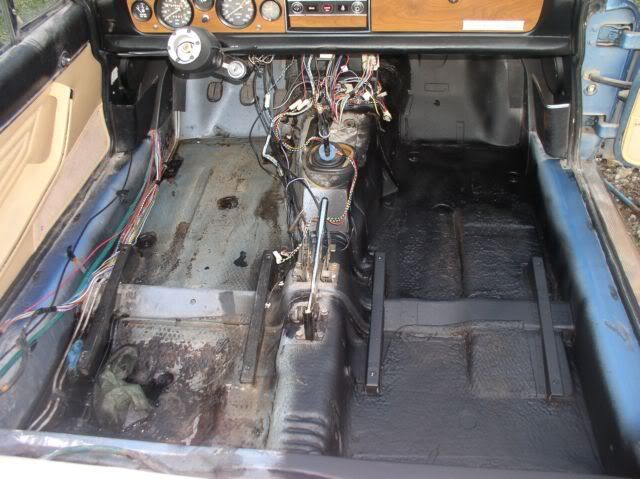
here's what it looked like with the insulation/sound barrier stuffs....
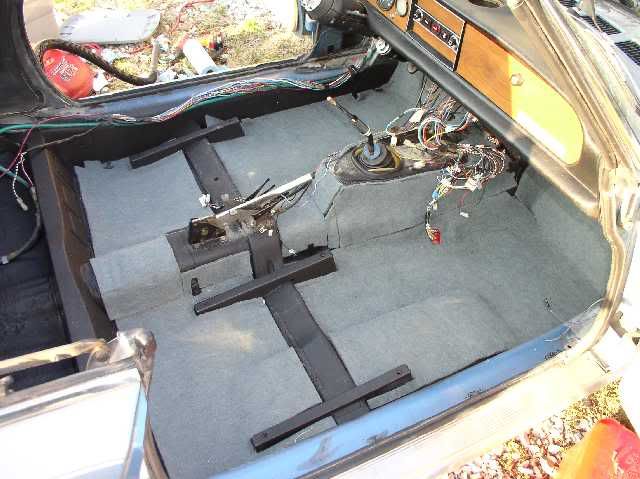
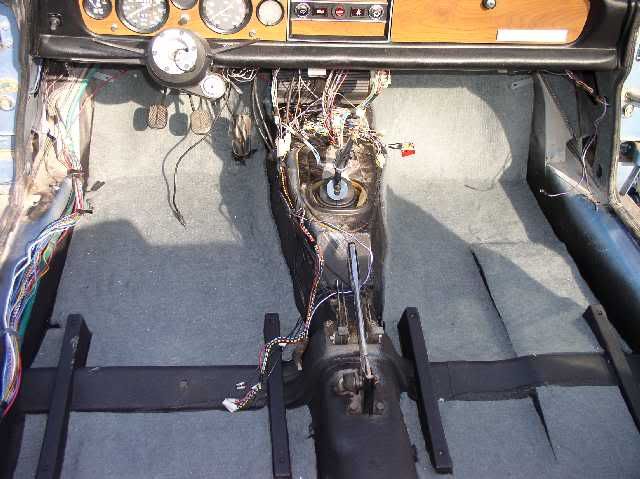
ps, notice the messiness on the driver's side. the main reason I only did half, wasn't for the cool pictures it was for the fuel line I found leaking right by the driver. I still feel a little weird about the fuel traveling on the inside of the car right by the driver, but at least I know my lines are new.
here's a couple of pictures after cleaning that crap off of the floor with a before and after of the rubberized stuff.


here's what it looked like with the insulation/sound barrier stuffs....


ps, notice the messiness on the driver's side. the main reason I only did half, wasn't for the cool pictures it was for the fuel line I found leaking right by the driver. I still feel a little weird about the fuel traveling on the inside of the car right by the driver, but at least I know my lines are new.
-
htchevyii
- Patron 2022

- Posts: 1807
- Joined: Thu Jan 17, 2008 9:31 pm
- Your car is a: 1982 Spider hers 1972 Spider his
- Location: Hydesville, CA (NorCal)
Re: Floor panels (pics)
I use the Master Series, like Offshore mentioned. It's a moisture cured urethane like POR, but is easier to work with and adheres better. It's easier to topcoat too.
Trey

1982 SPIDER 2000, 1964 CHEVYII, 1969 Chevy Nova, 2005 DODGE RAM, 1988 Jeep Comanche
1972 Spider, 78 Spider rat racer 57 f-100,

1982 SPIDER 2000, 1964 CHEVYII, 1969 Chevy Nova, 2005 DODGE RAM, 1988 Jeep Comanche
1972 Spider, 78 Spider rat racer 57 f-100,
-
amsiegel
Re: Floor panels (pics)
AHHHH
It going to give me nightmares from when I did my floors all the sanding and scraping, scraping and sanding, painting etc etc.
It going to give me nightmares from when I did my floors all the sanding and scraping, scraping and sanding, painting etc etc.
-
MNspiderman
Re: Floor panels (pics)
Call me Crazy but DID I SEE A WOODEN SUN VISOR? Or was that an optical illusion with wood grain.
-
Danno
Re: Floor panels (pics)
You are crazy. BUT, it's not because you were seeing things. We won't get into it now, lol. SERIOUSLY, THOUGH, I have to know exactly how those are connected. Making wooden visors doesn't seem to be too difficult EXCEPT for how to connect them. I need close ups.MNspiderman wrote:Call me Crazy but DID I SEE A WOODEN SUN VISOR? Or was that an optical illusion with wood grain.
P.S. sorry for the hijack!!!
