More Problems
- kilrwail
- Posts: 1100
- Joined: Wed Mar 04, 2009 6:49 am
- Your car is a: 1978 Fiat 124 Sport Spider
- Location: Perth, Ontario
Re: More Problems
Glad to hear you've solved that problem! And hooray for Alvon and Reyy for coming to the rescue 
_____________________________________________________________
Peter Brownhill
1978 Fiat 124 Sport Spider - original owner
1977 Porsche 911S - track car
2022 Ram 4 x 4 - hauler
PCA National Instructor and Motorsport Safety Foundation Level 2 Instructor
Peter Brownhill
1978 Fiat 124 Sport Spider - original owner
1977 Porsche 911S - track car
2022 Ram 4 x 4 - hauler
PCA National Instructor and Motorsport Safety Foundation Level 2 Instructor
- Tappy
- Posts: 721
- Joined: Wed Apr 02, 2008 8:22 pm
- Your car is a: 124 spider 2000 1979
- Location: Belgium ; Centre Of Europe
Re: More Problems
where can i book such an Alvon ? 
FineItalianAutomobile Technology
pls don't see what i write , read what i mean
pls don't see what i write , read what i mean
- TulsaSpider
- Posts: 1547
- Joined: Tue Apr 29, 2008 7:33 pm
- Your car is a: 1978 Spyder 124 2L
- Location: Tulsa, Ok
Re: More Problems
Allright! That's wonderful! Where can I get my very own Alvon? or Rey or.... I guess I'll just have my little box here!
1978 Spyder 1800 make that 2L! Finally making real progress!
- launieg
- Posts: 454
- Joined: Tue Mar 25, 2008 4:17 pm
- Your car is a: 1981 spider 2000
- Location: Duncan, BC, Canada
Re: More Problems
Alvon is a true gentleman! Well done, and what a relief for all of us 
Launie
'81 Spider Rolling Restoration
'81 Spider Rolling Restoration
- Kevin1
- Posts: 399
- Joined: Tue Feb 17, 2009 8:55 pm
- Your car is a: 1980 Spider 2000 FI
- Location: Maine, USA
Re: More Problems
That is so cool - there's no better people to be found than the folks you find around Fiats! 
-
ventura ace
Re: More Problems
I enjoyed spending the day with Steve and his family, especially since the end result was that the spider seems to be in good running shape for now. Credit goes to many of you folks that have pitched in your ideas and solutions, and several others that were there to lend a hand a few weeks ago and scratched their heads with me by telephone since then (Ron, Gary, Ryan, Mark, Rey, Eladio). Thanks to Rey for having the tools to remove the crankshaft nut, and to Mark and Eladio for hanging around the shop a little longer to get us the seals. I'm just the lucky one that got to experience the thrill of seeing it run again. You all know how that feels when you've spent your time working on something, you've had a few setbacks, tackled the problems, then got it all going again -- it's a good feeling!
That front crankshaft seal has me a little puzzled, though. Steve took some pictures, maybe they'll show the what puzzles me. What we found is that the sealing area on the crankshaft stops inboard of the outer edge of the seal and the seal carrier plate. In other words, when the seal and carrier plate are in place, the rubber sealing lip of the seal just barely engages the end of the crankshaft. There was a rough spot on the leading chamfered edge of the crankshaft, so we filed it down a tad, and smoothed it with sandpaper. That may have been what snagged the first seal that we put in a few weeks ago. Or, it could be that the lipped edge of the seal never actually made it over the end of the crankshaft sealing surface, and was pinched between that surface and the toothed drive pulley that butts up against -- but I would think we would have noticed that (or should have).
I took a look at X-section views in my various Fiat workshop manuals this morning, and all the pictures show that the front cranshaft seal doesn't actually seal against the crankshaft, but seals on the OD of the small drive pulley, on the smooth full diameter behind the toothed gears (same diameter as the crankshaft). It is shown this way for the 1592, 1608, and 1.8L engines -- and maybe the 2.0L also, but I'm not sure if the X-section view applies to that engine in my manual. It seems like I remember running across something like this before --- that there are a couple of different drive pulley designs, 1) with a longer diameter behind the toothed part for sealing on the drive pulley, and 2) with a very short round portion behind the toothed part, with a corresponding longer crankshaft OD for sealing. This one appears to be the latter, since there was no room at all for sealing on the small drive pulley. Anybody else run accross this? What's the scoop? I can't remember what my 1.8L engine was like when I put it together several years ago.
I'm curious to see Steve's pictures, to see how they compare to the manual.
A
-
ventura ace
Re: More Problems
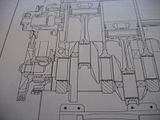
Here is a picture of the seal as depicted in the workshop manual for the 1.8L engine. The seal is on the crankshaft drive pulley:

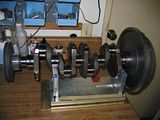
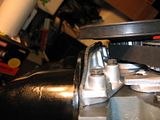
Here are a couple of shots from when I was building a 1.8L engine a few years ago:


You can see that the oil seal has to be on the cranshaft, and not the cranshaft drive pulley. I noticed that the seal carrier plate from Steve's engine was different than my engine. Steve's has 'wall' around the area where the toothed drive pulley sits, probably to protect it from debris kicked up from the road. Mine does not have the 'wall', and I can't be sure whether it is or is not original to the 1.8L engine, since I don't have a complete history of where all the parts came from for my engine. However, it does look like the seal carrier on my engine positions the seal such that the seal engagement to the crankshaft is not so close to the end of the crankshaft as it is on Steve's engine. I wonder if Steve's engine may have had the seal carrier changed at some time in it's past with one from a 2.0L engine?? Maybe the cranshafts were slightly longer up front for that engine???
In any event, the seal on Steve's engine does seem to engage the crankshaft adequately, though it is very close.
A

Here are a couple of shots from when I was building a 1.8L engine a few years ago:


You can see that the oil seal has to be on the cranshaft, and not the cranshaft drive pulley. I noticed that the seal carrier plate from Steve's engine was different than my engine. Steve's has 'wall' around the area where the toothed drive pulley sits, probably to protect it from debris kicked up from the road. Mine does not have the 'wall', and I can't be sure whether it is or is not original to the 1.8L engine, since I don't have a complete history of where all the parts came from for my engine. However, it does look like the seal carrier on my engine positions the seal such that the seal engagement to the crankshaft is not so close to the end of the crankshaft as it is on Steve's engine. I wonder if Steve's engine may have had the seal carrier changed at some time in it's past with one from a 2.0L engine?? Maybe the cranshafts were slightly longer up front for that engine???
In any event, the seal on Steve's engine does seem to engage the crankshaft adequately, though it is very close.
A
- kilrwail
- Posts: 1100
- Joined: Wed Mar 04, 2009 6:49 am
- Your car is a: 1978 Fiat 124 Sport Spider
- Location: Perth, Ontario
Re: More Problems
Never having been afraid to show my ignorance...here's a naive question. Is it possible that you've left out an O-ring between the outer pulley shaft and the block? There appears to be one that would act as a spacer, separating the pulley from the carrier by enough to leave room for the seal. As I read the drawings, the seal should sit in the carrier on the outboard side. Without that spacer, the seal would be rubbed by the inboard face of the pulley. This is new to me since I've never been there and other engines I've worked on had the seal directly in the crankcase. Try not to laugh too hard if it's a really dumb question. 
_____________________________________________________________
Peter Brownhill
1978 Fiat 124 Sport Spider - original owner
1977 Porsche 911S - track car
2022 Ram 4 x 4 - hauler
PCA National Instructor and Motorsport Safety Foundation Level 2 Instructor
Peter Brownhill
1978 Fiat 124 Sport Spider - original owner
1977 Porsche 911S - track car
2022 Ram 4 x 4 - hauler
PCA National Instructor and Motorsport Safety Foundation Level 2 Instructor
-
ventura ace
Re: More Problems
The drawing doesn't show the details of the seal. It's a typical oil seal for a rotating shaft. It has light contact from a rubber part made specifically for this purpose. You would really need to look at one to get the best feel for it. The seal is pressed into an aluminum carrier plate that is attached to the front of the engine block. There is a similar set-up for the rear seal at the back end of the block.kilrwail wrote: . . . Is it possible that you've left out an O-ring between the outer pulley shaft and the block?
A
- Tappy
- Posts: 721
- Joined: Wed Apr 02, 2008 8:22 pm
- Your car is a: 124 spider 2000 1979
- Location: Belgium ; Centre Of Europe
Re: More Problems
just a question because i think i have the same problem , does it matter if you put on the gasket /seal on AFTER you put on he oil pan/gasket , thats happend with me and i think i have a leak there also.still need to determne the oil return ring or he gasket is leaking there ...
FineItalianAutomobile Technology
pls don't see what i write , read what i mean
pls don't see what i write , read what i mean
-
So Cal Mark
Re: More Problems
it's harder to install the seal housing once the pan is on. A new unsquashed oil pan gasket will make it hard to get the seal housing bolts lined up unless you install the housing without the seal, then install the seal
-
spiderrey
- Posts: 2623
- Joined: Sat Jan 28, 2006 2:08 pm
- Your car is a: 70 124 spider-74x19-03 ranger edge
- Location: San Dimas, Ca
Re: More Problems
i believe the only dumb question is the one you didnt ask......
-
ventura ace
Re: More Problems
Tappy,
It's better to put the oil pan on last, but that's not always possible or practical if the engine is in the car.
If putting the seal housing on while the oil pan remains in place, be sure to dab a generous amount of sealant in the corner where the oil pan and engine block join.
In our case yesterday, we were able to pull the seal housing off with the seal still in place, gently and carefully prying from the top and the side edges and using a thin scraper to seperate the seal housing from the oil pan gasket. We did so on purpose, because we wanted to look at how the seal was installed in the housing, to see if it had been an improper installation. As it turns out, the seal had been properly installed in the housing, fully pressed in until it bottomed out in the housing, and the spring energizer was still in place.
Since the oil pan gasket did not seem to be pushing too much against the seal housing, we decided to to put the new seal in the housing before mounting the housing onto the engine. We used a thin strip of cardboard (lubricated well) to help the seal slide over the end of the camshaft, by putting the cardboard guide shim around the camshaft, and sliding the seal over the cardboard. For our first attempt, we tried a carboard guide that went 360° around the camshaft, but it bound up and would not go. For the second try, we cut a smaller strip of cardboard to guide the seal over the bottom 90°-12o° of the camshaft, since the main binding would be there, due to the oil pan gasket pushing everything upwards. It slipped on very nicely.
Probably the better approach is per Mark's suggestion. Put the seal housing on first (without the seal). Put the screws from the oil pan to the seal housing in next and snug them up somewhat to bring the seal housing down firmly on the oilpan gasket, while checking to see that the holes line up with the threaded holes in the block. Install the screws from the housing to the block. Snug the oil pan screws first, to try to center the seal housing, then tighten the screws attaching the seal housing to the block, then finish by tightening the oil pan screws. Then carefully install the crankshaft seal, using a thin cardbaord shim as described above to guide the rubber lip seal into place over the end of the camshaft. Remove the carboard shim. Done.
A
-
joelbert2k
Re: More Problems
That's great news Steve 


I like your new signature, I don't think I've ever seen a more appropriate one
Joel
I like your new signature, I don't think I've ever seen a more appropriate one
Joel