My 1978 Spider progressive restoration
-
AriK
- Patron 2018

- Posts: 1149
- Joined: Sat Apr 02, 2011 7:58 pm
- Your car is a: 1979 Fiat Spider
- Location: Montreal Canada
Re: My 1978 Spider progressive restoration
It depends, what are your intentions? If you apply a paint or por-15/equivalent then the oil acts as a contaminant. In the case of por-15, its objective is meant to apply it over a light coat of rust, perhaps my image above of the perfectly polished floor was overzealous behaviour, or worse, OCD on my part.
-
Frankd1
- Posts: 135
- Joined: Tue Sep 15, 2015 4:13 pm
- Your car is a: 1978 Spider
- Location: Southwestern Ontario, Canada
Re: My 1978 Spider progressive restoration
I didn't think of the oil acting as a contaminant. Even after cleaning and sanding there may be some residual that is left over which could possibly be an issue for POR or eastwood's rust encapsulator to stick.. I haven't sprayed anything yet, the area is clean and dry though.
Here's my intention with this:
- remove fuel lines for renewal
- sand and wire brush everything to remove as much surface rust as possible
- cut out and weld in steel patch where required in the footwell area
- there is a small area next to the forward fuel line strap (to the right of it) that will need to be trimmed and patched
- a couple of small holes in the rear pan area behind the driver seat that can be repaired with a layer of fibre glass cloth
- sand and clean everything including welds
- seam seal as required
- coat the entire area with POR 15 or Eastwood rust encapsulator
- prime and paint over the coating although this step may not be entirely necessary
- lay down EZ cool or something similar
- underpad and carpet
I don't think your sanding was overzealous, I think it is wanting something as rust free as possible to last as long as possible. What you did was something that I had envisioned as well...perhaps I'm OCD as well lol!
Question,
With the floor panels sanded smooth, will POR or Eastwood rust encapsulator still stick?
It looks like you had no issue with it judging by your photo. Looks great by the way!
-
AriK
- Patron 2018

- Posts: 1149
- Joined: Sat Apr 02, 2011 7:58 pm
- Your car is a: 1979 Fiat Spider
- Location: Montreal Canada
Re: My 1978 Spider progressive restoration
I can't comment about Eastwood but I can say I swear by Por-15. There are many enthusiasts who prefer other products of the same class. Others claim that Por-15 does not give good long term results. The preferences can be searched on this forum. I personally have successful results, i guess partly due to my overzealous ways. The technique behind Por-15 is that it must be done in 3 phases. The first is a very potent degreasing procedure, the second phase etches the metal, leaving a zinc phosphate coating which helps your step 3 adhere with good results. Take your time for each phase and follow the instructions to the T. Phases 1 & 2 have finishing steps requiring rinsing with water. Leave floors dry for several days before phase 3 and even then, blow with compressed air for the nooks and crannies. Any trace of water or oil will spoil the final result.
My fine friend and fellow roadtrip traveller 4uall documents the procedure here:
http://forum.fiatspider.com/f15/viewtop ... &hilit=por
My fine friend and fellow roadtrip traveller 4uall documents the procedure here:
http://forum.fiatspider.com/f15/viewtop ... &hilit=por
-
Frankd1
- Posts: 135
- Joined: Tue Sep 15, 2015 4:13 pm
- Your car is a: 1978 Spider
- Location: Southwestern Ontario, Canada
Re: My 1978 Spider progressive restoration
Thanks for the info Ari!
I won't have a chance to work on the car this week due to work but I will take a look at the link you provided.
I won't have a chance to work on the car this week due to work but I will take a look at the link you provided.
- royn
- Patron 2018

- Posts: 77
- Joined: Sat Aug 09, 2014 1:33 pm
- Your car is a: 1982 Spider 2000
- Location: 2864 Fall, Norway
Re: My 1978 Spider progressive restoration
Hi Frankd1
Nice car you have !
In your earlier post you asked about the heather cover, I post some pics and you see how it looks like from the underside. I just pulled out the heather in my car, have to change the heather core. Its as someone else mentioned not recommend just for the gasket.
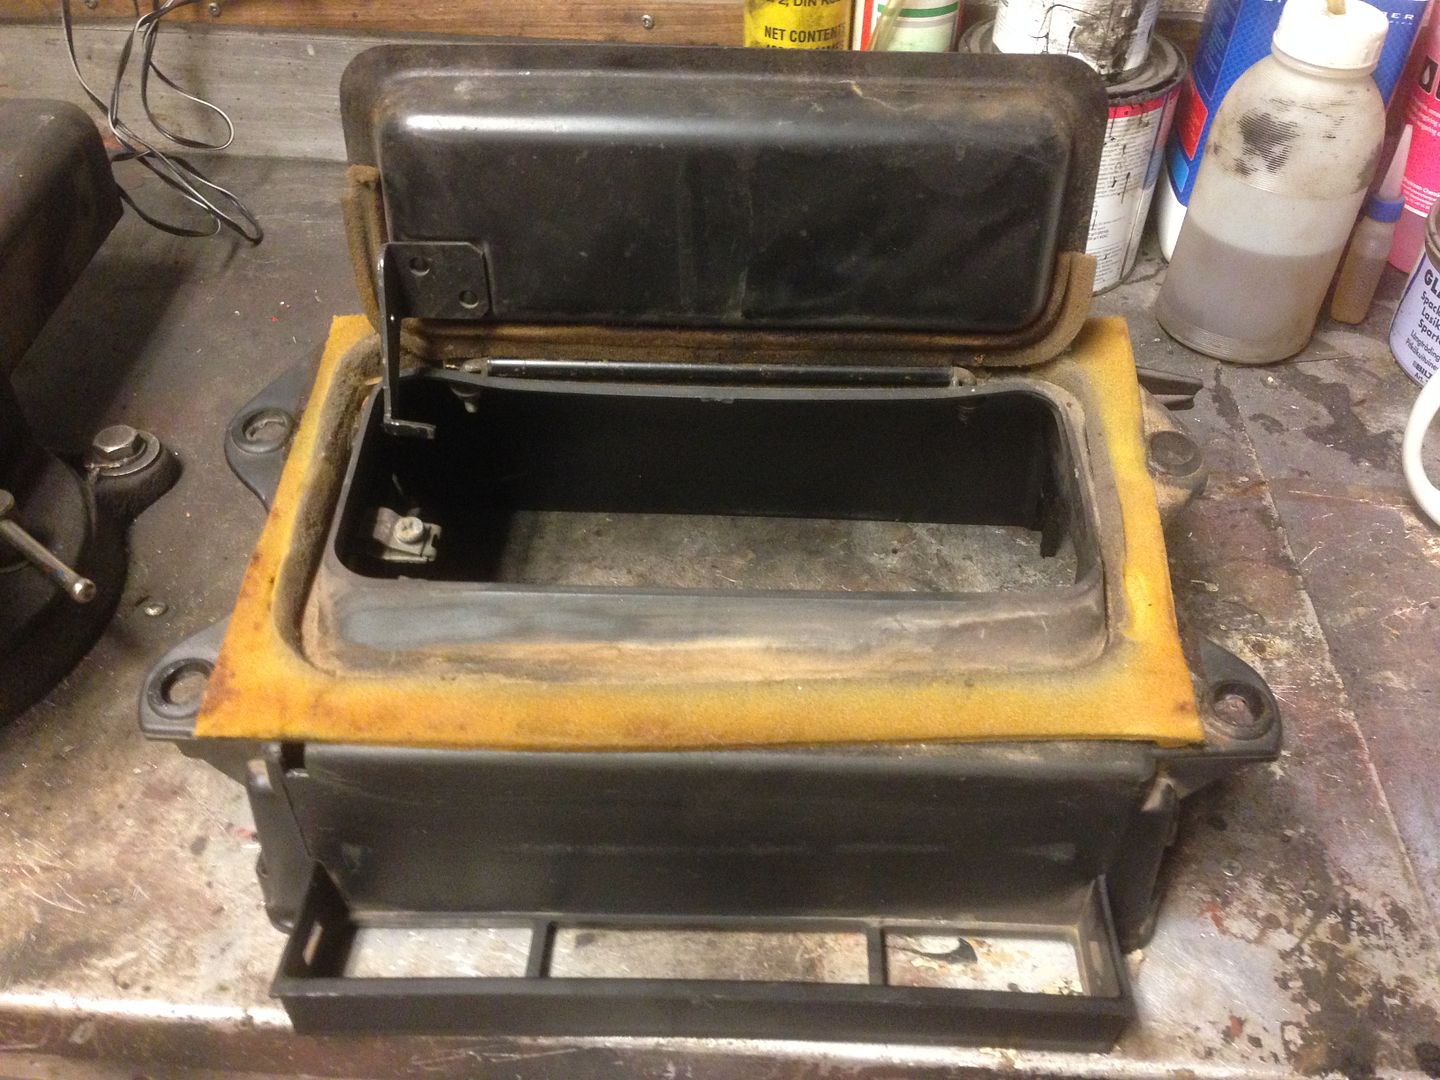
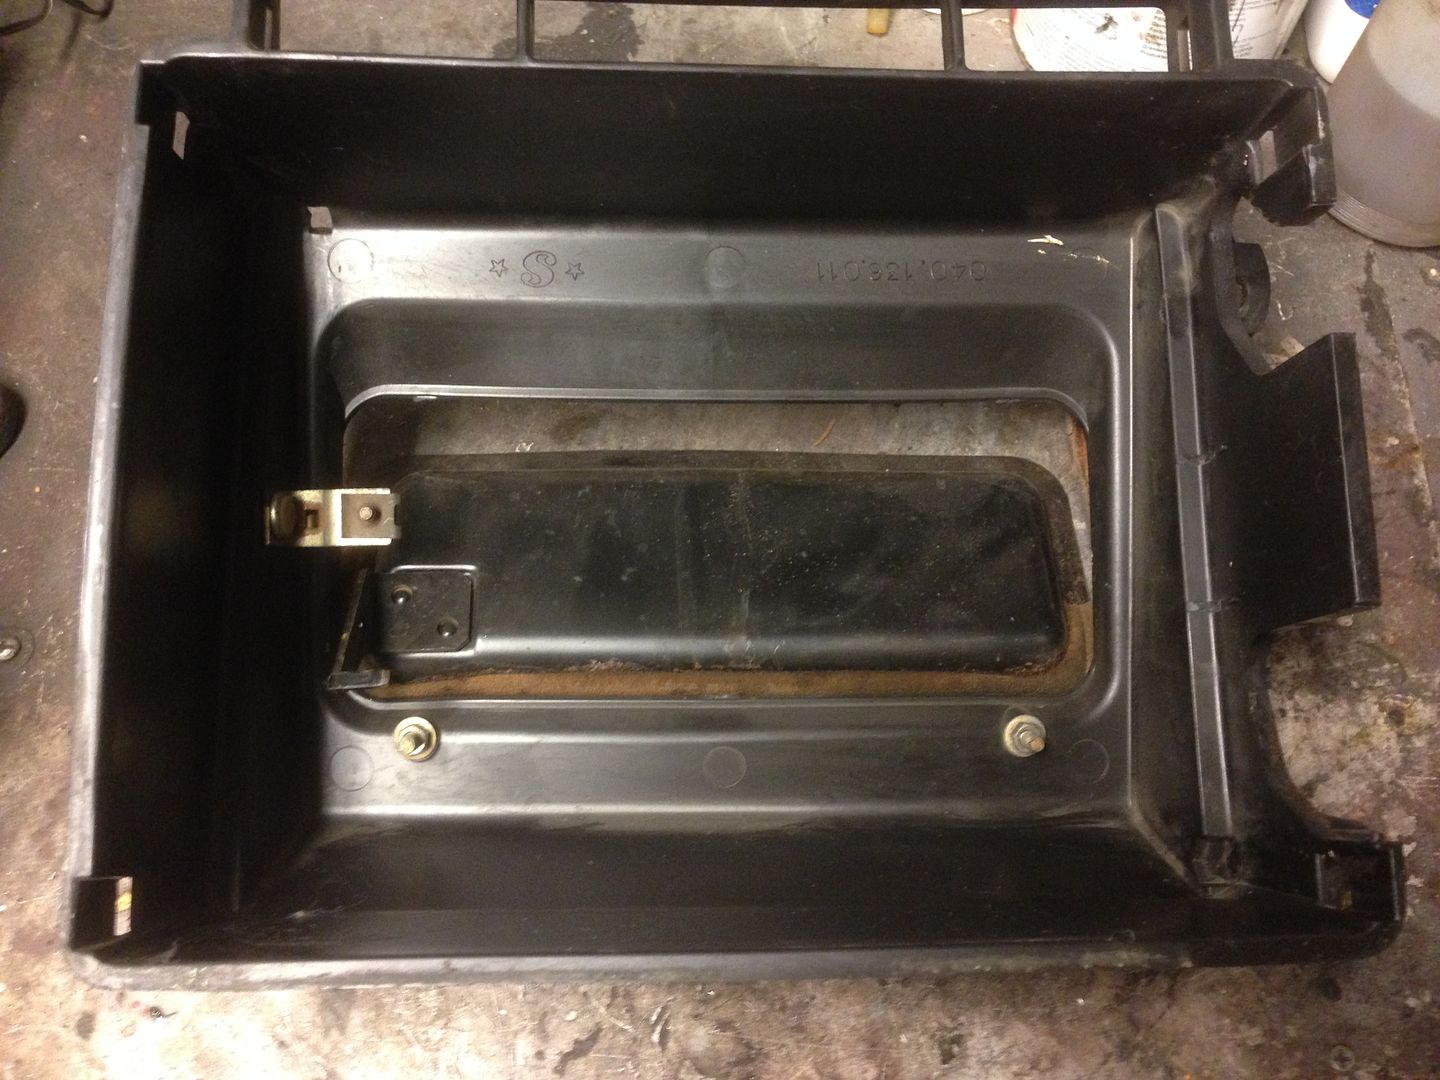 [/img]
Nice car you have !
In your earlier post you asked about the heather cover, I post some pics and you see how it looks like from the underside. I just pulled out the heather in my car, have to change the heather core. Its as someone else mentioned not recommend just for the gasket.

 [/img]
royn
1982 Fiat Spider 2000
-
Frankd1
- Posts: 135
- Joined: Tue Sep 15, 2015 4:13 pm
- Your car is a: 1978 Spider
- Location: Southwestern Ontario, Canada
Re: My 1978 Spider progressive restoration
Thanks royn!
So I'm getting to the point where I am going to decide on which product to use to coat and seal the floor panels with...
At this point I have narrowed it down to 2 products: POR 15 system or master series silver.
I'm looking for input from those of you have used either one (thanks Ari for info the link), in the meantime I will continue researching on this forum and online.
So far my understanding of POR 15 is that it can be applied directly over surface rust however, I don't intend to leave any rust on the panels. All surface rust will be sanded off and there will be an area in the footwell under the pedals with new metal. For the couple of small holes in the rear pan behind the seat rails, a layer of fiberglass cloth.
So basically there will be smooth clean metal and some metal that is pitted from surface rust being removed and a couple of small holes.
I realize there is a prep procedure for the POR and that I can lay in the fiberglass while the first coat is wet and then seal it up for the subsequent coats.
As far as master series:
2 coats of silver over surface rust or new metal or cleaned metal with pitting and then a color coat as a final.
Can I lay in fiberglass cloth into the first coat in the same manner as POR?
Any advice or comments? I'd love to hear, thanks!
Last edited by Frankd1 on Wed Jan 06, 2016 10:35 pm, edited 1 time in total.
-
Frankd1
- Posts: 135
- Joined: Tue Sep 15, 2015 4:13 pm
- Your car is a: 1978 Spider
- Location: Southwestern Ontario, Canada
Re: My 1978 Spider progressive restoration
Thanks royn!
So I'm getting to the point where I am going to decide on which product to use to coat and seal the floor panels with...
At this point I have narrowed it down to 2 products: POR 15 system or master series silver.
I'm looking for input from those of you have used either one (thanks Ari for info and the link), in the meantime I will continue researching on this forum and online.
So far my understanding of POR 15 is that it can be applied directly over surface rust however, I don't intend to leave any rust on the panels. All surface rust will be sanded off and there will be an area in the footwell under the pedals with new metal. For the couple of small holes in the rear pan behind the seat rails, a layer of fiberglass cloth.
So basically there will be smooth clean metal and some metal that is pitted from surface rust being removed and a couple of small holes.
I realize there is a prep procedure for the POR and that I can lay in the fiberglass while the first coat is wet and then seal it up for the subsequent coats.
As far as master series:
2 coats of silver over surface rust or new metal or cleaned metal with pitting and then a color coat as a final.
Can I lay in fiberglass cloth into the first coat in the same manner as POR?
Any advice or comments? I'd love to hear, thanks!
-
Frankd1
- Posts: 135
- Joined: Tue Sep 15, 2015 4:13 pm
- Your car is a: 1978 Spider
- Location: Southwestern Ontario, Canada
Re: My 1978 Spider progressive restoration
Sorry double post 
-
Frankd1
- Posts: 135
- Joined: Tue Sep 15, 2015 4:13 pm
- Your car is a: 1978 Spider
- Location: Southwestern Ontario, Canada
Re: My 1978 Spider progressive restoration
Did some work yesterday...I decided to pull the driver side rocker panel and have a look underneath. The rocker panel is in good shape, just needs a bit of cleaning on the backside to remove some crud but otherwise no rust. There is a thin film of oil on the back which helps keep the corrosion at bay.
Outside:
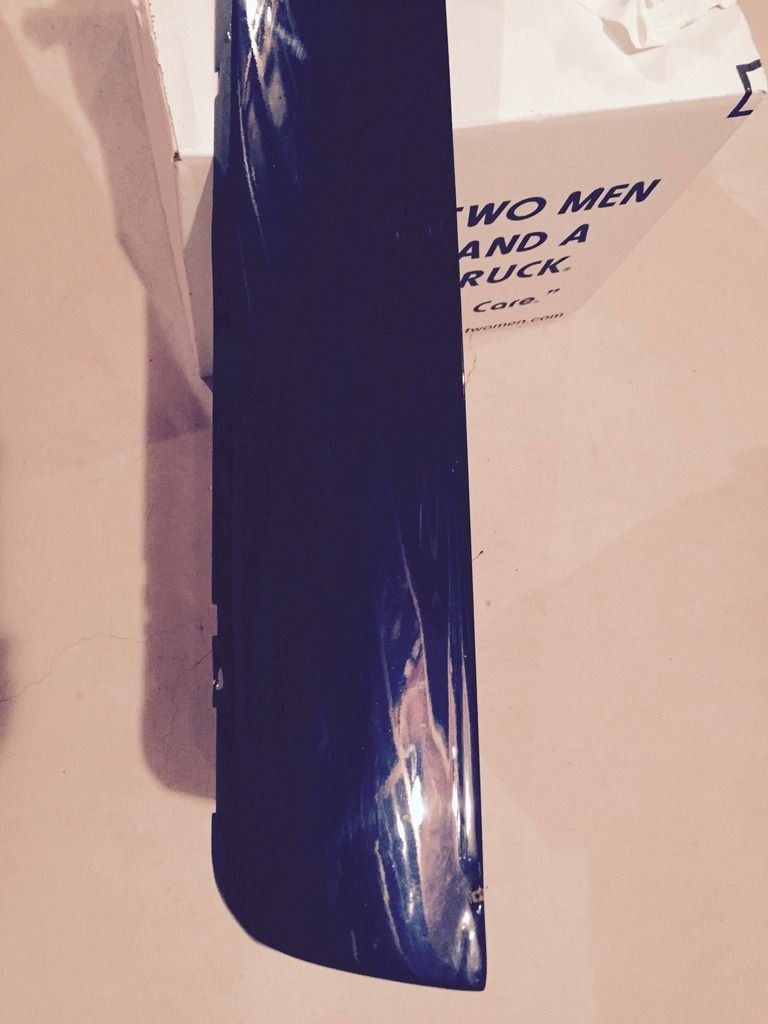
Back:
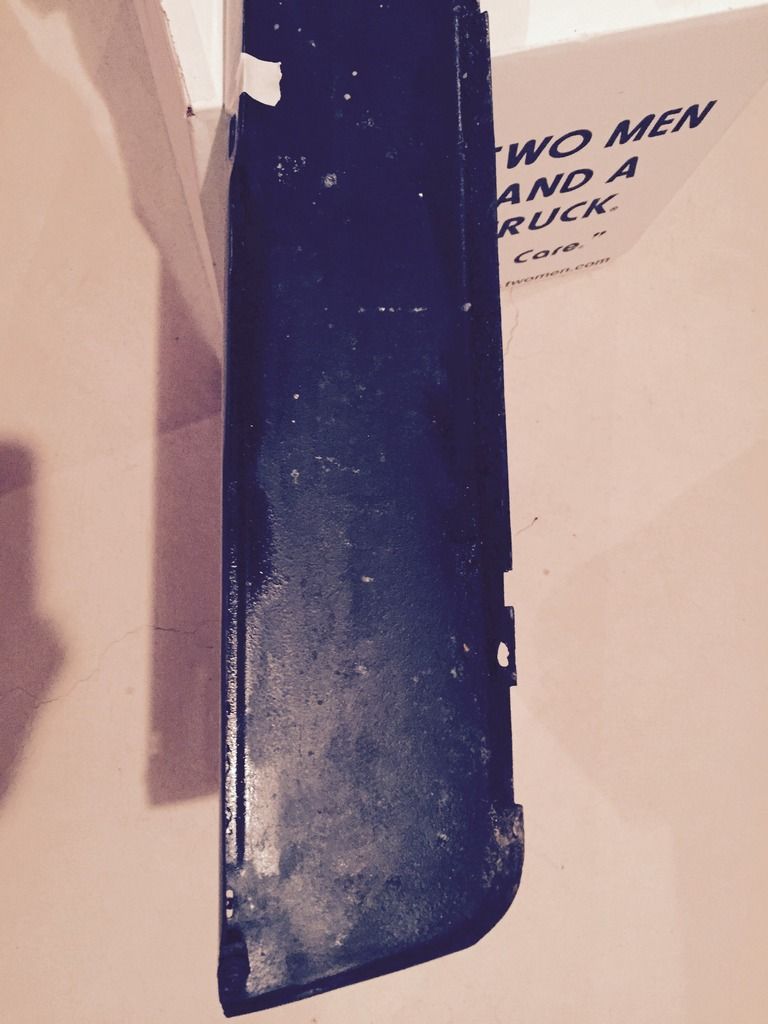
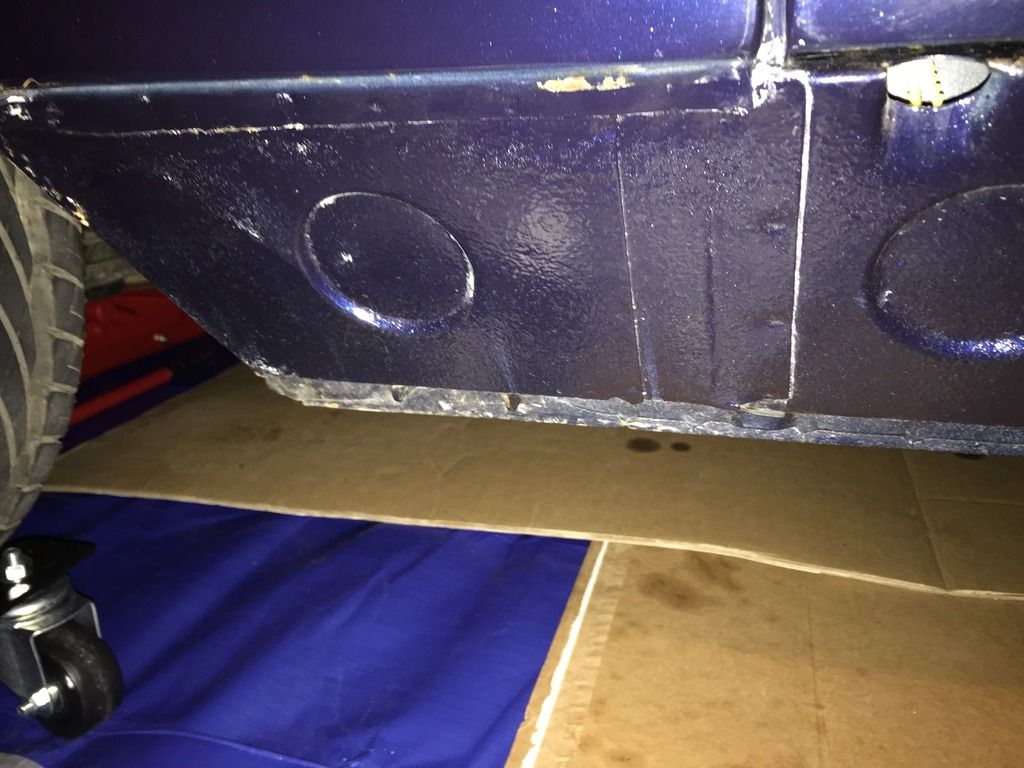
The sill itself seems solid. There is one spot at the rear sill where it welds to the middle portion that has some corrosion. More on that in a minute...
Forward sill:
Middle of sill:
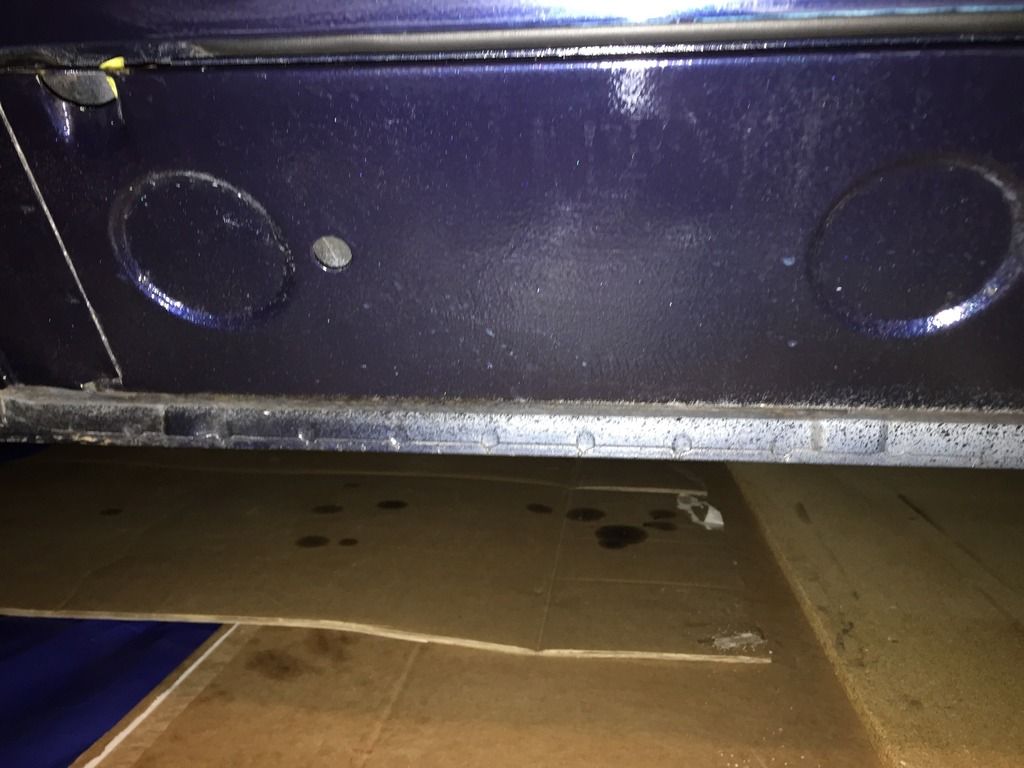
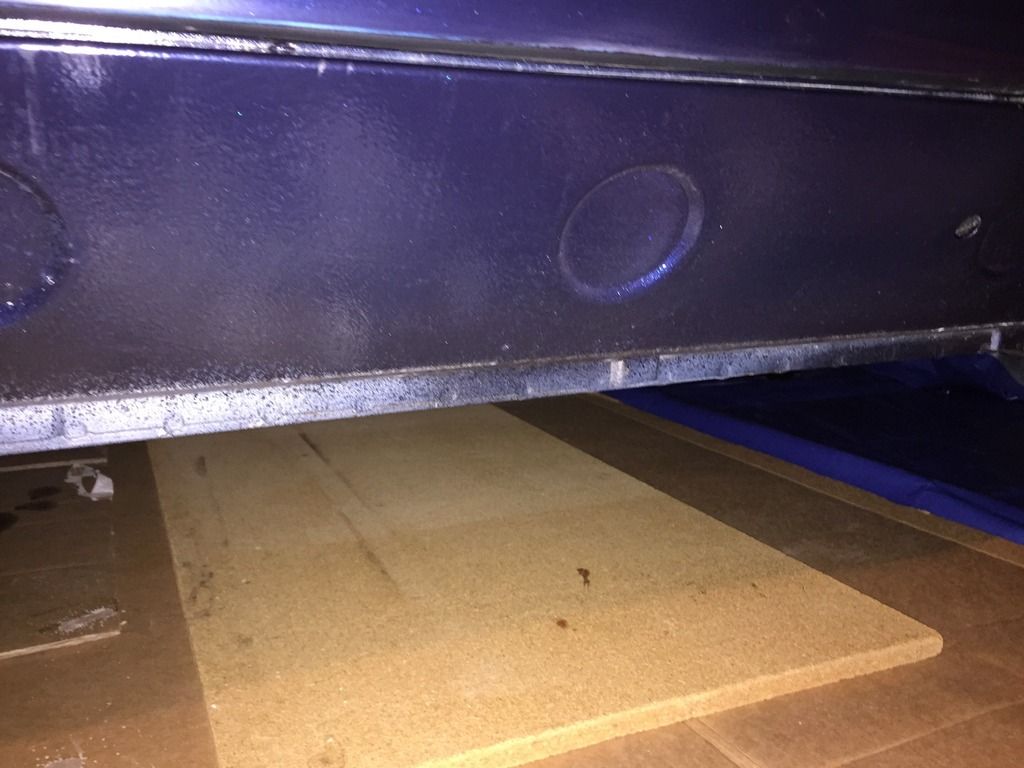
Rear sill:
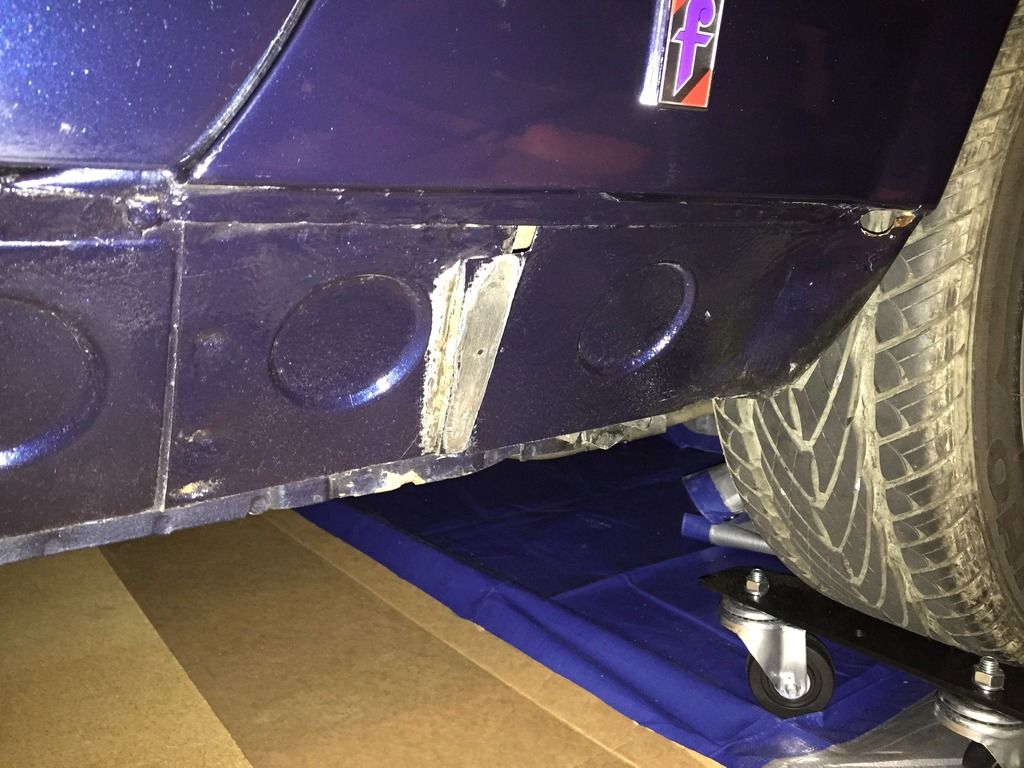
You can see the area that I sanded down...when I was checking things over something caught my eye. I noticed that the forward edge of the rear portion of the sill was not sitting quite flush, where it overlaps and is spot welded to the rear edge of the middle sill.
I started poking around under this raised edge and was able to break through due to rust...
Here are some photos. First this is how it should be as shown by the forward portion of the sill:
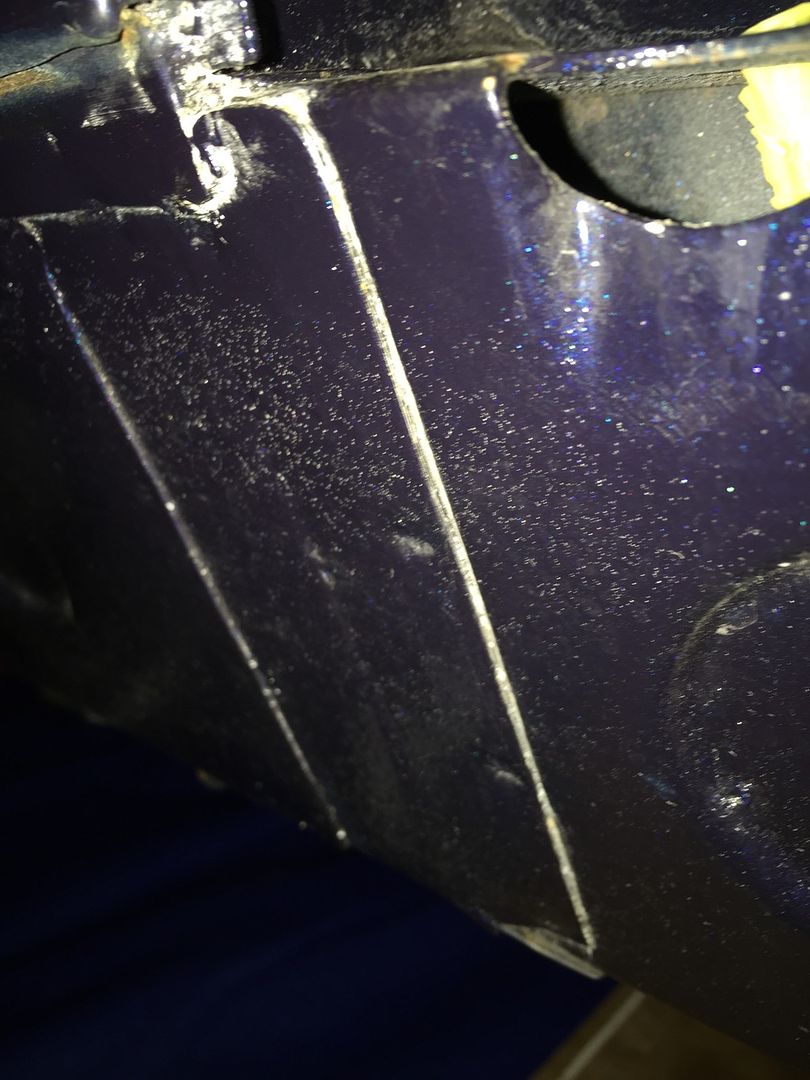
This is what I found after some scrapping and sanding:
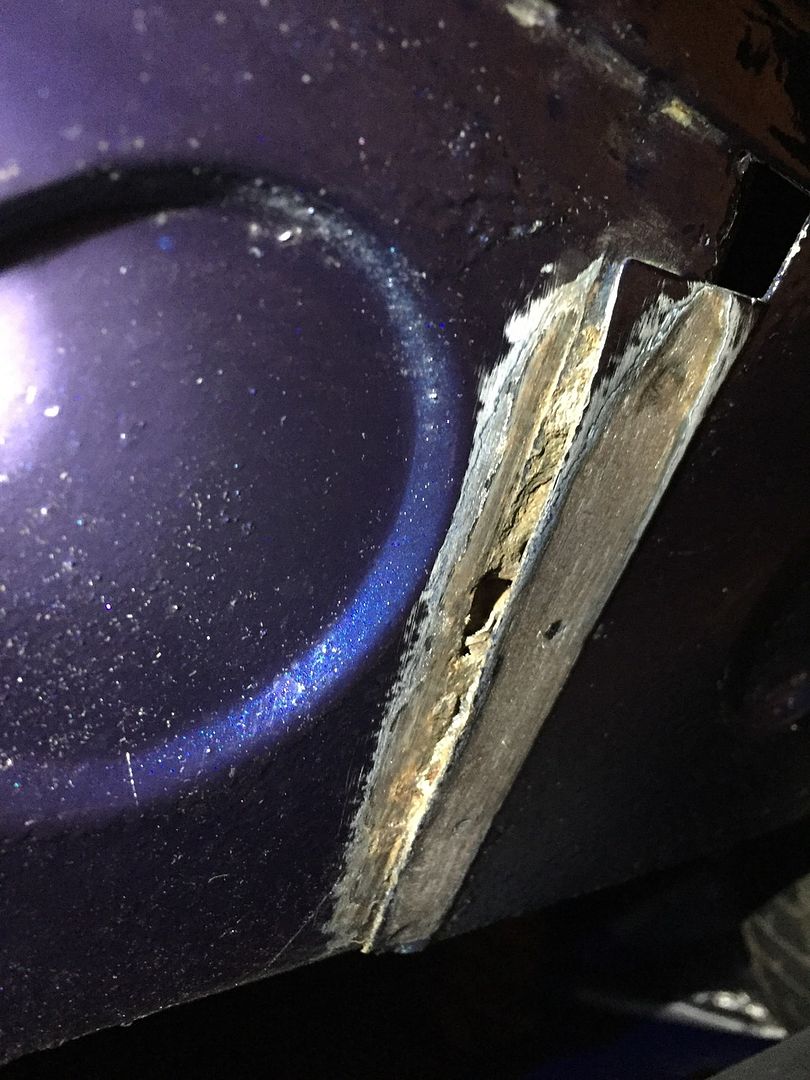
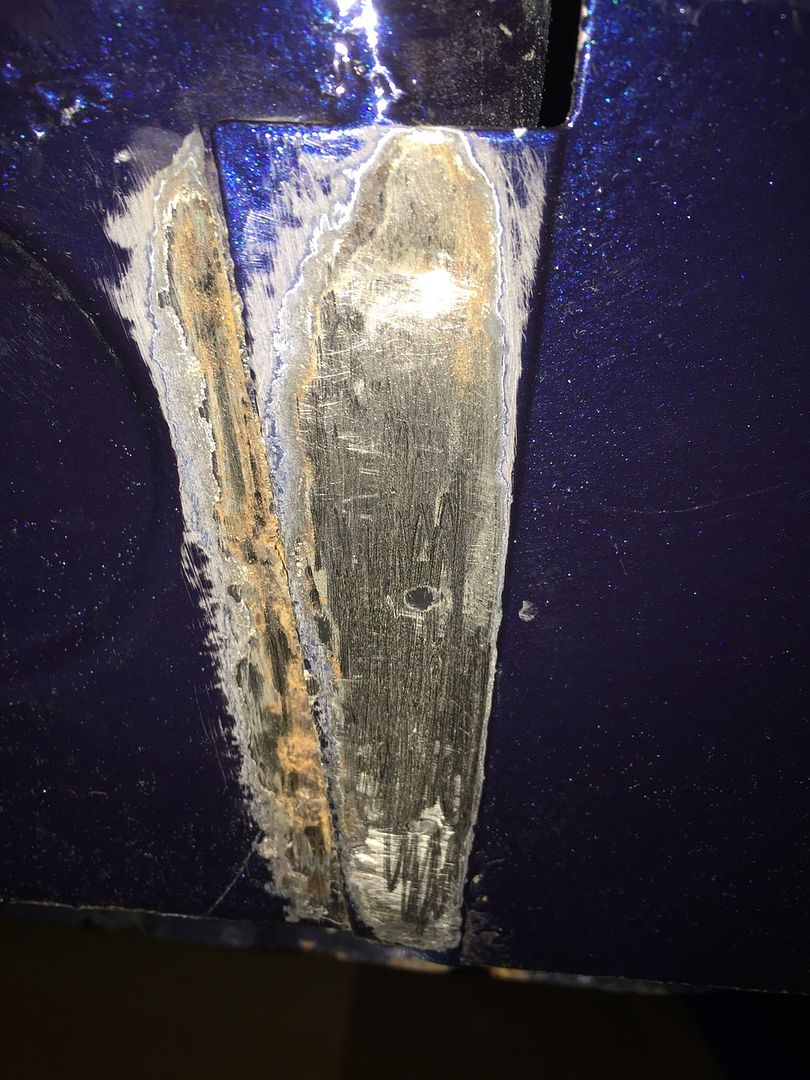
I was able to snake my digital inspection camera into the sill and have a look around. From what I can tell there only seems to be a few patches of surface rust on the backside of the sill except for this one spot. There is also seam filler on the backside of this overlap where I poked through. I'm guessing that these are the original sills.
How best to deal with this?
Should I drill out the spot welds and remove the rear portion of the sill? Clean up the rust on the rear flange of the middle sill and weld in a new flange as required? Then spot weld in the rear sill again once the repair is done.
Also, once everything is cleaned up inside the sill I'm thinking that this would be a good area to spray in some Eastwood internal frame coating? I'd like to neutralize and encapsulate whatever surface rust remains in there...
Outside:

Back:

The sill itself seems solid. There is one spot at the rear sill where it welds to the middle portion that has some corrosion. More on that in a minute...
Forward sill:

Middle of sill:


Rear sill:

You can see the area that I sanded down...when I was checking things over something caught my eye. I noticed that the forward edge of the rear portion of the sill was not sitting quite flush, where it overlaps and is spot welded to the rear edge of the middle sill.
I started poking around under this raised edge and was able to break through due to rust...
Here are some photos. First this is how it should be as shown by the forward portion of the sill:

This is what I found after some scrapping and sanding:


I was able to snake my digital inspection camera into the sill and have a look around. From what I can tell there only seems to be a few patches of surface rust on the backside of the sill except for this one spot. There is also seam filler on the backside of this overlap where I poked through. I'm guessing that these are the original sills.
How best to deal with this?
Should I drill out the spot welds and remove the rear portion of the sill? Clean up the rust on the rear flange of the middle sill and weld in a new flange as required? Then spot weld in the rear sill again once the repair is done.
Also, once everything is cleaned up inside the sill I'm thinking that this would be a good area to spray in some Eastwood internal frame coating? I'd like to neutralize and encapsulate whatever surface rust remains in there...
-
Frankd1
- Posts: 135
- Joined: Tue Sep 15, 2015 4:13 pm
- Your car is a: 1978 Spider
- Location: Southwestern Ontario, Canada
Re: My 1978 Spider progressive restoration
passenger seat and carpet removed.
The factory under pad/jute was actually in good shape. It wasn't falling apart and was still adhered to the tar coating underneath it.
I pulled it all out though and tossed it. The lighting wasn't that great and you can see the carpet adhesive along the sill but you get the idea:
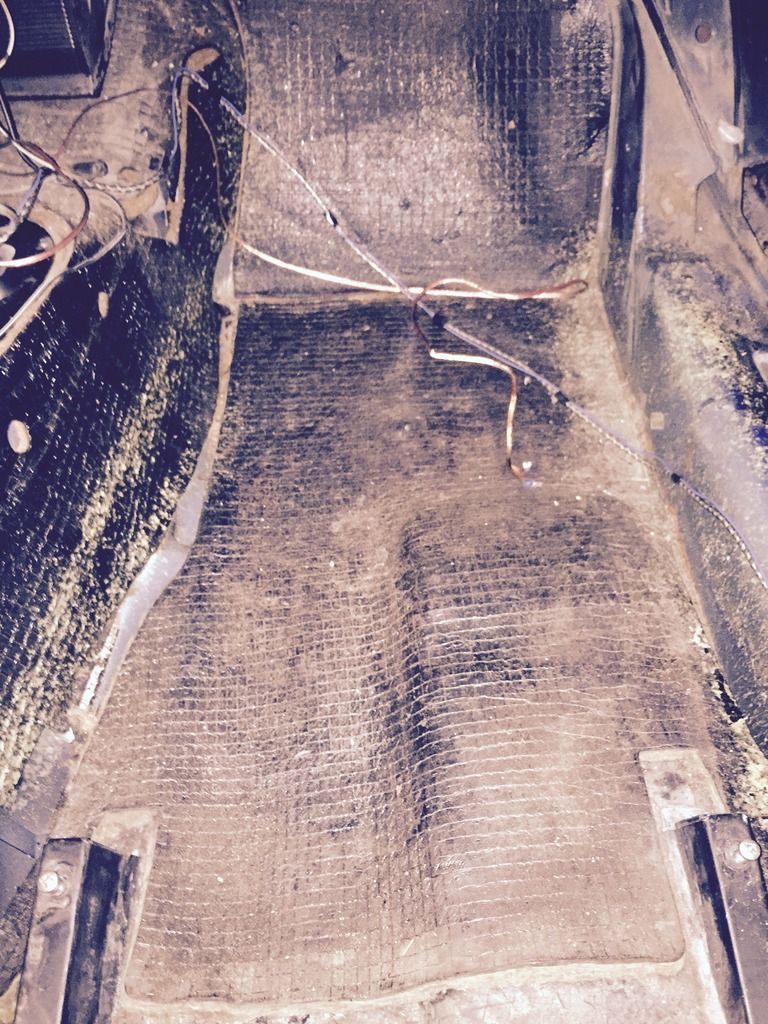
The tar on the floor panel is in good shape and still well adhered which means there should be little to no rust on this side. I didn't really find any loose or cracked areas that are consistent with water getting underneath. I thought about leaving it down, but decided I'm going to remove it all because I do want to get a good look at the metal underneath and properly seal it up. I do have an electric oscillating tool with scrapper blade and that should make the removal easier. I need to clean all the carpet adhesive off of the sill as well:
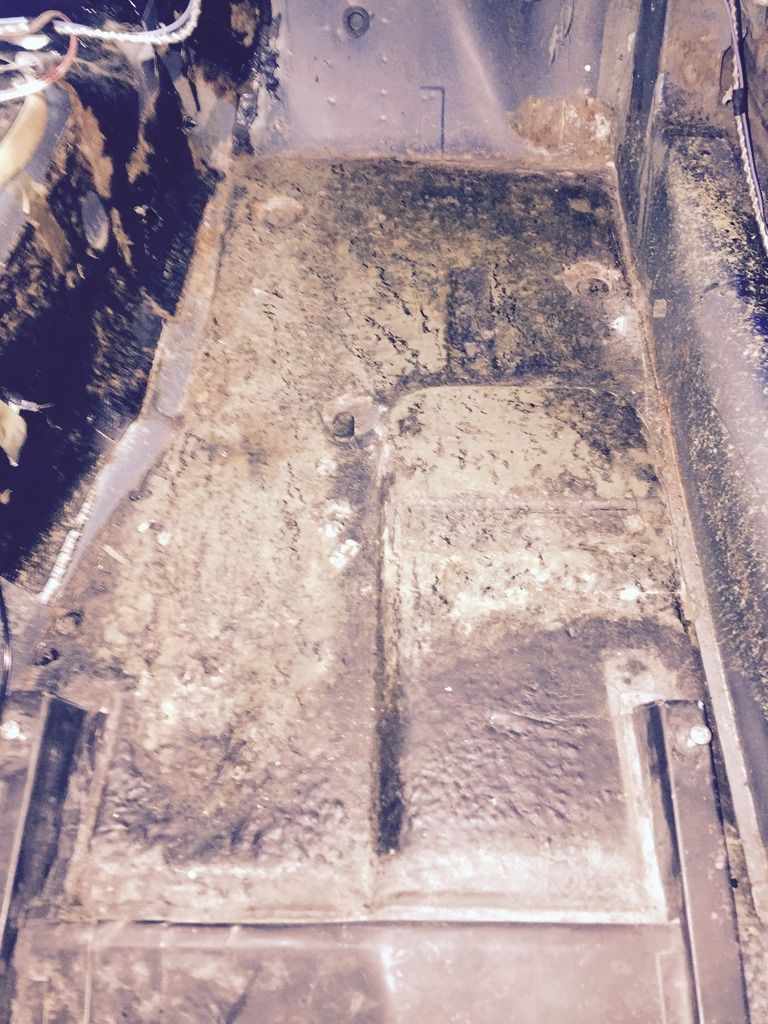
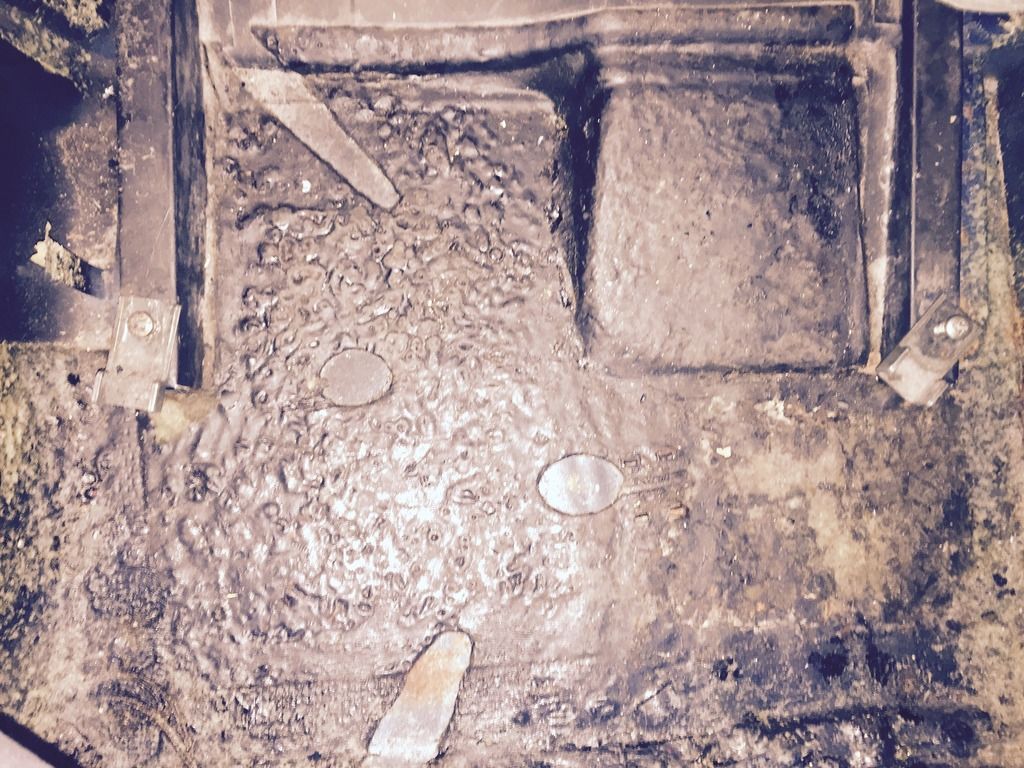
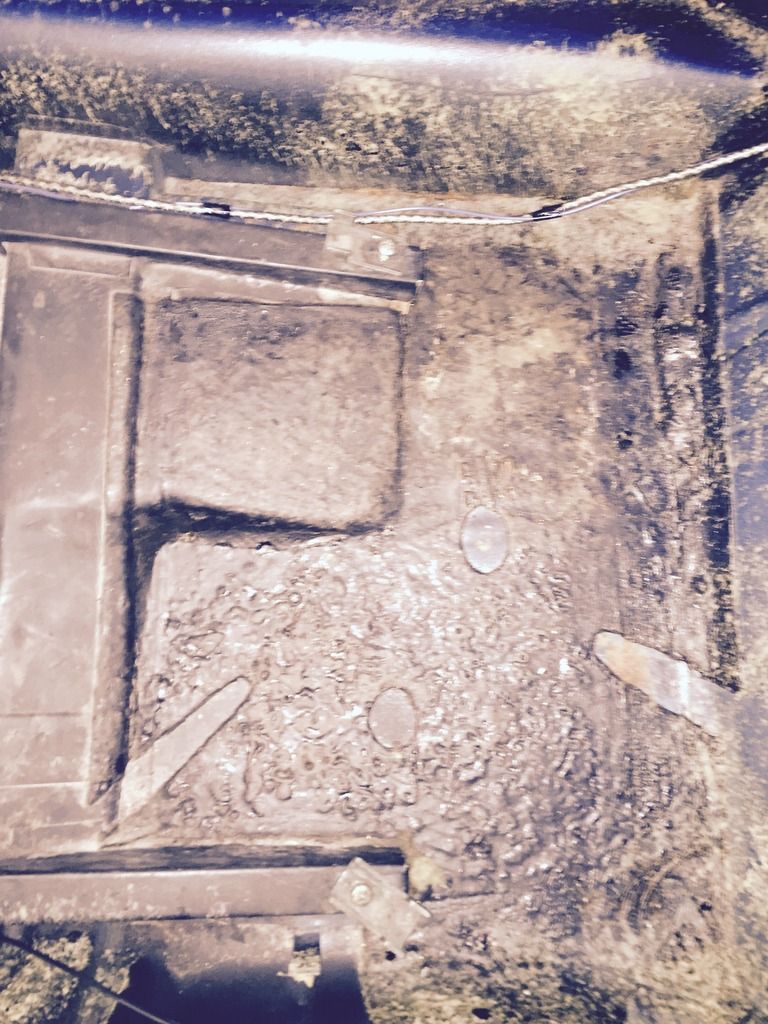
Footwell area, no rust except for a small patch of surface rust in the bottom right hand corner:
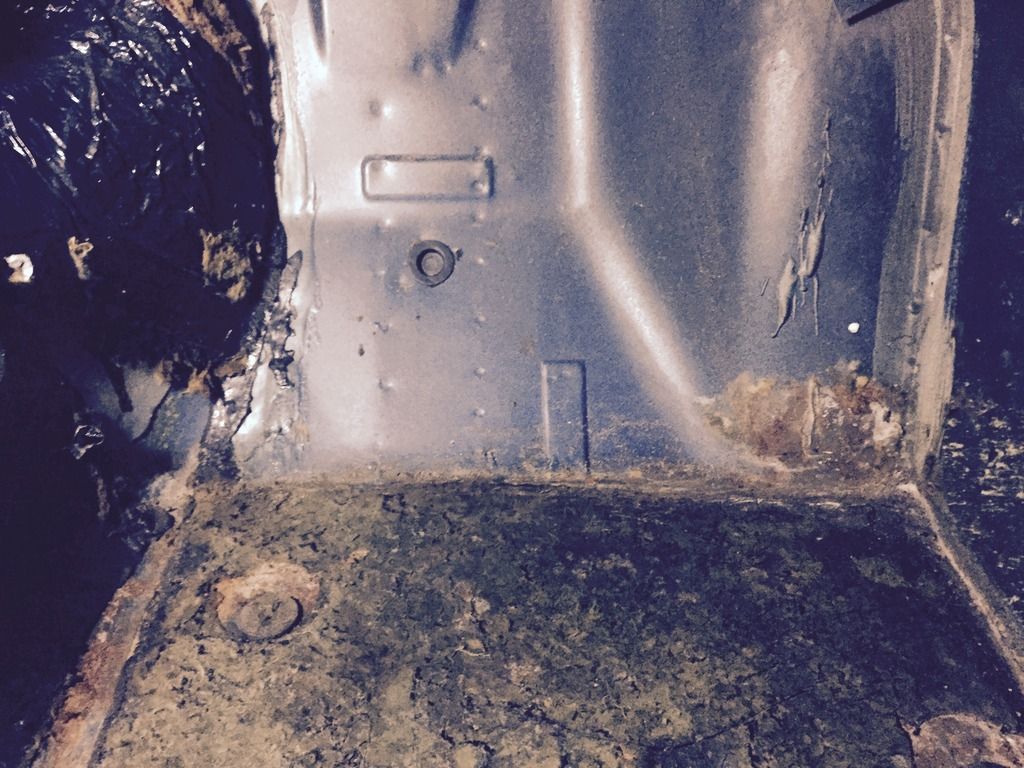
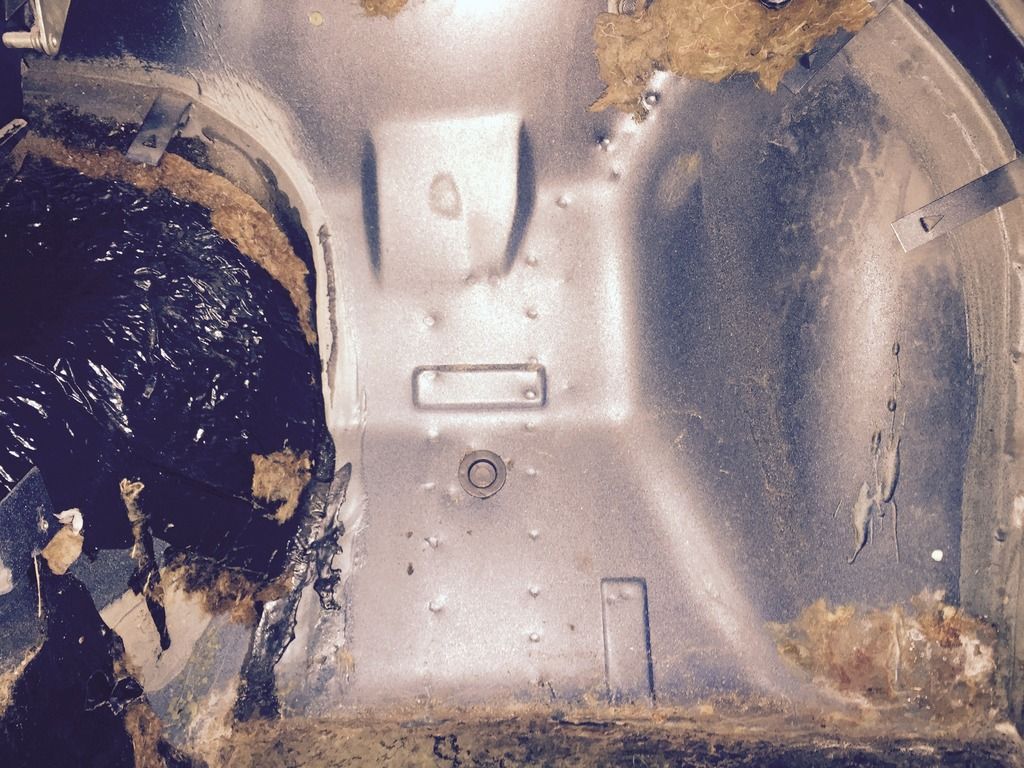
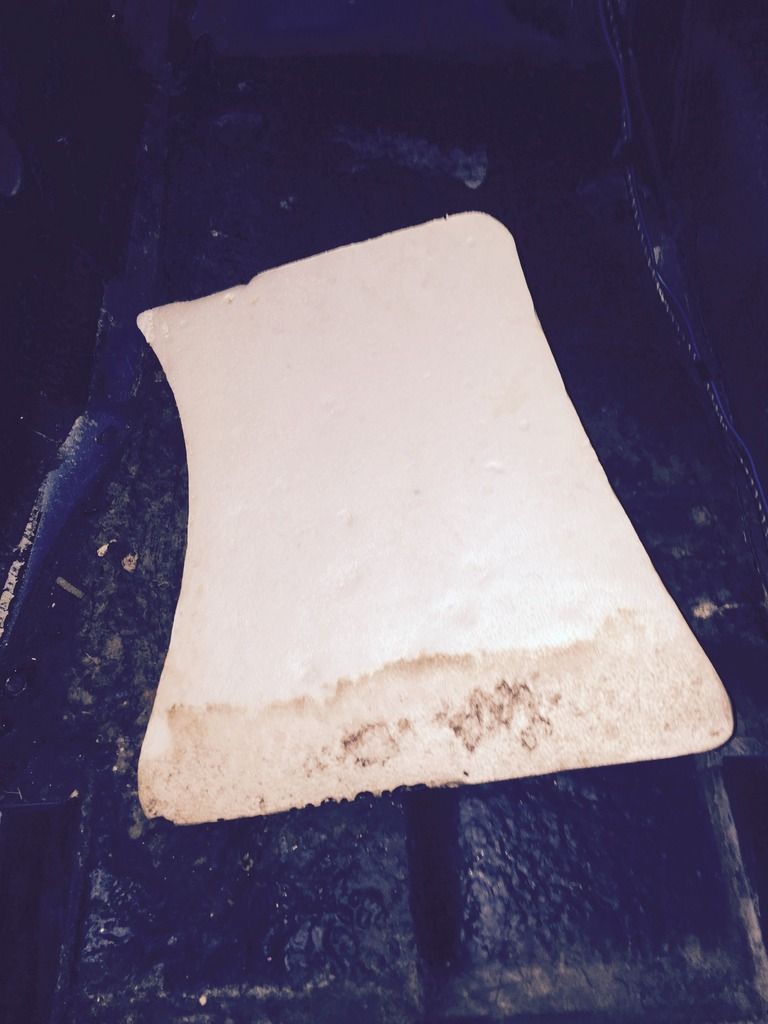
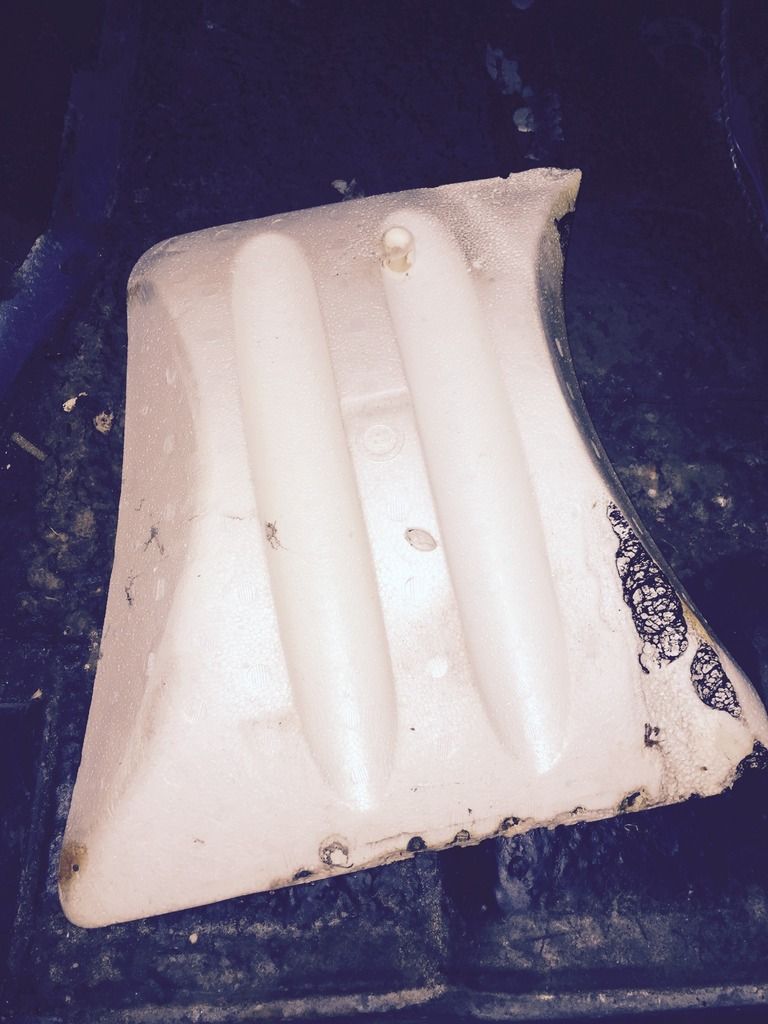
Still have the white styrofoam piece that was under the underpad:
still plugging away, sorry for the picture quality, the lighting wasn't that great
The factory under pad/jute was actually in good shape. It wasn't falling apart and was still adhered to the tar coating underneath it.
I pulled it all out though and tossed it. The lighting wasn't that great and you can see the carpet adhesive along the sill but you get the idea:

The tar on the floor panel is in good shape and still well adhered which means there should be little to no rust on this side. I didn't really find any loose or cracked areas that are consistent with water getting underneath. I thought about leaving it down, but decided I'm going to remove it all because I do want to get a good look at the metal underneath and properly seal it up. I do have an electric oscillating tool with scrapper blade and that should make the removal easier. I need to clean all the carpet adhesive off of the sill as well:


Footwell area, no rust except for a small patch of surface rust in the bottom right hand corner:


Still have the white styrofoam piece that was under the underpad:


still plugging away, sorry for the picture quality, the lighting wasn't that great
-
Frankd1
- Posts: 135
- Joined: Tue Sep 15, 2015 4:13 pm
- Your car is a: 1978 Spider
- Location: Southwestern Ontario, Canada
Re: My 1978 Spider progressive restoration
I was in the driver side front wheel well having a look at the perforations in the lower foot well area and I noticed this rubber weather strip fastened along the vertical wheel well piece and contacting the inside of the fender...was this something FIAT did at the factory?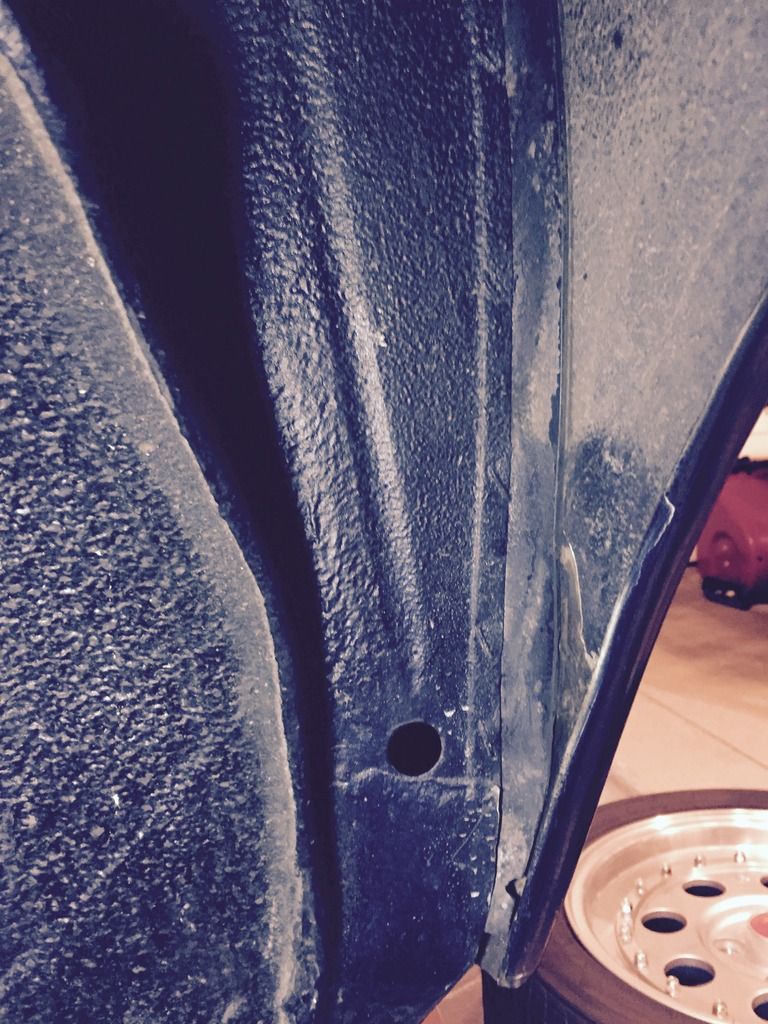
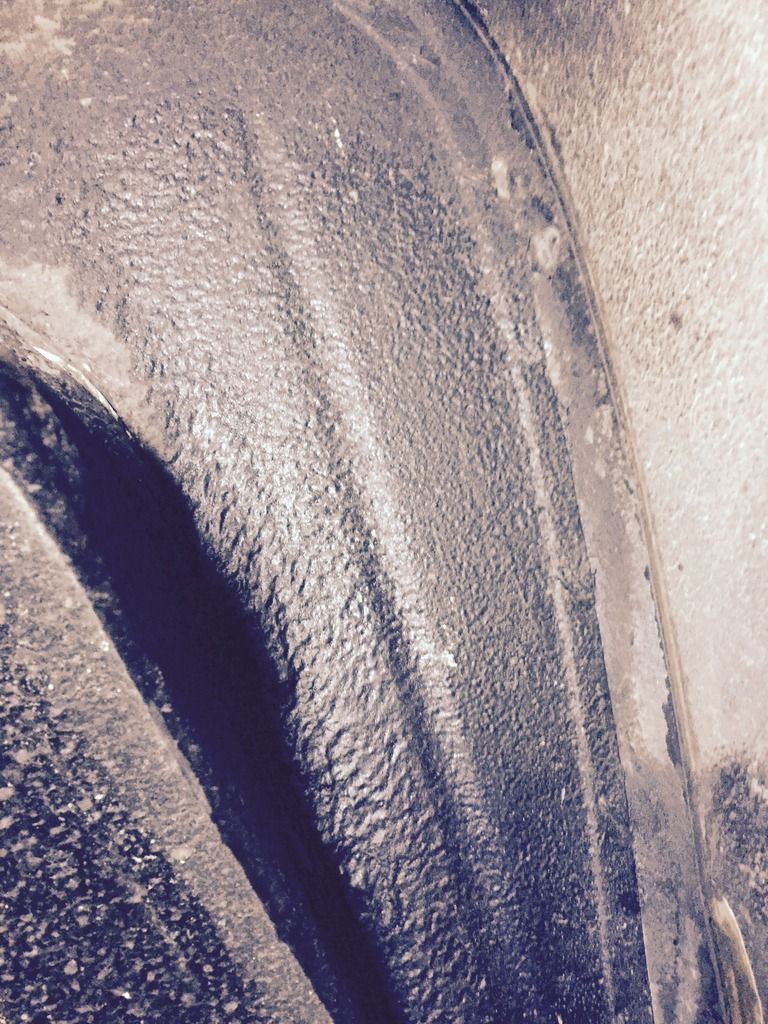
I found a couple of patches that were welded in at the front of the outer and inner sill....
Here is the patch on the outer sill:
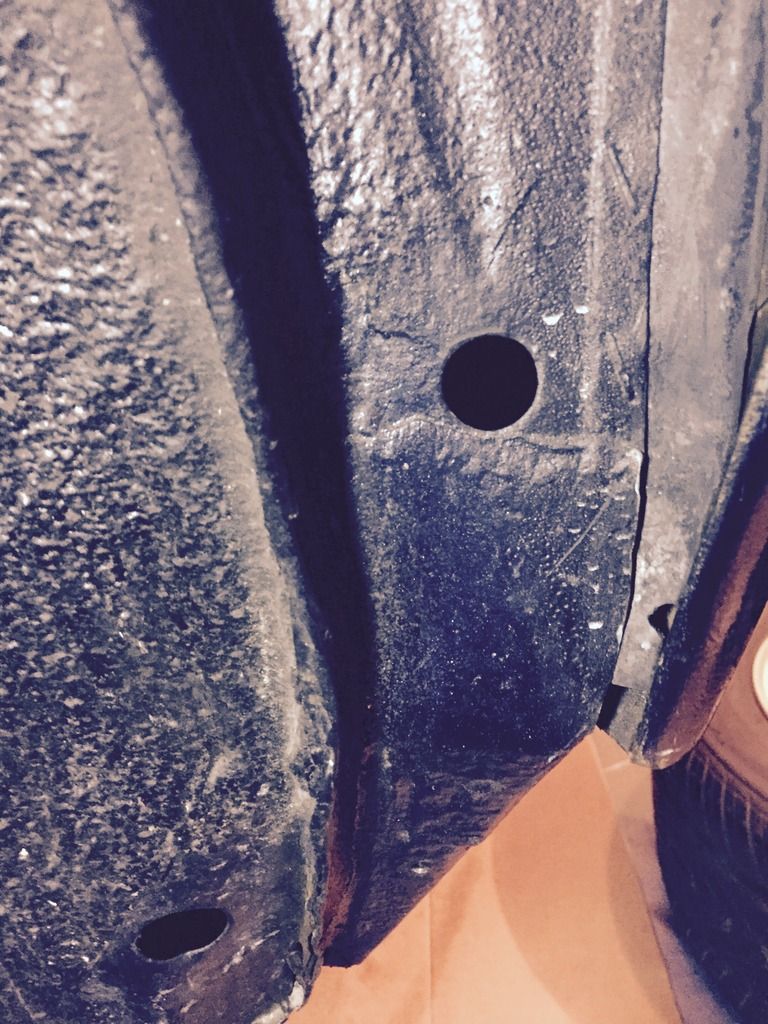
This patch at the front of the inner sill has sloppy welds. I will remove it and redo it. Once the front of the sill is opened up I will be able to get in there and vacuum out any debris, check for surface rust and neutralize, and then spray in Eastwood internal frame coating:
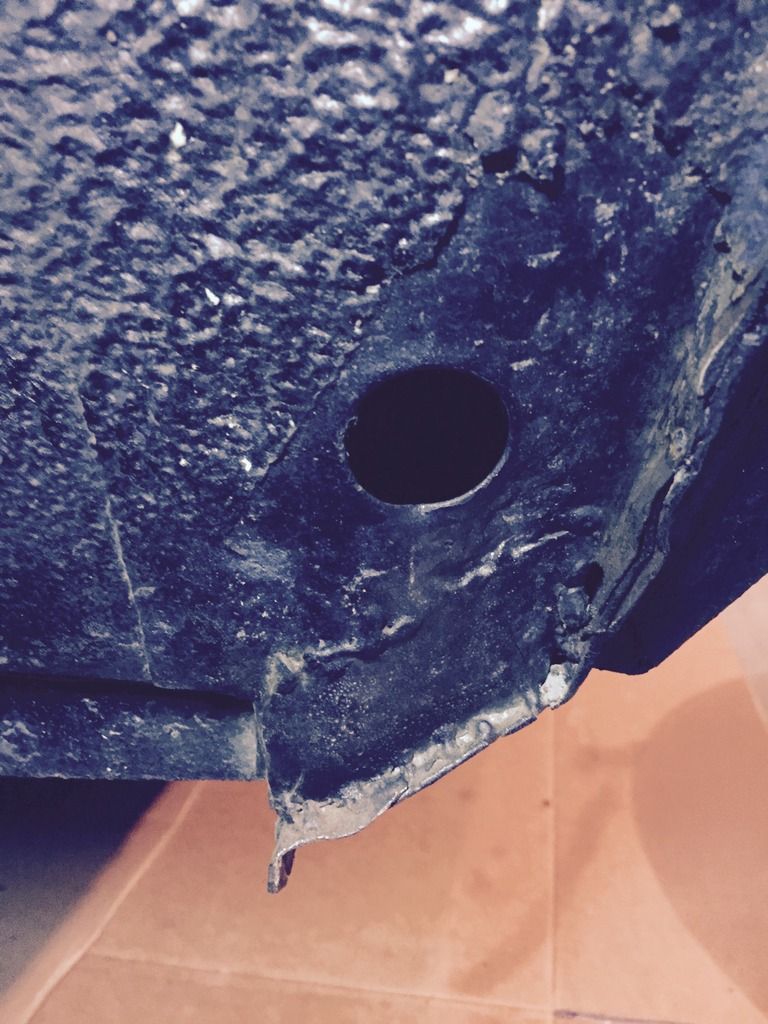
What gauge of sheet metal should I get for the patches I need to make for the floor pan and foot well area? 16 or 18?
What was factory thickness?
What was the purpose of the tar under the wiper cowling? I've decided that I'm going to scrape it all out..


I found a couple of patches that were welded in at the front of the outer and inner sill....
Here is the patch on the outer sill:

This patch at the front of the inner sill has sloppy welds. I will remove it and redo it. Once the front of the sill is opened up I will be able to get in there and vacuum out any debris, check for surface rust and neutralize, and then spray in Eastwood internal frame coating:

What gauge of sheet metal should I get for the patches I need to make for the floor pan and foot well area? 16 or 18?
What was factory thickness?
What was the purpose of the tar under the wiper cowling? I've decided that I'm going to scrape it all out..
-
klweimer
- Posts: 550
- Joined: Tue Mar 27, 2012 7:45 am
- Your car is a: 1982 Spider 2000
- Location: Arvada, Colorado
Re: My 1978 Spider progressive restoration
Hi Frank,
Relative to your question on the tar under the wiper cowling, I assume it was there to dampen any "ringing" by that large piece of sheet metal facing into the passenger cabin. Removing it will probably be completely unnoticed. As for the gauge of sheet metal to use for floor patches, I'd go with 18 gauge, as it is easier to cut and form than 16 gauge, which is slightly thicker. If the patches were going be large and structural, I'd go with the 16 gauge.
Kirk
-
wizard124
- Posts: 770
- Joined: Mon Oct 29, 2012 9:27 pm
- Your car is a: 1980 124 spider FI
- Location: Sheridan, WY exSan Rafael, CA
Re: My 1978 Spider progressive restoration
Frank, beautiful car!
Reading thru this post, I lived this not too long ago.
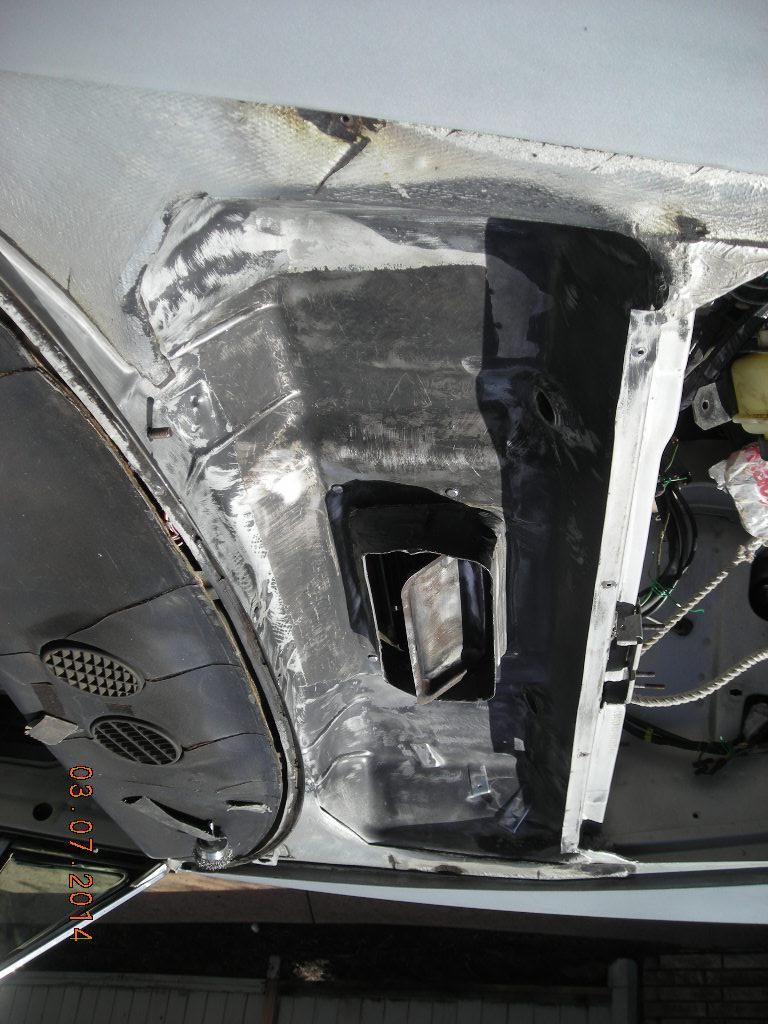
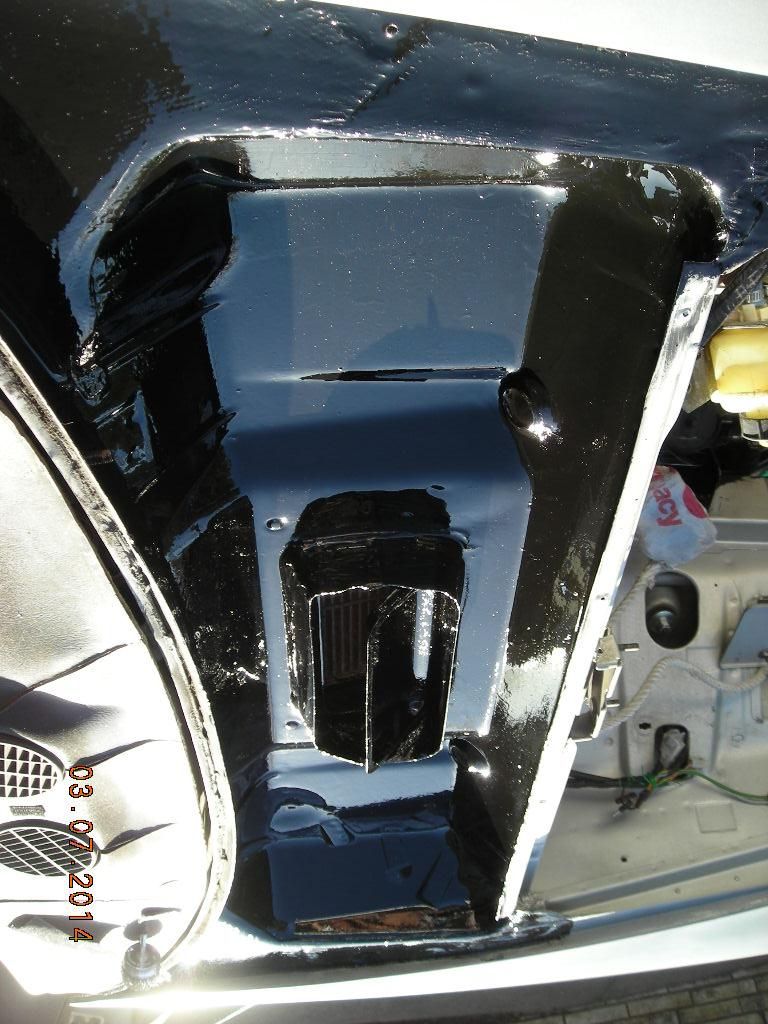
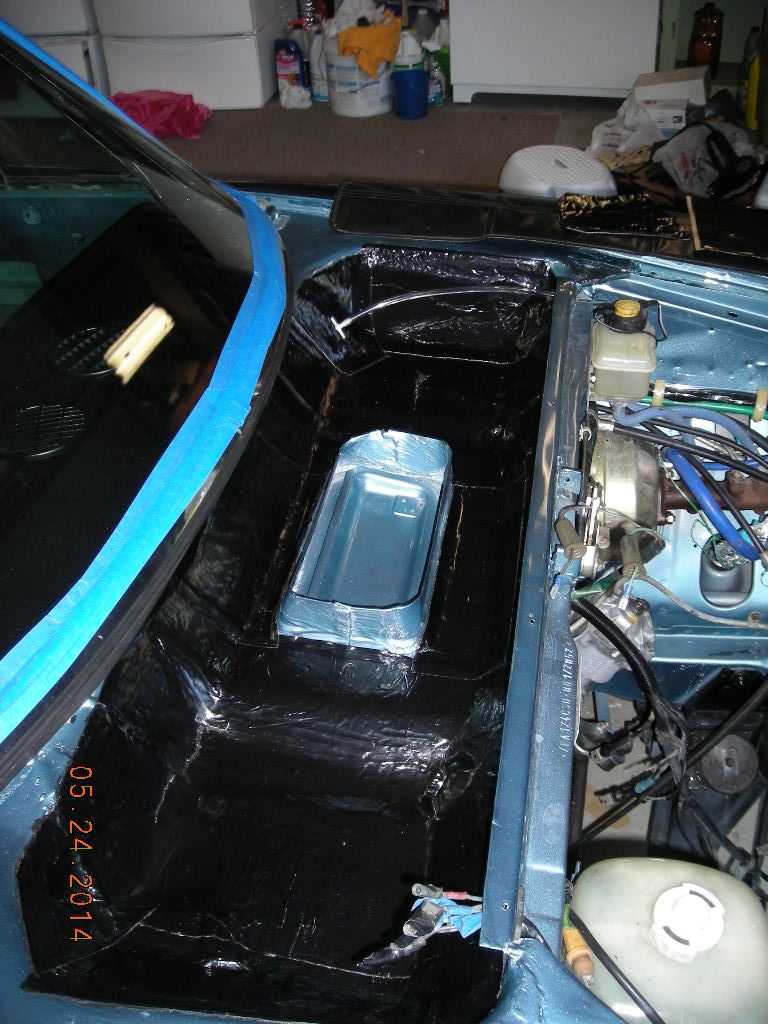
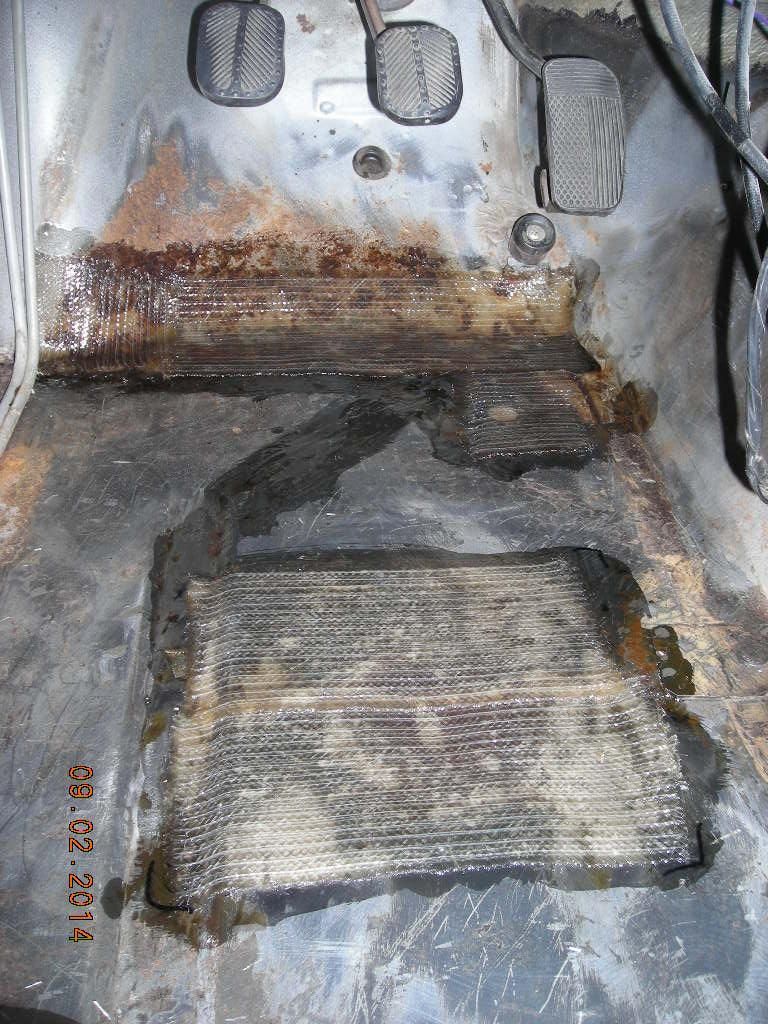
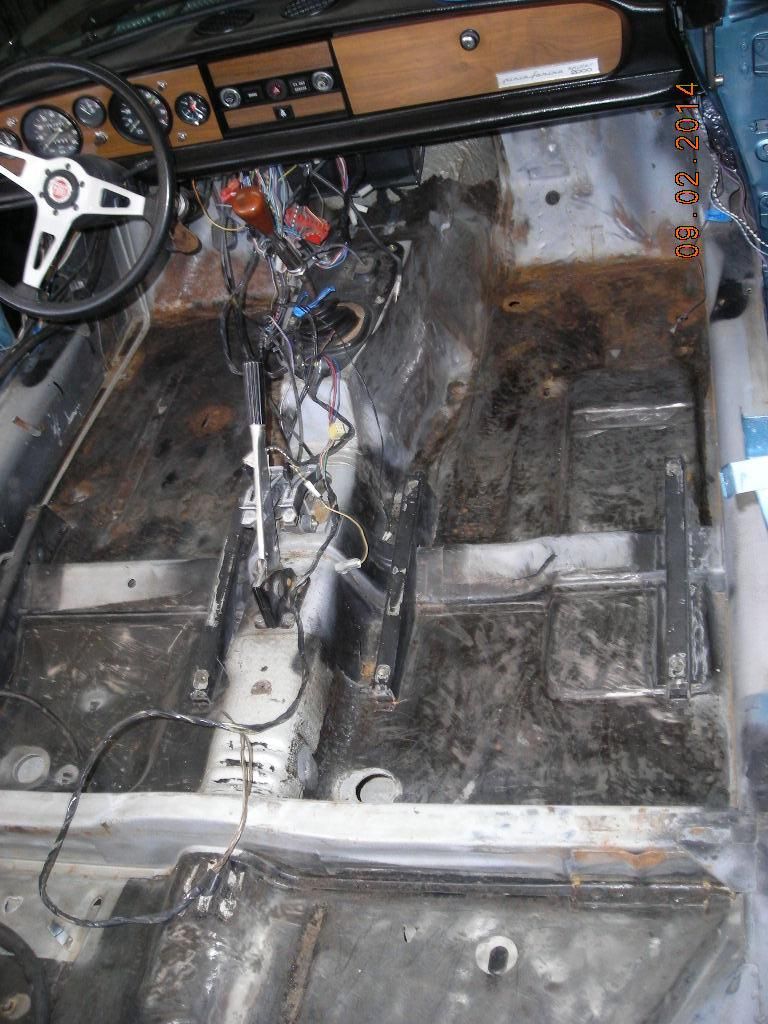
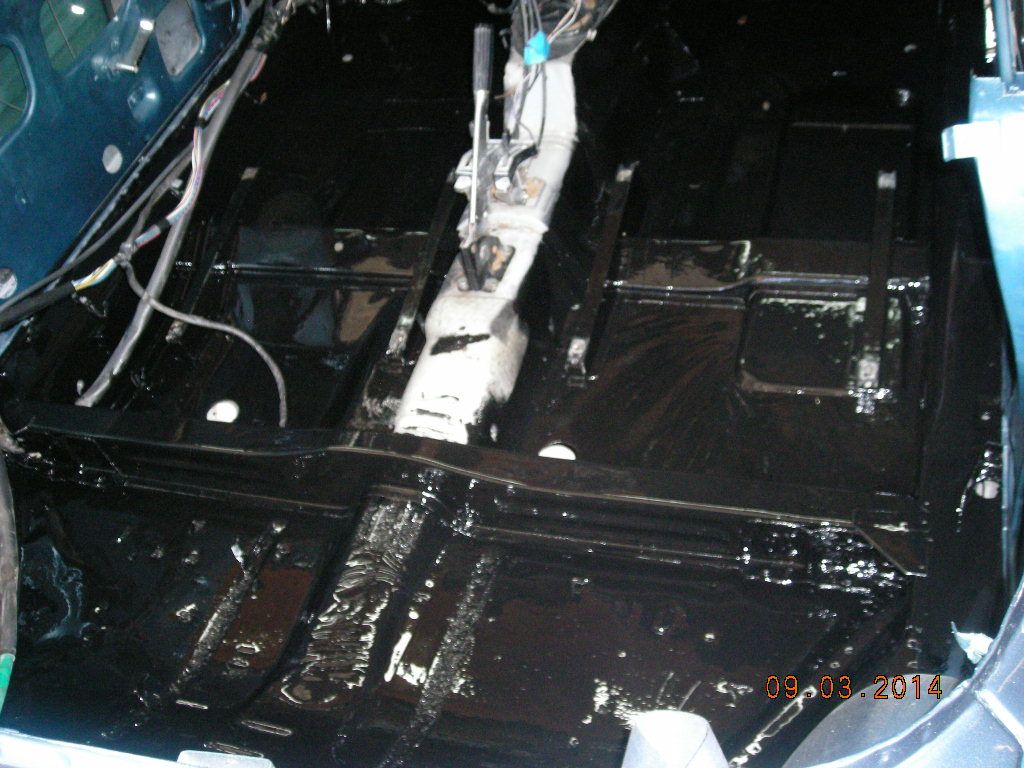
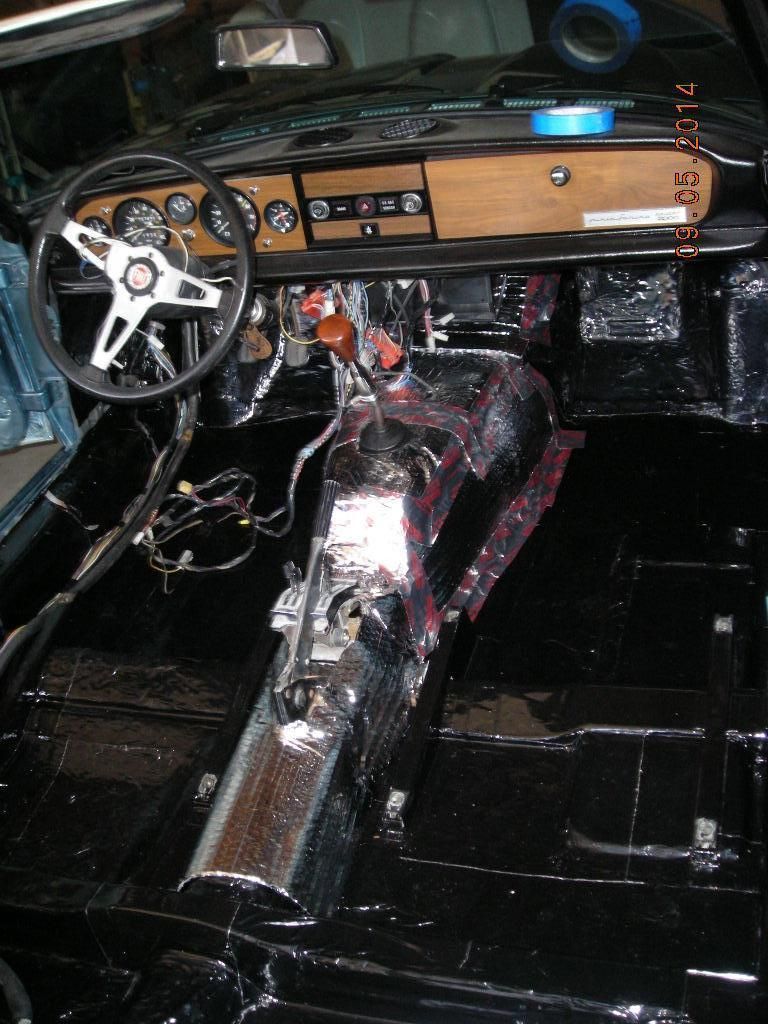
I used Por15 under the cowl and floor panel. Scraped, wire brushed, vacuumed and wiped everything down with acetone. 2 coats of Por15, applied the second coat while the first was still tacky. Por15 brushes easily and is very thin, seeps into the tiniest cracks and seams. I did not use anything else like Naval Jelly or Simple Green or water in those areas. I am not convinced those steps are necessary; probably depends on the time you are willing to spend on this. Those added steps may even compromise the Por15 itself if not done right.
I applied fiberglass patches over the most rusted, pinholed areas. I used thick bi-directional mat and resin. I suppose using Por15 as the bonding agent would work; I hadn't heard nor considered that. After the patches were cured overnight. I Por15 right over them as well.
I had some minor rust spots on the fuel lines also. I Por15 those lines also. I didn't think it necessary to replace them.
I used HushMat over the Por15 areas. Easy to cut and apply.
I discovered two openings up under the cowl area where some body panels join. With the cowl removed and in a lit garage, look up under the dash above the inside side foot storage pockets and you might see the holes. Maybe the size of a dime. I stuffed them closed with some stuff commonly called "dum dum". I was given this stuff from my paint shop. I don't recall the proper name.


'80 spider FI, SnugTop hardtop
http://s940.photobucket.com/user/a7ewiz ... t=3&page=1
http://s940.photobucket.com/user/a7ewiz ... t=3&page=1
-
Frankd1
- Posts: 135
- Joined: Tue Sep 15, 2015 4:13 pm
- Your car is a: 1978 Spider
- Location: Southwestern Ontario, Canada
Re: My 1978 Spider progressive restoration
Thanks for the photos, the POR 15 job looks great.
As an update, I've decided on what I will do as far as coating the interior...After I have fixed the area in the lower foot well I will be brushing on a coating of Ospho to neutralize and convert any surface rust that wasn't removed with wire wheeling and sanding. Once the Ospho is dry I will apply two coats of Masterseries silver, seam seal what needs to be seam sealed and then top coat with AG111 in satin black.
Everything has been ordered so I should be getting it soon.
In the meantime I'm still working away at cleaning and prepping. Today I spent a few hours removing all of the carpet glue that is on the sills, and the rear seat cross member. This is pain in the a$$ work, I'm using a scotchbrite pad and simple green max to loosen the adhesive. It is taking a lot of elbow grease but it seams to be working.
Here is the driver side cross member with most of the gunk removed: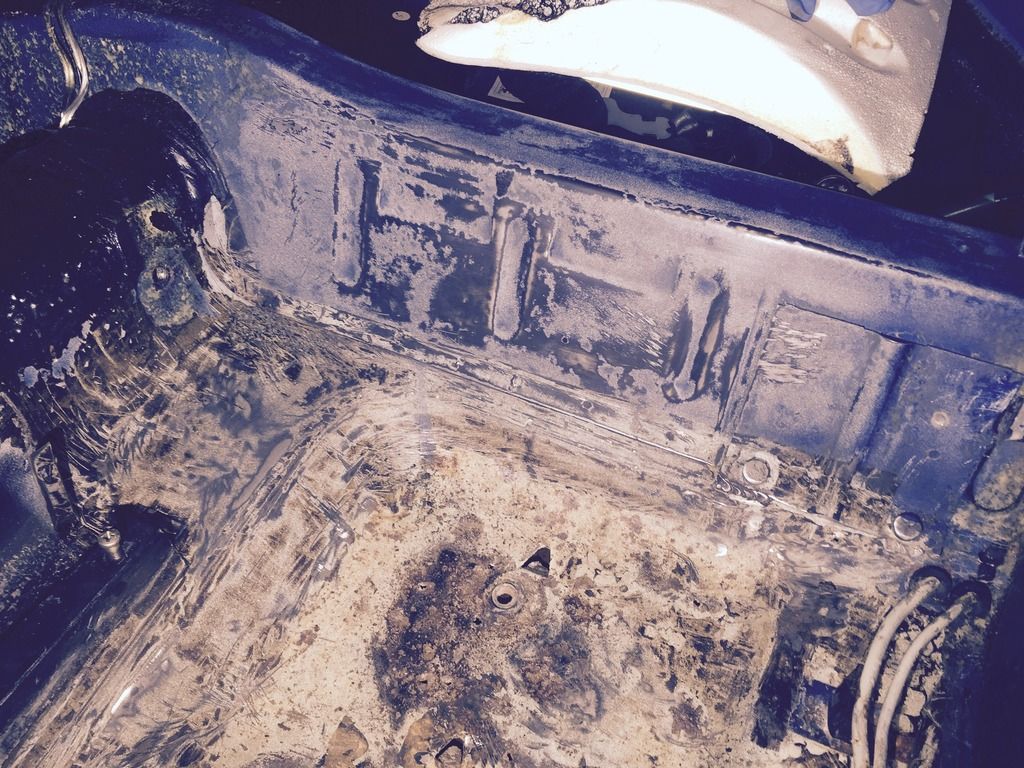
Here is the passenger side of the crossmember with the adhesive still there: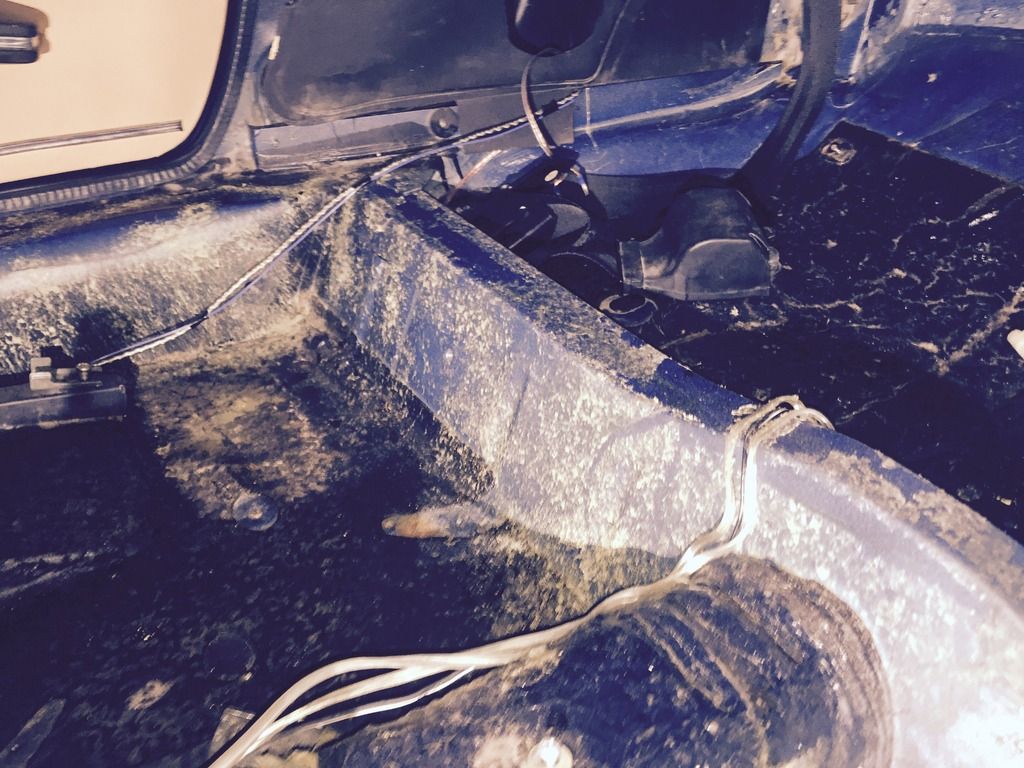
As an update, I've decided on what I will do as far as coating the interior...After I have fixed the area in the lower foot well I will be brushing on a coating of Ospho to neutralize and convert any surface rust that wasn't removed with wire wheeling and sanding. Once the Ospho is dry I will apply two coats of Masterseries silver, seam seal what needs to be seam sealed and then top coat with AG111 in satin black.
Everything has been ordered so I should be getting it soon.
In the meantime I'm still working away at cleaning and prepping. Today I spent a few hours removing all of the carpet glue that is on the sills, and the rear seat cross member. This is pain in the a$$ work, I'm using a scotchbrite pad and simple green max to loosen the adhesive. It is taking a lot of elbow grease but it seams to be working.
Here is the driver side cross member with most of the gunk removed:

Here is the passenger side of the crossmember with the adhesive still there:

-
Frankd1
- Posts: 135
- Joined: Tue Sep 15, 2015 4:13 pm
- Your car is a: 1978 Spider
- Location: Southwestern Ontario, Canada
