Hey Guys,
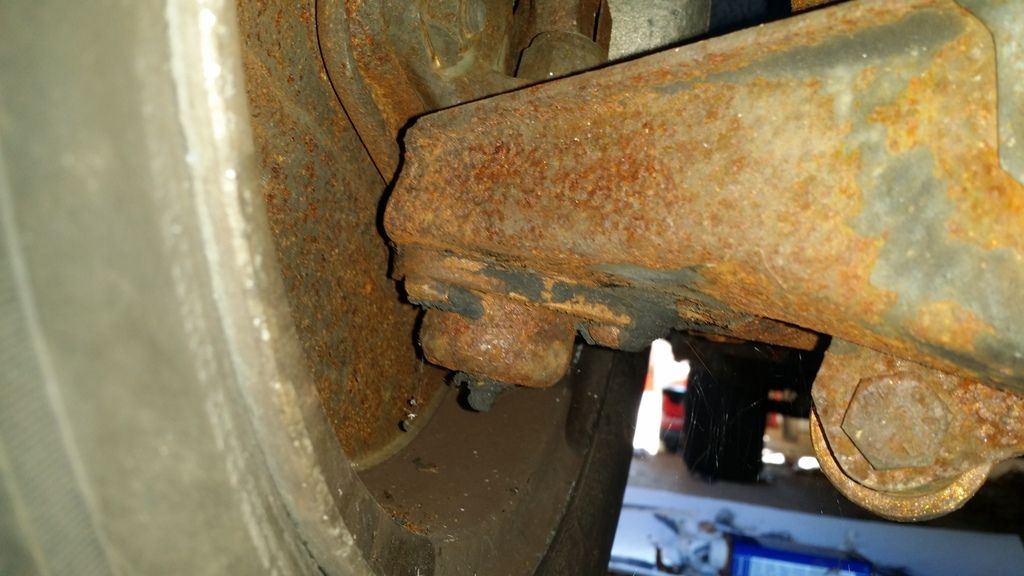
I'm going to be attacking my camber issues this next week. I was planning on shimming (see existing thread started a week ago), but upon examination of where the A-arm meets with the crossmember I noticed that the bolts were already very close to flush. They're multi-thread bolts, so I could shim a little further, but I figured if the crossmember was OK and the member was already heavily shimmed, there must be something else causing a problem.
The previous owner had replaced the ball joint that connects the lower A-arm. He also replaced the brakes on the car-- but when I bought it the rear brakes wouldn't engage at all, so I'm thinking he did all the work with no load on the suspension members (since loading the rear is necessary to flush the brake fluid)... likely causing the camber misalignment I'm dealing with right now.
A short examination revealed that the bottom joints look OK (replaced and original):
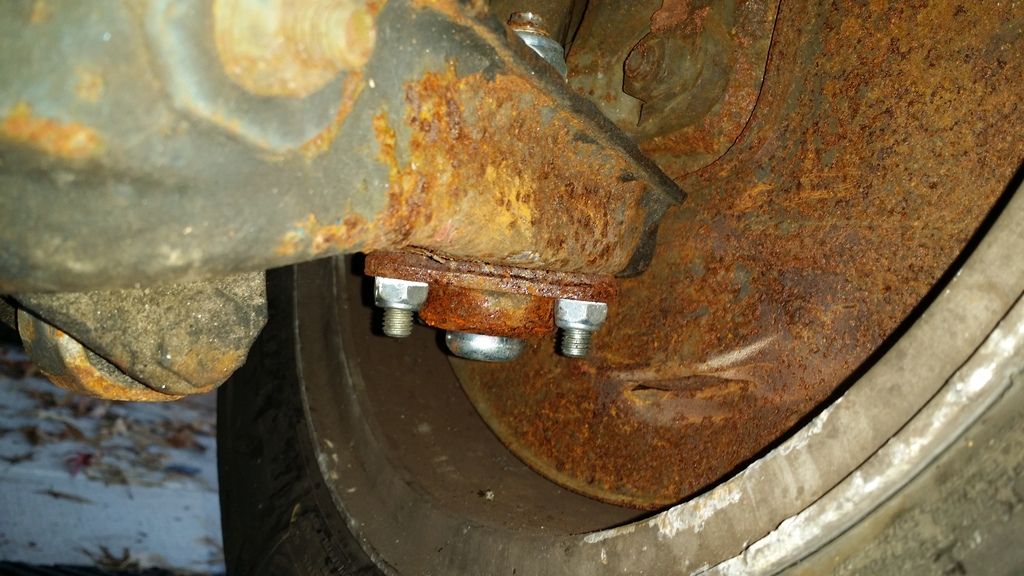
While there's clearly a difference in the compression of the bushing on the top (replaced and original, respectively):
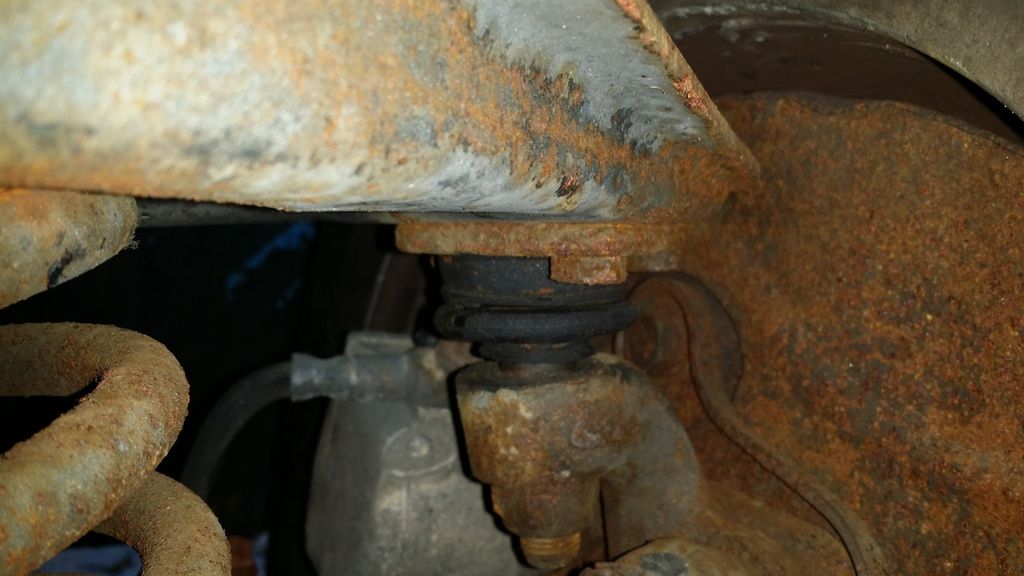
It honestly looks like the upper bolt is just severely under-torqued... I'm guessing if I un-torque the two bolts connecting the A-arms to the Hub, then re-torque them using a crowfoot wrench and a torque wrench, starting with the top then doing the bottom, that it'll probably do the trick. I should be able to resolve the camber issues and will be *removing* instead of adding shims. Does that sound right?
I have the car on ramps right now; if the adjustment should be done with the suspension fully loaded I could pretty easily put the rear on stands and add a couple hundred pounds to the front end and adjust it now.
Camber misalignment where previous owner replaced ball joint
-
- Posts: 2130
- Joined: Wed Dec 24, 2014 10:21 pm
- Your car is a: 1978 124 Spider with Isuzu Turbo Diesel
Re: Camber misalignment where previous owner replaced ball joint
I would start with Eli's Suspension Primer at Mirafiori and ensure that the front cross member is properly torqued which is something that should be done at every oil change before going too far.
http://www.mirafiori.com/124susp/
-
- Posts: 985
- Joined: Sat Apr 21, 2012 6:08 pm
- Your car is a: 1970 fiat 124bc
- Location: Belgrade, Serbia, eastern Europe
Re: Camber misalignment where previous owner replaced ball joint
that's one seriously rusty suspension. the car must have sat in the grass for ages
i'd replace the top ball joint to begin with. rubber is cracked open so it won't last long anyhow
-
- Patron 2022
- Posts: 823
- Joined: Sat Jan 30, 2010 7:58 pm
- Your car is a: 1979 spider 2000
- Location: Charlotte, NC
Re: Camber misalignment where previous owner replaced ball joint
That's not a bushing on the upper ball joint. There isn't a bushing there. That'sInfinityAero wrote:While there's clearly a difference in the compression of the bushing on the top (replaced and original, respectively):
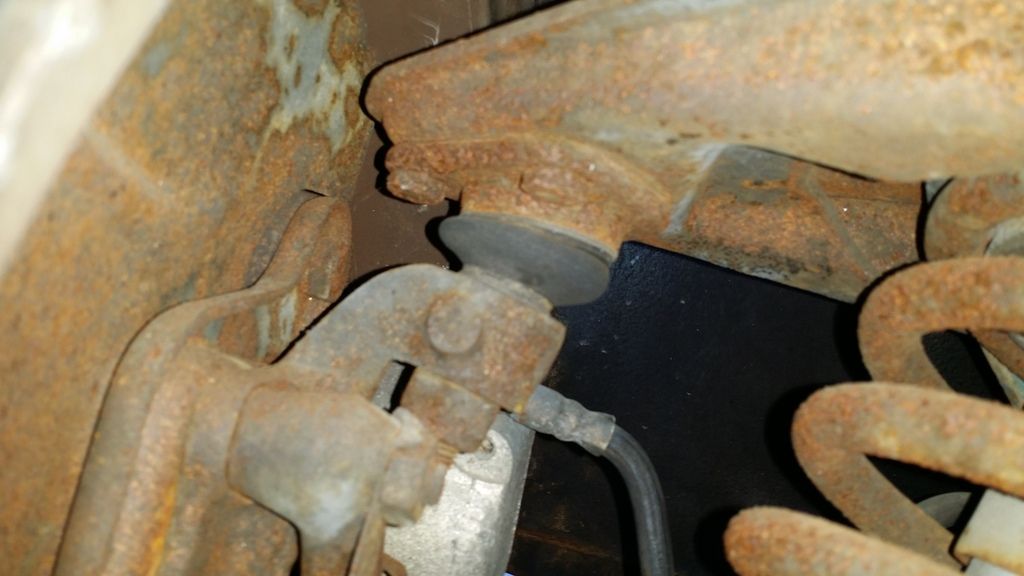
a boot. And it's looks like it's cracked.
1979 Fiat Spider (since new)
2005 Lincoln LS (the wife's car)
2003 Chevrolet Cavalier (daily driver)
1999 Honda Shadow VLX 600
1972 Grumman Traveller 5895L (long gone).
2005 Lincoln LS (the wife's car)
2003 Chevrolet Cavalier (daily driver)
1999 Honda Shadow VLX 600
1972 Grumman Traveller 5895L (long gone).
Re: Camber misalignment where previous owner replaced ball joint
Definitely, I just borrowed a good torque wrench to do exactly that. I figured I'd torque down all the cross-member to frame bolts before correctly torquing the control arm bolts and hub bolts.DieselSpider wrote:I would start with Eli's Suspension Primer at Mirafiori and ensure that the front cross member is properly torqued which is something that should be done at every oil change before going too far.
http://www.mirafiori.com/124susp/
I've read through the suspension primer-- it had good coverage of bolt torques so I think I have all the values I need.
Re: Camber misalignment where previous owner replaced ball joint
It's a 38 yr old DC-owned vehicle that has 127K miles on it... I noticed towards the end of this summer that the suspension components on my daily driver, a 2012 Genesis Coupe, are showing signs of flash rusting. They put too much salt on the roads for the limited snow we actually get here. I would guess it's more that this car was winter driven for years than that it sat for an extended period of time in grass, but my experience with rust is limited...djape1977 wrote:that's one seriously rusty suspension. the car must have sat in the grass for ages
i'd replace the top ball joint to begin with. rubber is cracked open so it won't last long anyhow
I'm planning to replace the shocks and springs this winter, and figured I'd do all bushings, boots and original ball joints at that time, since I'll have to do the major deconstruction anyways. My thought was I'll pull the arms completely off, sand 'em down, and coat them with a rust preventative before painting and reinstalling. In the meantime I want to see if it's even possible to get it in alignment before I start purchasing-- I'm hopeful that it's not a case of the body being warped in some way that I can't see.
Ah, it is indeed a boot, sorry for the terminology mix-up. I'm decent at working with mechanical assemblies but have always sucked with vocab.bobplyler wrote:That's not a bushing on the upper ball joint. There isn't a bushing there. That's
a boot. And it's looks like it's cracked.
After looking at pictures of the boots as they're sold, I'm barely even sure what I'm looking at here! Here's what I'm finding when I look for that replacement boot:
After looking at that, I can see that the boot is pretty much shot, but it also still looks to me like the gap between the hub and upper arm is larger on that side than the other.
For the purposes of checking to see if I can get it in alignment without major frame work or shimming, I think I'm going to do the following:
Torque all accessible bolts to the values specified in Eli's suspension primer.
Untorque the lower A-arm bolt.
Untorque the upper A-arm bolt.
Apply the correct torque to the upper A-Arm bolt.
Apply the correct torque to the lower A-arm bolt.
Check camber.
Remove or add shims as necessary.
Check camber.
Personally I'm guessing the PO loosened the upper ball joint bolt while replacing the lower ball joint, then torqued it after he had factory spec'd the lower bolt, and that doing them in the wrong order led to the excess gap and problems with getting that wheel in alignment. If getting all the torque settings set correctly gets it back in reasonable spec, I'll feel a little more comfortable buying the full set of bushings/boots/ball joints for the front, along with a new panhard rod for the rear, as well as a set of tires. I know it'd likely need a little more adjustment of the alignment at that point, but at least I'd be starting with the knowledge that I'm not going to re-do the whole setup (and drop all that cash) only to find that I'll never be able to get it close to correctly aligned without a frame shop un-warping the unibody...
-
- Posts: 614
- Joined: Thu Jul 05, 2012 7:06 pm
- Your car is a: 1972 124 Spider
Re: Camber misalignment where previous owner replaced ball joint
IIRC, aren't the upper and lower control arm bolts/nuts to be torqued while the suspension is under load? Any suggestions on how to load the front suspension enough so that the bushings are properly pre-loaded prior to torque? Rather not have to re-load the entire car to max capacity; them's a lot of 40# salt bags up and down the stairs!!
Neil
Neil
Neil O'Connor
Madison, WI
72 FIAT 124 Spider
12 Jeep Grand Cherokee Overland Summit
14 Ram 1500 Laramie Longhorn Eco-Diesel
ex-71 FIAT 124 Coupe
and a host of Audi's, Saabs, VW's, MOPAR's, Fords, and a Bimmer....
Madison, WI
72 FIAT 124 Spider
12 Jeep Grand Cherokee Overland Summit
14 Ram 1500 Laramie Longhorn Eco-Diesel
ex-71 FIAT 124 Coupe
and a host of Audi's, Saabs, VW's, MOPAR's, Fords, and a Bimmer....
Re: Camber misalignment where previous owner replaced ball joint
Hey Neil,njoconnor wrote:IIRC, aren't the upper and lower control arm bolts/nuts to be torqued while the suspension is under load? Any suggestions on how to load the front suspension enough so that the bushings are properly pre-loaded prior to torque? Rather not have to re-load the entire car to max capacity; them's a lot of 40# salt bags up and down the stairs!!
Neil
I believe I'd read exactly that. 150 lbs in each drivers seat and 150 in trunk.
Hadn't seen the same direction for the crossmember to frame bolts... I'm trying to get those torqued right with a combination of sockets and crowfoot wrenches, hopeful I can get to all of them wit out disconnecting the lower arm. Not a ton of space to get to the bolts....
-
- Posts: 614
- Joined: Thu Jul 05, 2012 7:06 pm
- Your car is a: 1972 124 Spider
Re: Camber misalignment where previous owner replaced ball joint
The loaded torques seem to only apply to those connections using flexible bushings, like the control arm bolts, rear trailing arms, panhard, etc. The idea is to preload the rubber bushings prior to final torques. For the solid cross member to body connections, I don't believe there's a pre-load required/recommended. But....I'm far from an expert on that part of the assembly.
Best wishes with your coming projects. Have fun with it; I found the learning and skill expansion incredibly rewarding.....
Neil
Best wishes with your coming projects. Have fun with it; I found the learning and skill expansion incredibly rewarding.....
Neil
Neil O'Connor
Madison, WI
72 FIAT 124 Spider
12 Jeep Grand Cherokee Overland Summit
14 Ram 1500 Laramie Longhorn Eco-Diesel
ex-71 FIAT 124 Coupe
and a host of Audi's, Saabs, VW's, MOPAR's, Fords, and a Bimmer....
Madison, WI
72 FIAT 124 Spider
12 Jeep Grand Cherokee Overland Summit
14 Ram 1500 Laramie Longhorn Eco-Diesel
ex-71 FIAT 124 Coupe
and a host of Audi's, Saabs, VW's, MOPAR's, Fords, and a Bimmer....
Re: Camber misalignment where previous owner replaced ball joint
It's been fun and good learning so far, no deal breakers or total standstills besides waiting to buy tools for budget reasons.njoconnor wrote:The loaded torques seem to only apply to those connections using flexible bushings, like the control arm bolts, rear trailing arms, panhard, etc. The idea is to preload the rubber bushings prior to final torques. For the solid cross member to body connections, I don't believe there's a pre-load required/recommended. But....I'm far from an expert on that part of the assembly.
Best wishes with your coming projects. Have fun with it; I found the learning and skill expansion incredibly rewarding.....
Neil
I've tightened the crossmember bolts to spec. Broke off one of the 14 lb bolts on the sway bar, so I'll have to pop out the remaining stud and replace. Crossmember bolts (the 40lb ones) on the passenger side were loose, so I got those in spec. Took a combo of crowfoot wrenches and using an extension and socket through the gap in the a arm and bolt. PITA.
Next, the bolts that hold the arms on. Looks like a 21mm socket, which I don't yet have. The ball joint connecting bolts, it looks like I'll have to disconnect the control arms from the hub or use something like 20 or 21mm crowfoot wrenches. I've got a shop manual (Haynes) in the mail, so hopefully that'll have the bolt specs so I can get the right tools.
Re: Camber misalignment where previous owner replaced ball joint
Hey Guys,
Update:
I went through the process of torquing all the bolts to factory specs. It went well with two exceptions:
Sheared off one of the bolts holding on the front sway bar
Stripped one of the bolts that connects the lower A-Arm to the crossmember.
The first one should be easy enough-- drill or punch out the old rivet and replace with a M8 bolt and nut-- torque to 14 lbs...
The second one-- we shall see. I borrowed a tap and die set from my buddy. The original thread was an M10-- I think the bolt is too stripped to ever torque it back to 45 lbs with that original thread, so I'm planning on re-threading it with a 3/8X16 thread instead, which is a little smaller and a little coarser.
How did it strip? Well, apparently there is a practical limit to how far you can shim that A-arm. I was able to add in 2 1/8" shims, in addition to the existing shims. This resulted in the bolt not quite being flush with the end of the nut-- apparently that bolt needs the full nut threaded to avoid stripping. Before stripping it, things were looking pretty good. I had the camber at roughly zero degrees on the left, and -1 degree on the right, so I was about halfway there.
My plan at this point is to get the assembly back together by removing shims, using the 3/8"X16 die, and then retorquing the nuts to the factory torque spec. From there, I'll buy some new tires, re-adjust the toe, and see how she drives. After that, I'll be saving up cash for a bit, then removing all the control arms and other suspension components to do a full overhaul, including:
Remove and rust proof upper and lower control arms
replace all bushings, boots, and ball joints
replace panhard rod
Replace springs and shocks
I'm hopeful I won't have to remove the crossmember, but if I do, what's the best procedure to deal with those bolts? If I end up having to drill out and replace one of the bolts, I'm thinking I should go with longer ones so that I'll have a little more play for shimming...