Edit....Back from paint!
- Ptoneill
- Posts: 606
- Joined: Thu Jul 15, 2010 1:28 am
- Your car is a: 1979 Fiat Spider 2000
- Location: Las Vegas, Nevada
Re: Edit....Back from paint!
Thank you all for your input...I am determined to keep these seats they are very supportive and go with the theme I am trying to pull off with the car. I have come to the conclusion that I will have to relocate and fabricate new lower rail mounts....so how to remove the old ones? I asked around and found out about a spot weld removal tool...I am sure a lot of you know how to use this tool but I am sure there are a bunch like me who don't ....so......
First the problem...removing old seat rails.
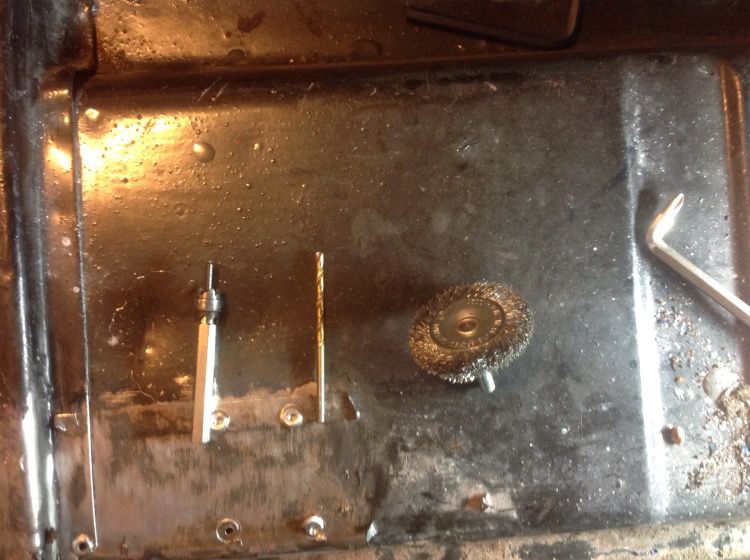
The tools required spot weld removal tool (14 dollars at NAPA), 1/8 drill bit, and wire brush.
Clean off paint, rust, and or dirt to clearly expose spot welds......note the guy who welded mine was drinking to much vino!
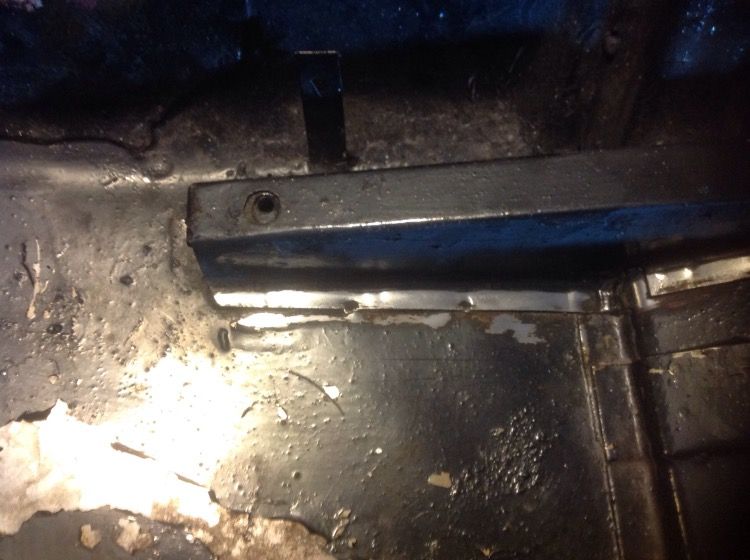
Next use the 1/8 inch bit to drill shallow pilot holes....note you may go all the way thru the floor....oops but easily patched.
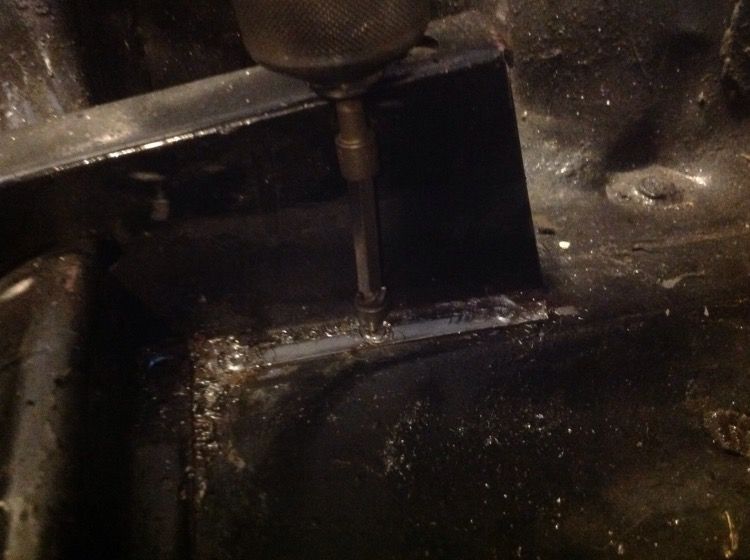
Then use the removal bit, the center is a spring loaded guide that goes in pilot hole, note extension used to get bit close.
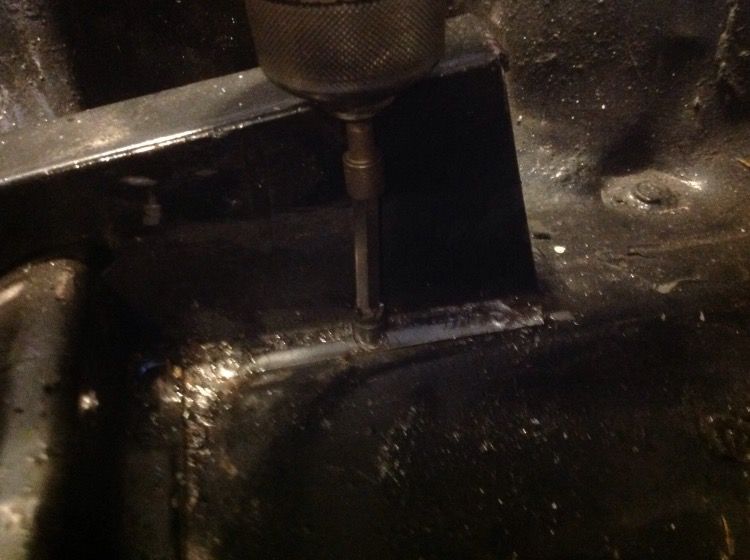
Then slowly increase drill speed as you press down. Again it is easy to cut completely through, try to only cut rail bracket.
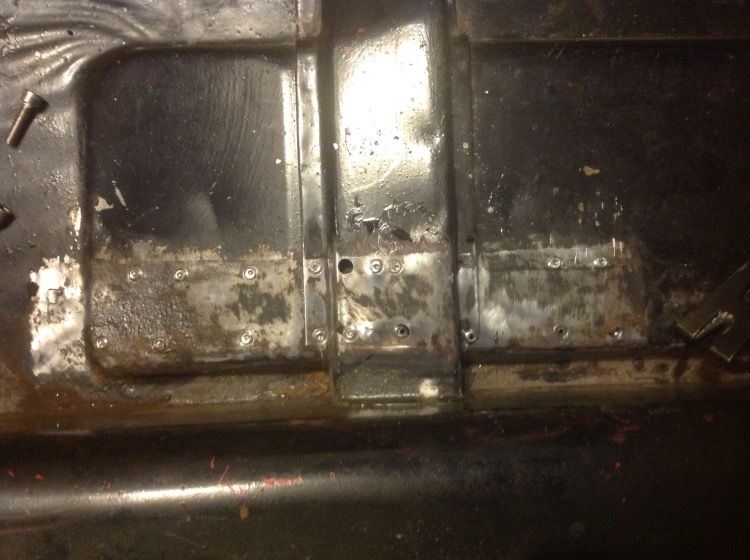
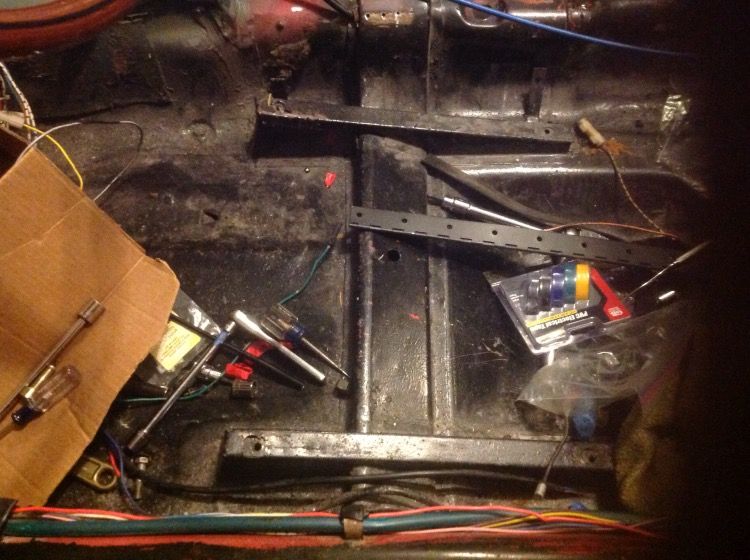
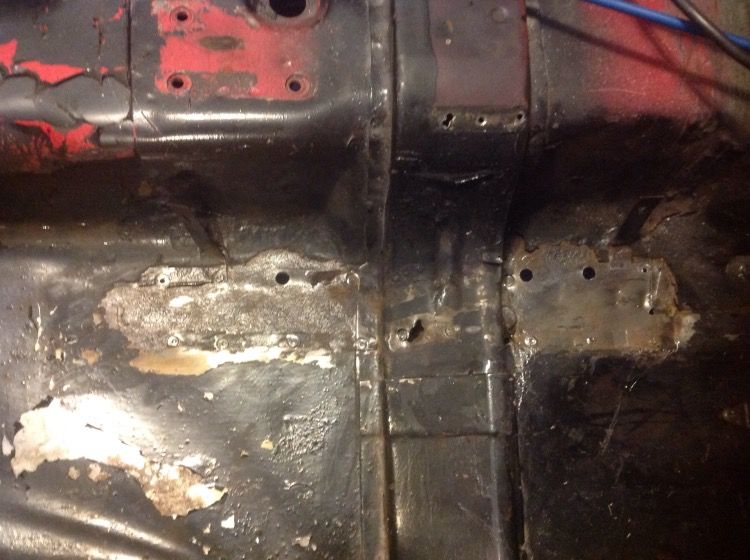
After you get all the spots cut you will still probably have to apply a little (or a lot) of encouragement with a B.F. Hammer to knock it off. Note the amount of pitting I found under the rails, in my first posts several years ago you will see that my car was very rust free. I think the rails let a lot of water collect with no where to go....bummer. Most of the round circles are the remains of the rail you can grind them off or leave them. You can also see that I punctured the floor boards several times with the drill bit and removal tool I will use some POR 15 putty to fill these holes.
I hope this helps someone I will post the new rail fabrication as it goes.
First the problem...removing old seat rails.
The tools required spot weld removal tool (14 dollars at NAPA), 1/8 drill bit, and wire brush.
Clean off paint, rust, and or dirt to clearly expose spot welds......note the guy who welded mine was drinking to much vino!
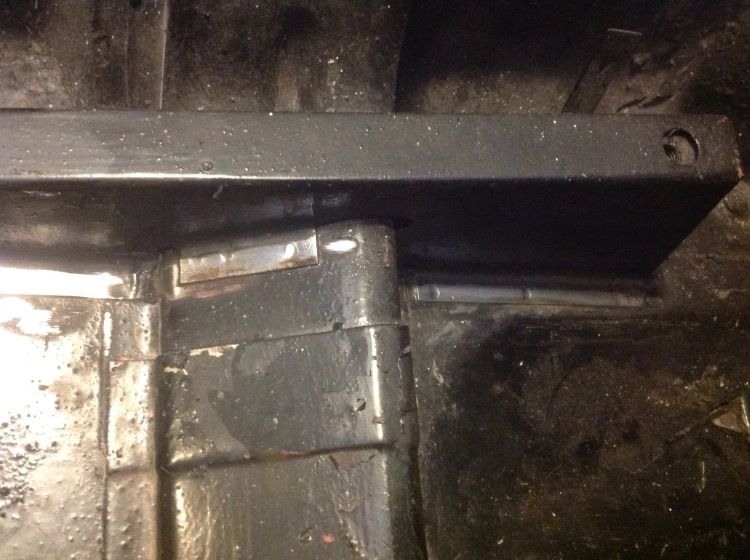
Next use the 1/8 inch bit to drill shallow pilot holes....note you may go all the way thru the floor....oops but easily patched.
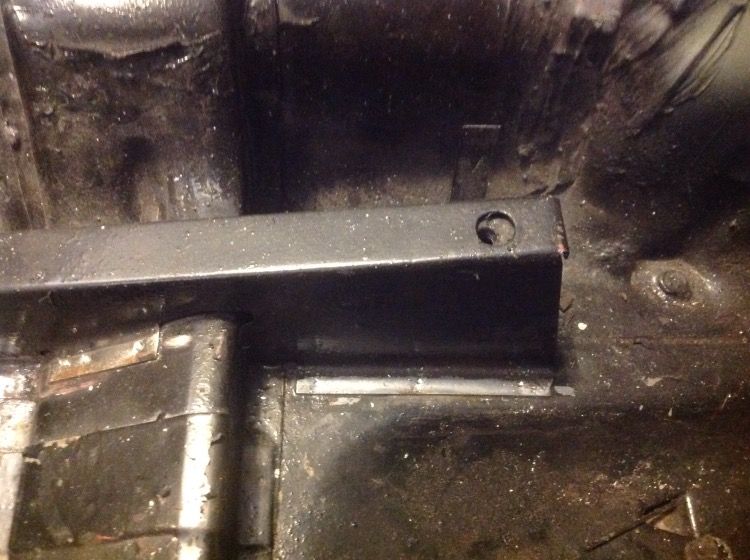
Then use the removal bit, the center is a spring loaded guide that goes in pilot hole, note extension used to get bit close.
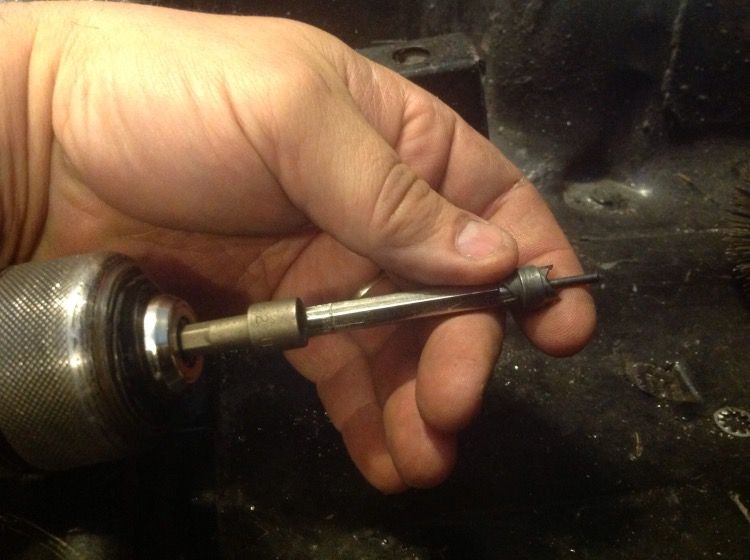
Then slowly increase drill speed as you press down. Again it is easy to cut completely through, try to only cut rail bracket.
After you get all the spots cut you will still probably have to apply a little (or a lot) of encouragement with a B.F. Hammer to knock it off. Note the amount of pitting I found under the rails, in my first posts several years ago you will see that my car was very rust free. I think the rails let a lot of water collect with no where to go....bummer. Most of the round circles are the remains of the rail you can grind them off or leave them. You can also see that I punctured the floor boards several times with the drill bit and removal tool I will use some POR 15 putty to fill these holes.
I hope this helps someone I will post the new rail fabrication as it goes.
Stay Safe,
Pat
79spider
HAVE FUN!! It's a FIAT!!
ptoneill@msn.com
http://s1121.photobucket.com/albums/l504/ptoneill/
Pat
79spider
HAVE FUN!! It's a FIAT!!
ptoneill@msn.com
http://s1121.photobucket.com/albums/l504/ptoneill/
- Ptoneill
- Posts: 606
- Joined: Thu Jul 15, 2010 1:28 am
- Your car is a: 1979 Fiat Spider 2000
- Location: Las Vegas, Nevada
Re: Edit....Back from paint!
Very slow going work has been keeping me busy, got to do 7 days at the U.S. Open!! Didn't get to see much golf but it was still cool working behind the scenes!
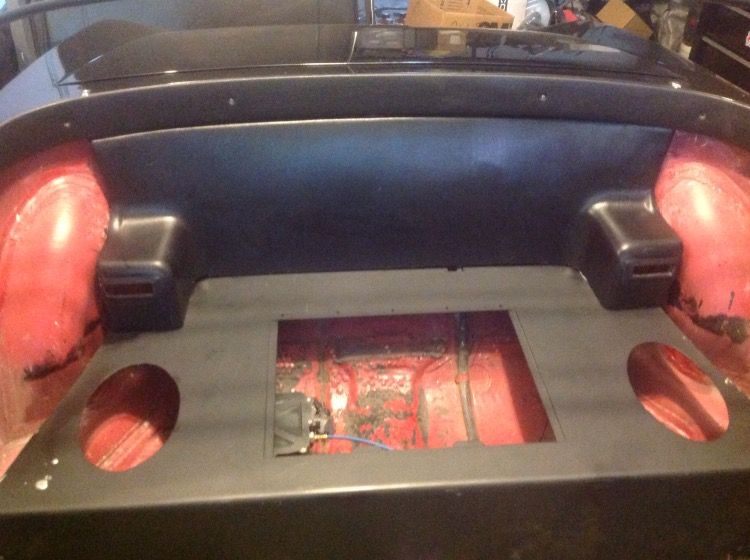
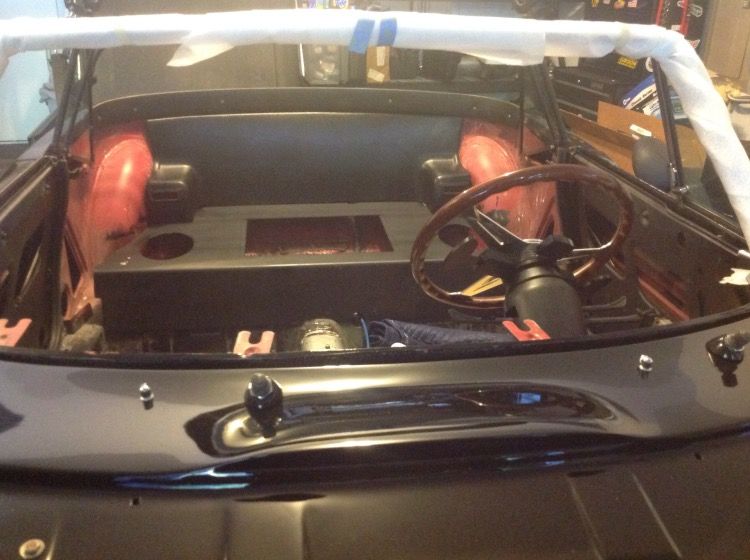
I have sorted out most of the electrical to include the push button start, I am not installing it until the dash gets covered. I did order up one of Marks fiberglass rear wall liners to make the upholstery work look better. Nice piece, however it is very helpful if you have a Dremel tool so you can cut the excess off of the piece. Here is mine on a test fit, note; I had to cut about 4 inches off the bottom to make it fit my shelf. I installed heavy sound damper behind the piece.
You can see the paddle shifter installed behind the Nardi steering wheel, the control box for the shifter is visible under the metal shelf, the blue cable sheath has a cable inside it that pushes and pulls the shifter lever on the auto transmission.
Stay Safe,
Pat
79spider
HAVE FUN!! It's a FIAT!!
ptoneill@msn.com
http://s1121.photobucket.com/albums/l504/ptoneill/
Pat
79spider
HAVE FUN!! It's a FIAT!!
ptoneill@msn.com
http://s1121.photobucket.com/albums/l504/ptoneill/
Re: Edit....Back from paint!
Good to see somebody making progress!!
Looking good Pat!!
Looking good Pat!!
- Ptoneill
- Posts: 606
- Joined: Thu Jul 15, 2010 1:28 am
- Your car is a: 1979 Fiat Spider 2000
- Location: Las Vegas, Nevada
Re: Edit....Back from paint!
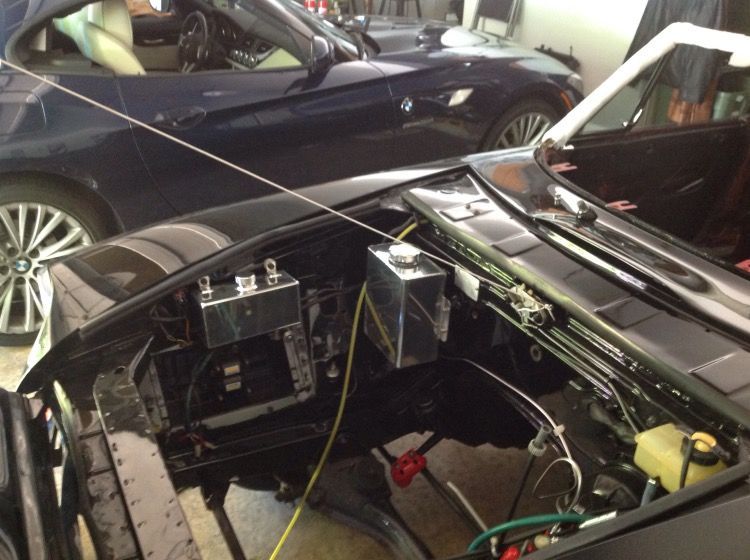
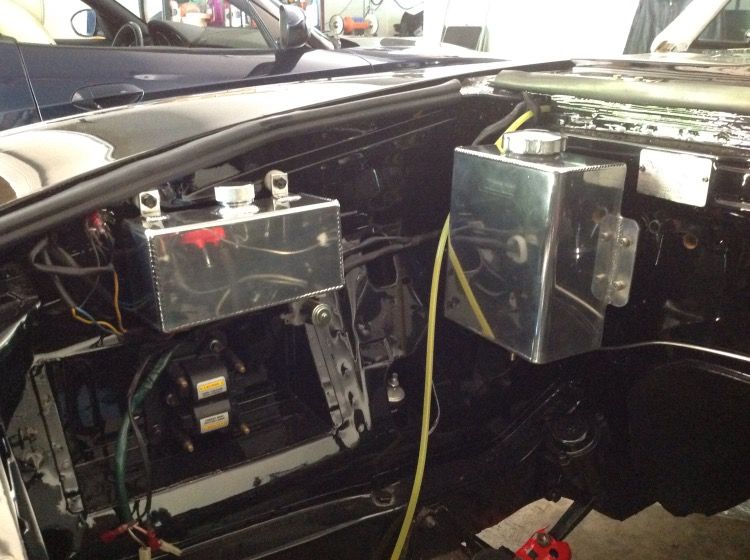
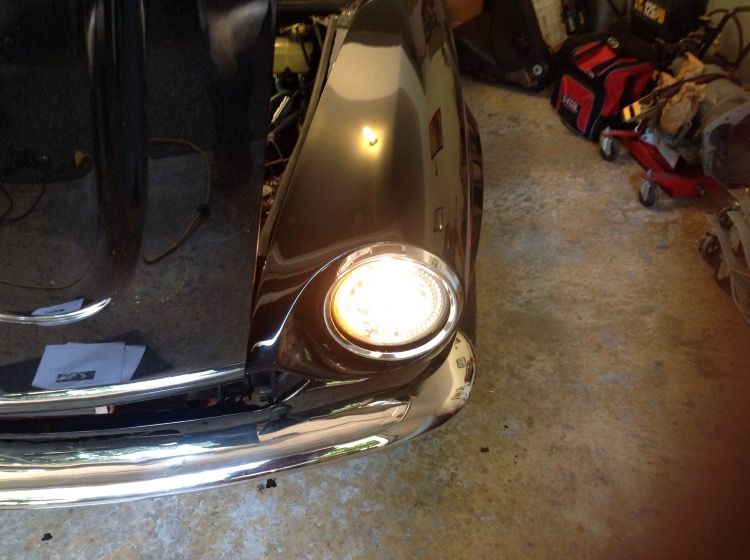
Got some stuff done this weekend.......sorta a two steps forward one step back kind of day. The good got the windshield and overflow tanks installed along with an IAP headlight relay kit....very high quality kit! On the down side I incorrectly tightened the headlight retaining ring and put a stress crack in one of the headlights I bought from Mark....bummer.
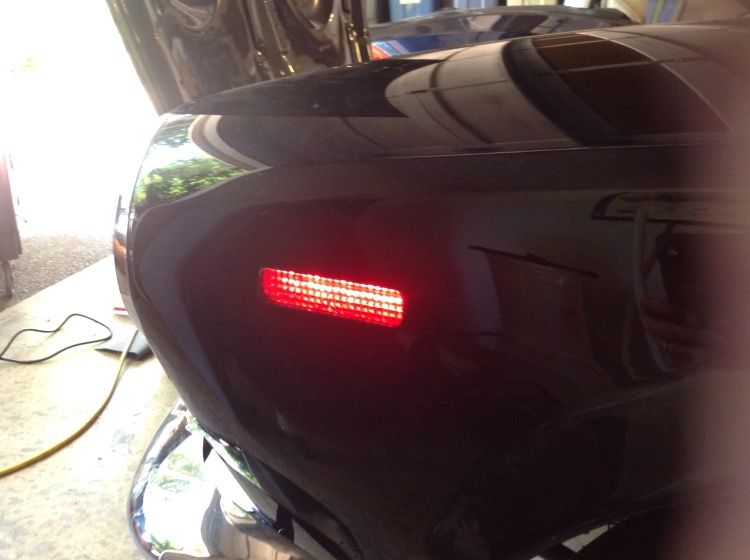
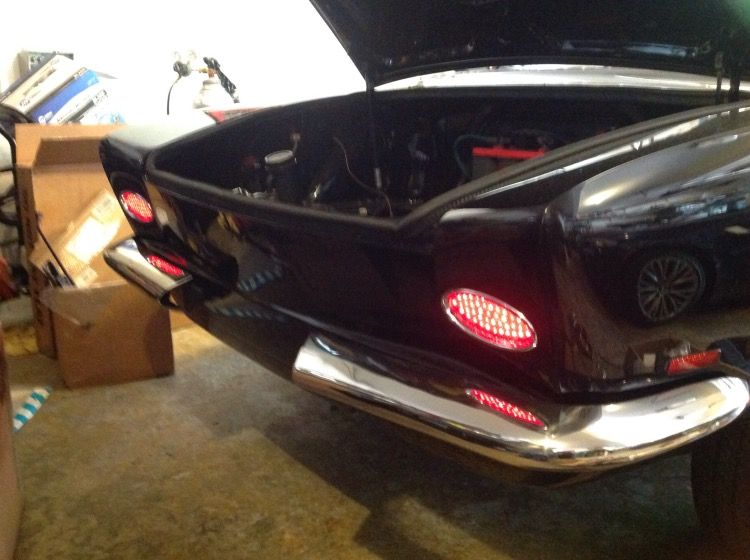
I then decided that if the headlights were plugged in I should apply power to see how they look.....They look GREAT!! My LED side lights and tail lights also came out better than expected!!........now the bad, but hopefully not to bad....I noticed a new smell...never a good thing when applying power for the first time in four years. I disconnected the battery and found that the infamous "brown" wire was very warm......probably caused by a short somewhere because most of the system is disconnected. Does not appear to be any permanent damage but I will not attempt to apply power again until all the wires are connected!!
Stay Safe,
Pat
79spider
HAVE FUN!! It's a FIAT!!
ptoneill@msn.com
http://s1121.photobucket.com/albums/l504/ptoneill/
Pat
79spider
HAVE FUN!! It's a FIAT!!
ptoneill@msn.com
http://s1121.photobucket.com/albums/l504/ptoneill/
-
- Posts: 614
- Joined: Thu Jul 05, 2012 7:06 pm
- Your car is a: 1972 124 Spider
Re: Edit....Back from paint!
Looks great, Pat! Love the LED's on these cars; nice and bright.
Nifty drill bit for those rivets. Add another item to the want list!
Neil
Nifty drill bit for those rivets. Add another item to the want list!
Neil
Neil O'Connor
Madison, WI
72 FIAT 124 Spider
12 Jeep Grand Cherokee Overland Summit
14 Ram 1500 Laramie Longhorn Eco-Diesel
ex-71 FIAT 124 Coupe
and a host of Audi's, Saabs, VW's, MOPAR's, Fords, and a Bimmer....
Madison, WI
72 FIAT 124 Spider
12 Jeep Grand Cherokee Overland Summit
14 Ram 1500 Laramie Longhorn Eco-Diesel
ex-71 FIAT 124 Coupe
and a host of Audi's, Saabs, VW's, MOPAR's, Fords, and a Bimmer....
-
- Posts: 2130
- Joined: Wed Dec 24, 2014 10:21 pm
- Your car is a: 1978 124 Spider with Isuzu Turbo Diesel
Re: Edit....Back from paint!
Is there a prefered source for those spot weld bits?
- Ptoneill
- Posts: 606
- Joined: Thu Jul 15, 2010 1:28 am
- Your car is a: 1979 Fiat Spider 2000
- Location: Las Vegas, Nevada
Re: Edit....Back from paint!
I got mine at NAPA by the body repair section, I am sure most part suppliers that carry body repair supplies would have them.DieselSpider wrote:Is there a prefered source for those spot weld bits?
Works well but with the thin metal on these cars it is easy to punch thru....I used a POR 15 epoxy putty to fill the holes.
Stay Safe,
Pat
79spider
HAVE FUN!! It's a FIAT!!
ptoneill@msn.com
http://s1121.photobucket.com/albums/l504/ptoneill/
Pat
79spider
HAVE FUN!! It's a FIAT!!
ptoneill@msn.com
http://s1121.photobucket.com/albums/l504/ptoneill/
-
- Posts: 2130
- Joined: Wed Dec 24, 2014 10:21 pm
- Your car is a: 1978 124 Spider with Isuzu Turbo Diesel
Re: Edit....Back from paint!
Our friends at Harbor Freight come through again:
http://www.harborfreight.com/3-8-eighth ... 95343.html
- Ptoneill
- Posts: 606
- Joined: Thu Jul 15, 2010 1:28 am
- Your car is a: 1979 Fiat Spider 2000
- Location: Las Vegas, Nevada
Re: Edit....Back from paint!
DieselSpider wrote:Our friends at Harbor Freight come through again
I was just there the other day...bought the hand hydraulic crimper to put on the new battery lug....worked great. One of those tools you don't use often but is worth it's weight in gold when you do need it!
http://www.harborfreight.com/hydraulic- ... h9U.mailto
Stay Safe,
Pat
79spider
HAVE FUN!! It's a FIAT!!
ptoneill@msn.com
http://s1121.photobucket.com/albums/l504/ptoneill/
Pat
79spider
HAVE FUN!! It's a FIAT!!
ptoneill@msn.com
http://s1121.photobucket.com/albums/l504/ptoneill/
- Ptoneill
- Posts: 606
- Joined: Thu Jul 15, 2010 1:28 am
- Your car is a: 1979 Fiat Spider 2000
- Location: Las Vegas, Nevada
Re: Edit....Back from paint!
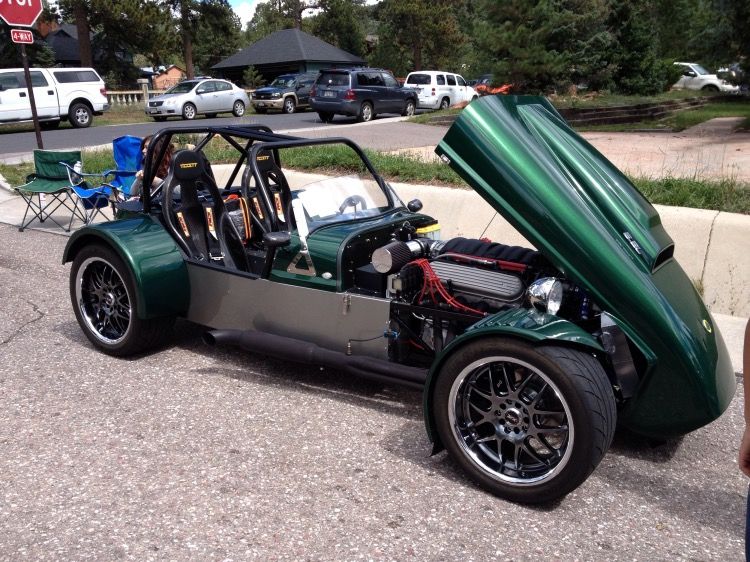
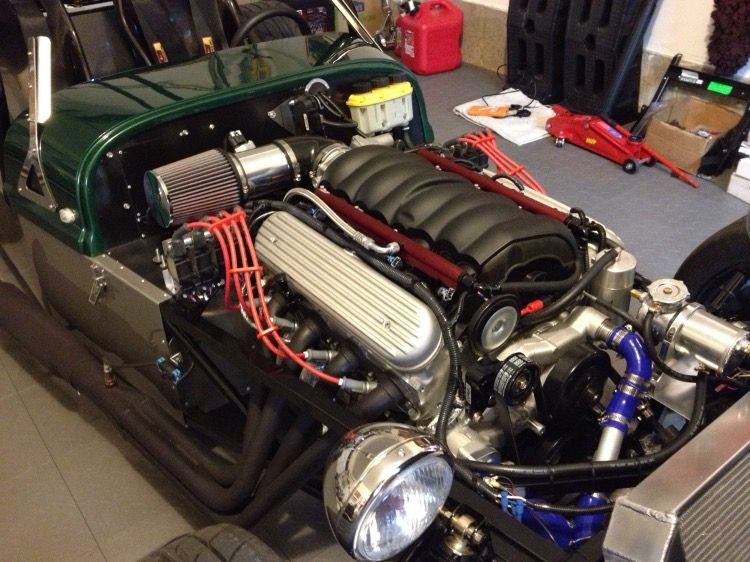
After much deliberation I have decided to replace the electrical system in the car. As I mentioned earlier I got the infamous brown wire pretty hot, I don't think I destroyed anything however it really got me to thinking about integrating the host of modifications I have made into the 36 year old system. My brother has built several Lotus 7 replica, his last is a 1200 lb beast with a brand new crate LS 3 in it with 430 hp!! He used an ISIS electrical system with great success. ISIS now goes by its new name...Infinitybox.
http://infinitybox.com
Here are some pictures of my brothers ride
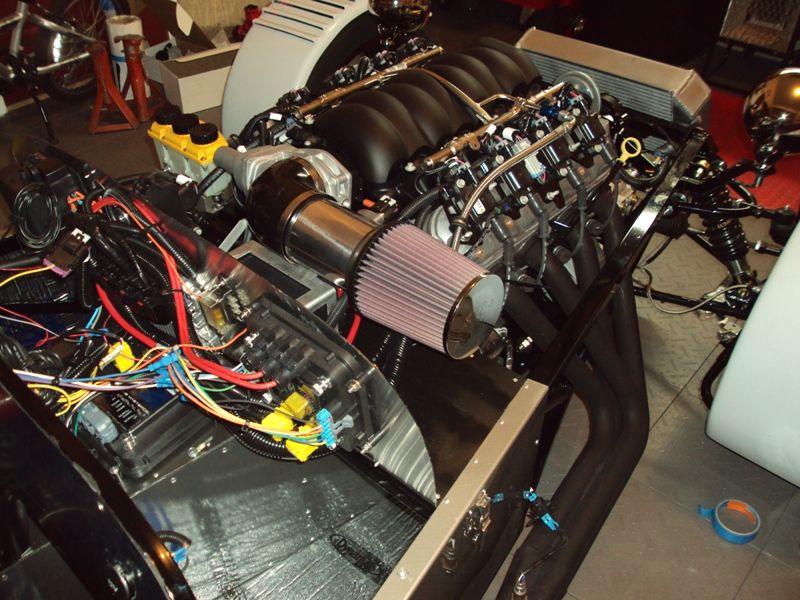
Here is the Isis master cell...note that the wiring is not completed and it now looks much better.
I will be ordering the 20 circuit kit with the key fob controller, it will be about three weeks to get the kit. I may start a seperate post detailing my installation.
Stay Safe,
Pat
79spider
HAVE FUN!! It's a FIAT!!
ptoneill@msn.com
http://s1121.photobucket.com/albums/l504/ptoneill/
Pat
79spider
HAVE FUN!! It's a FIAT!!
ptoneill@msn.com
http://s1121.photobucket.com/albums/l504/ptoneill/
-
- Posts: 740
- Joined: Mon May 05, 2008 1:03 am
- Your car is a: 1985.5 Volumex
Re: Edit....Back from paint!
Love the colour!
JIm
JIm
-
- Posts: 123
- Joined: Sun Jun 02, 2013 3:03 am
- Your car is a: Fiat 124 spider 1976
Re: Edit....Back from paint!
cool you are going to use the infinitybox (ISIS)...that is our plan as well for my sons spider restomod, our advantage is the car will be completely stripped down and on a rotisserie
good luck and we will be watching for updates on progress
- Ptoneill
- Posts: 606
- Joined: Thu Jul 15, 2010 1:28 am
- Your car is a: 1979 Fiat Spider 2000
- Location: Las Vegas, Nevada
Re: Edit....Back from paint!
So I ordered it today they advised that it would be about three weeks out before it is shipped.........bummer but it will give me more planning time.
I am putting off the interior work until the Infinitybox (Isis) system is in.
Stay Safe,
Pat
79spider
HAVE FUN!! It's a FIAT!!
ptoneill@msn.com
http://s1121.photobucket.com/albums/l504/ptoneill/
Pat
79spider
HAVE FUN!! It's a FIAT!!
ptoneill@msn.com
http://s1121.photobucket.com/albums/l504/ptoneill/
Re: Edit....Back from paint!
the rear seat panel I offer doesn't need any modification if you pair it with the bottom section I sell.
- Ptoneill
- Posts: 606
- Joined: Thu Jul 15, 2010 1:28 am
- Your car is a: 1979 Fiat Spider 2000
- Location: Las Vegas, Nevada
Re: Edit....Back from paint!
Mark makes an excellent point! My shelf is about 4 inches higher than the one he sells, I had made mine prior to his being available.
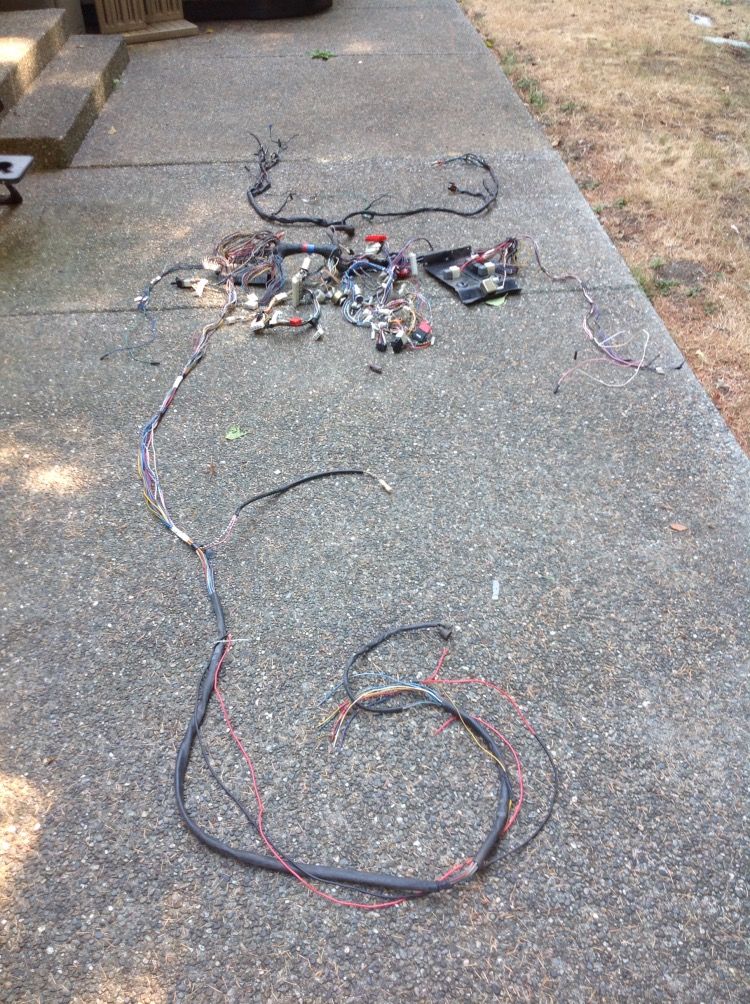
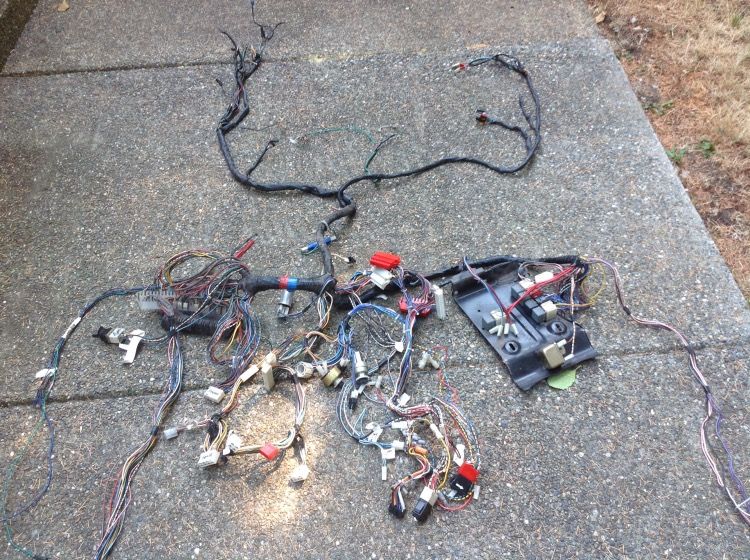
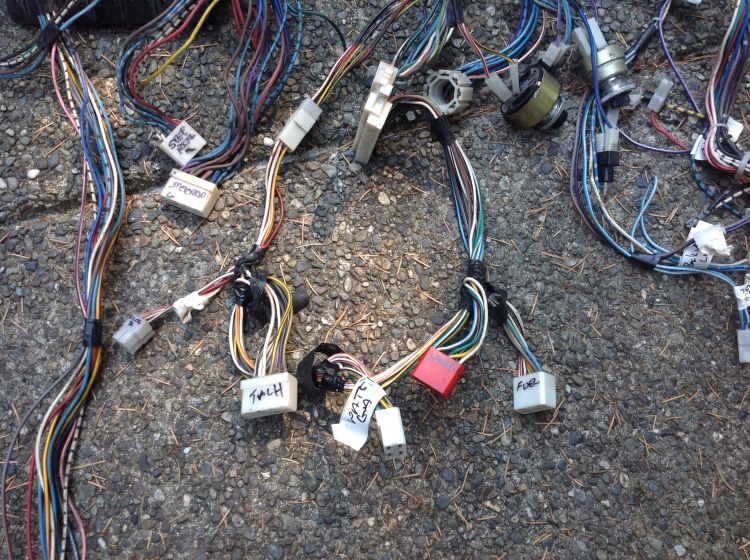
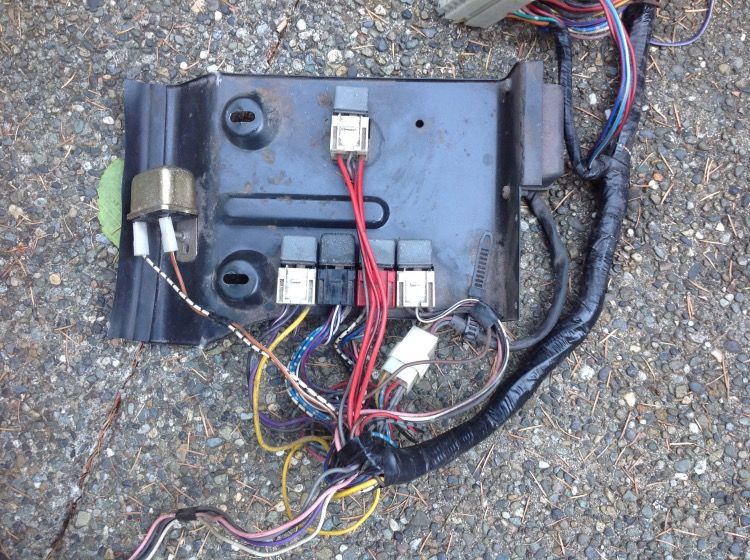
I removed the old harness today, it was not that hard just took some patience. I will be using bits and pieces of it with the new system, like the windshield wiper system. I will also recycle the connectors to the gauges and the automatic transmission start relay ( although I may not have to use it). When I am done I will donate the remainder of the harness, including fuse box to the first person who wants it.
Here it is laid out as it would be in the car
If anyone needs a photo of anything in the harness now is the perfect time to ask!!
Stay Safe,
Pat
79spider
HAVE FUN!! It's a FIAT!!
ptoneill@msn.com
http://s1121.photobucket.com/albums/l504/ptoneill/
Pat
79spider
HAVE FUN!! It's a FIAT!!
ptoneill@msn.com
http://s1121.photobucket.com/albums/l504/ptoneill/