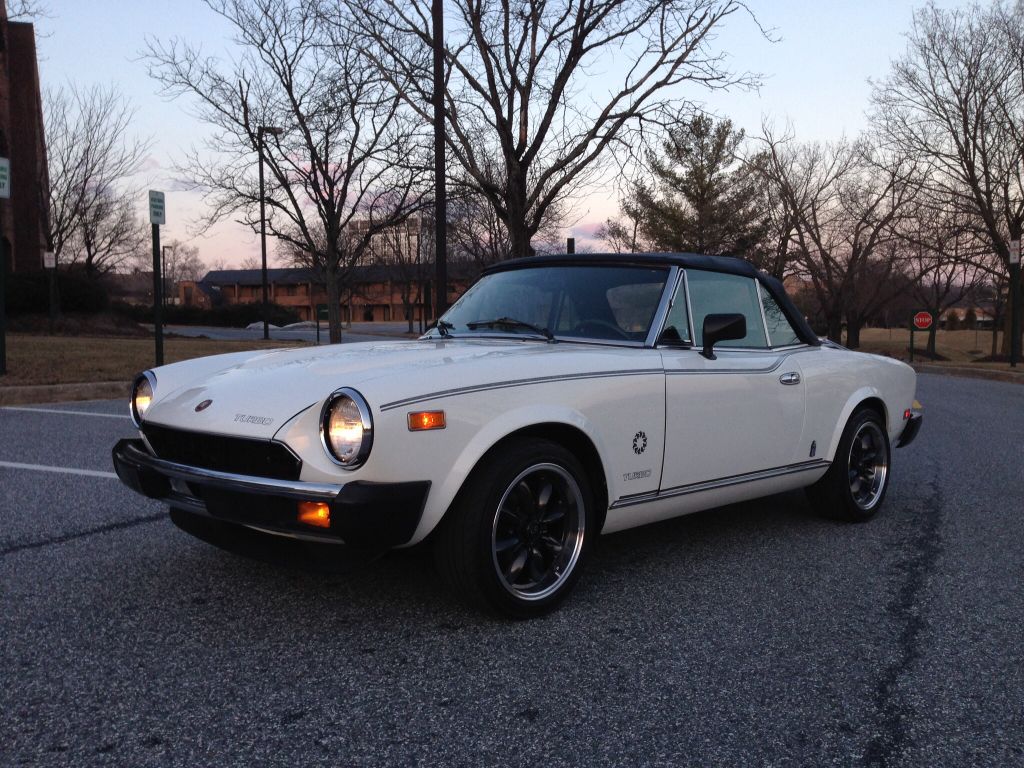
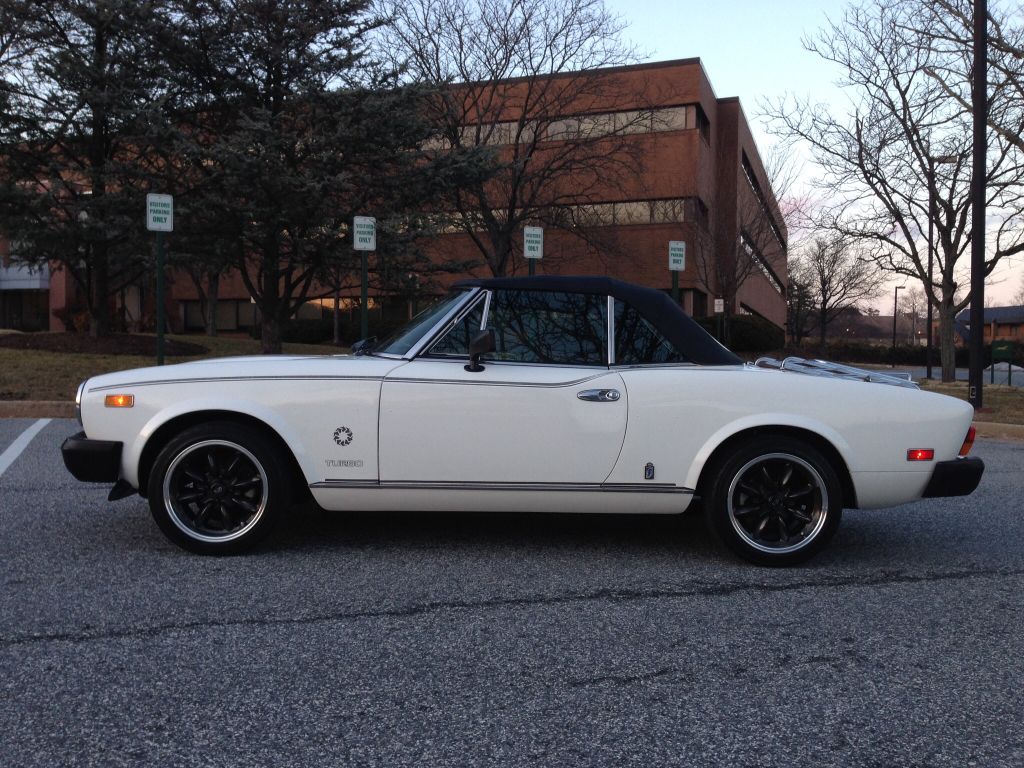
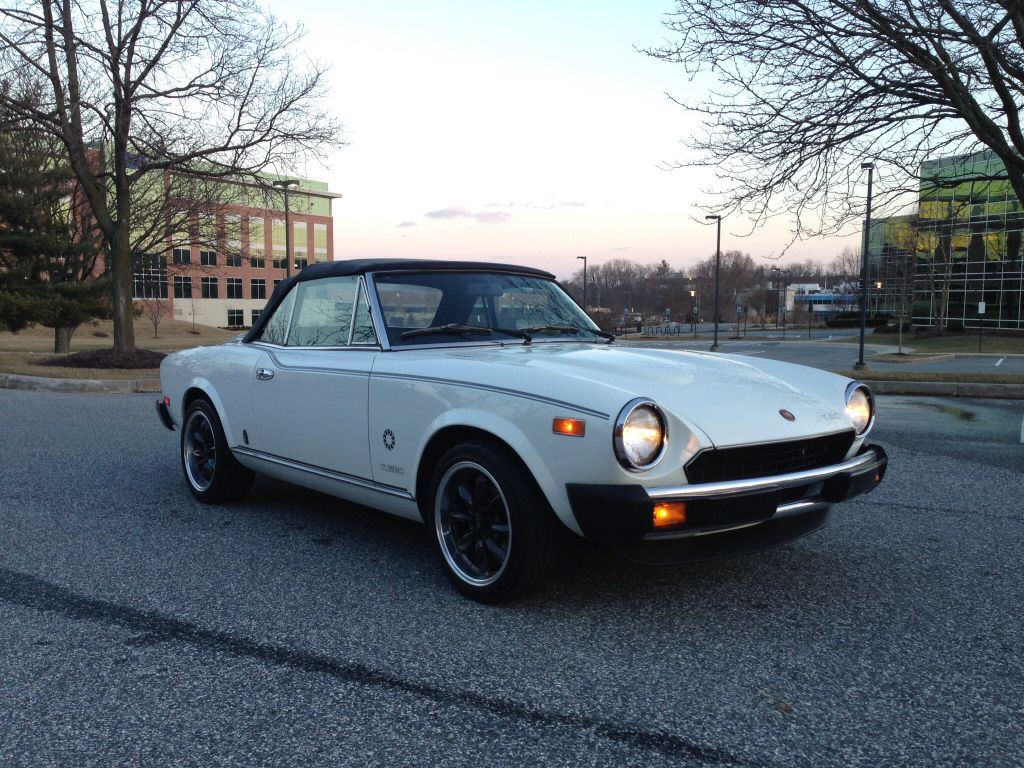
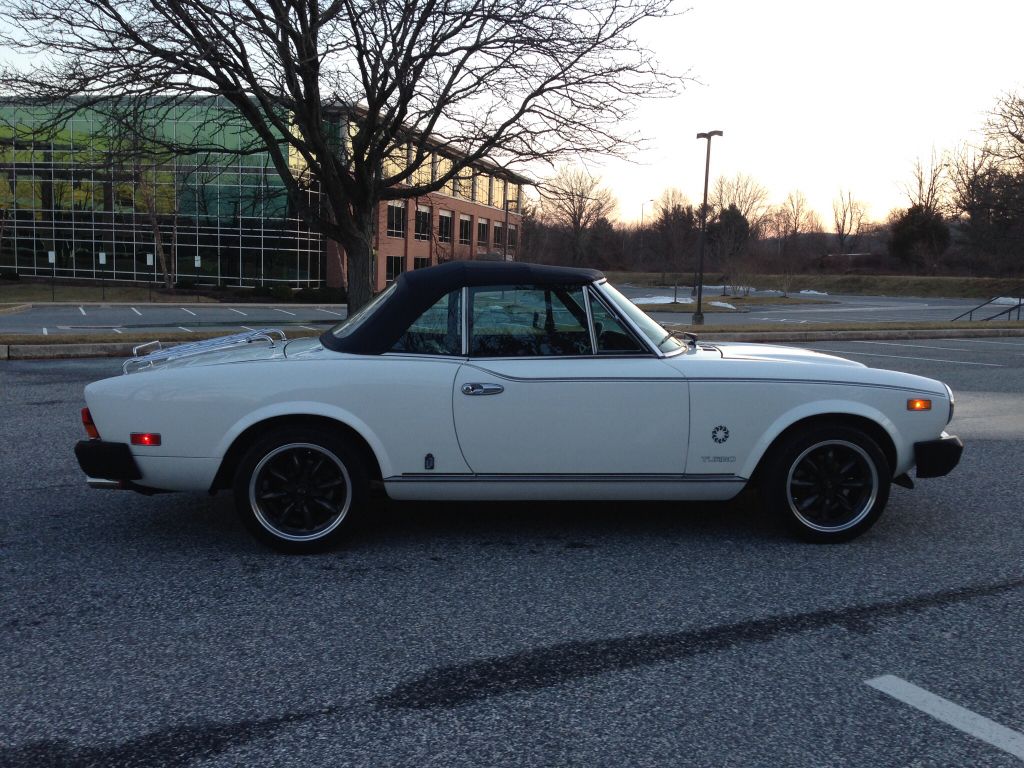
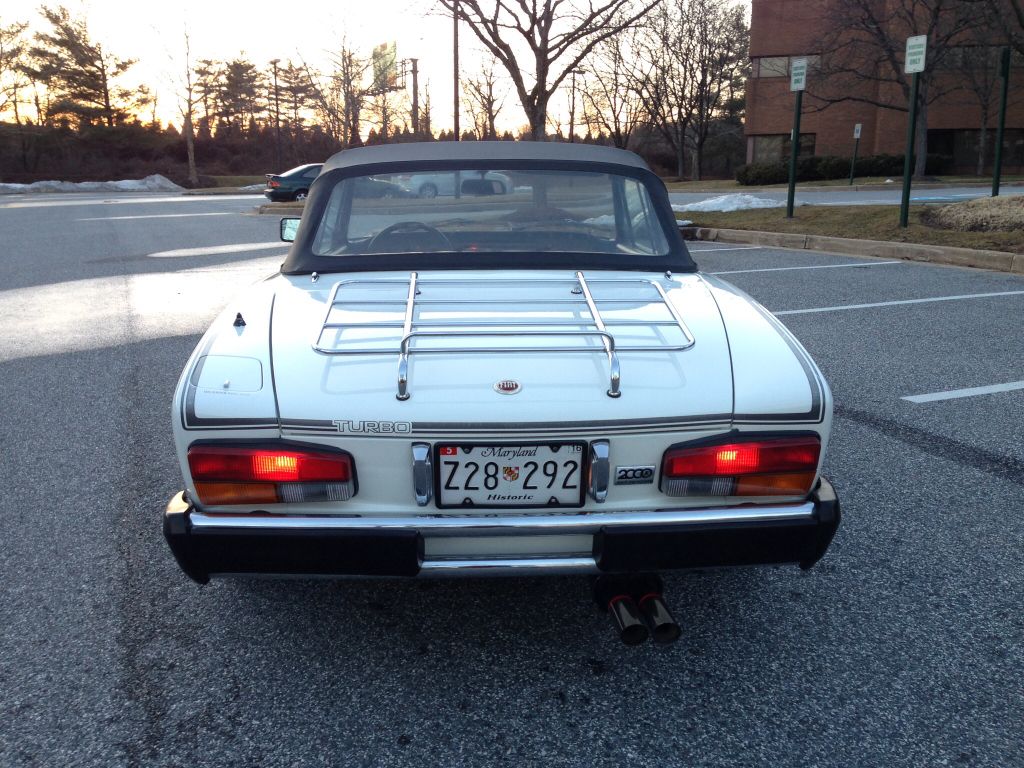
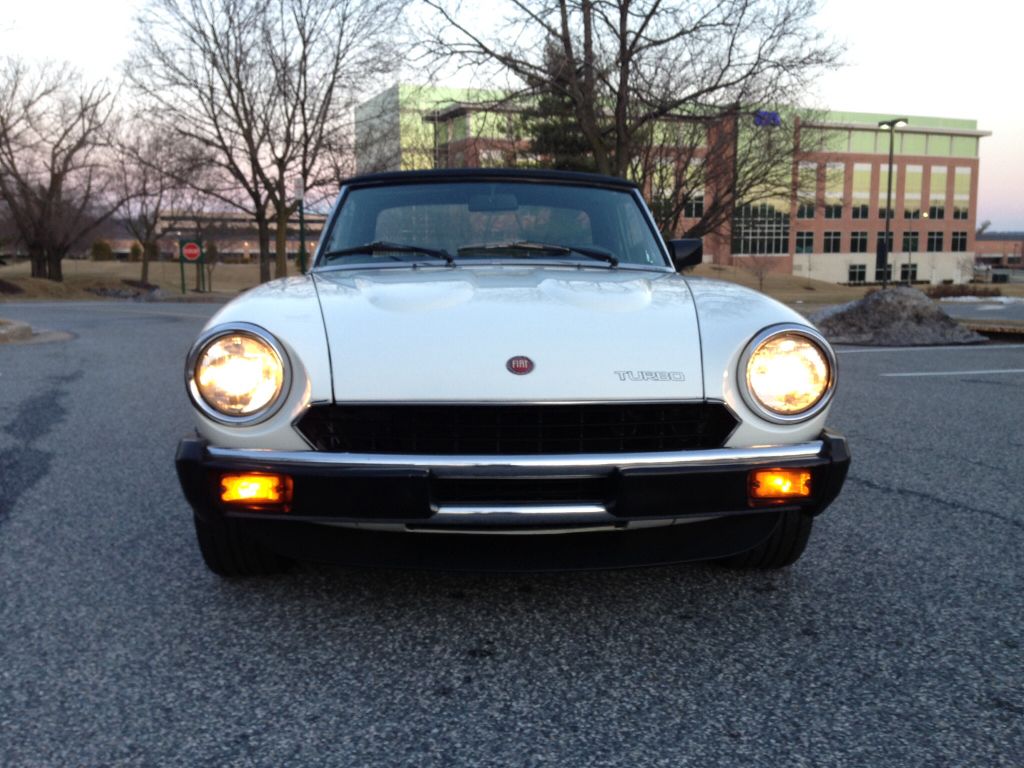
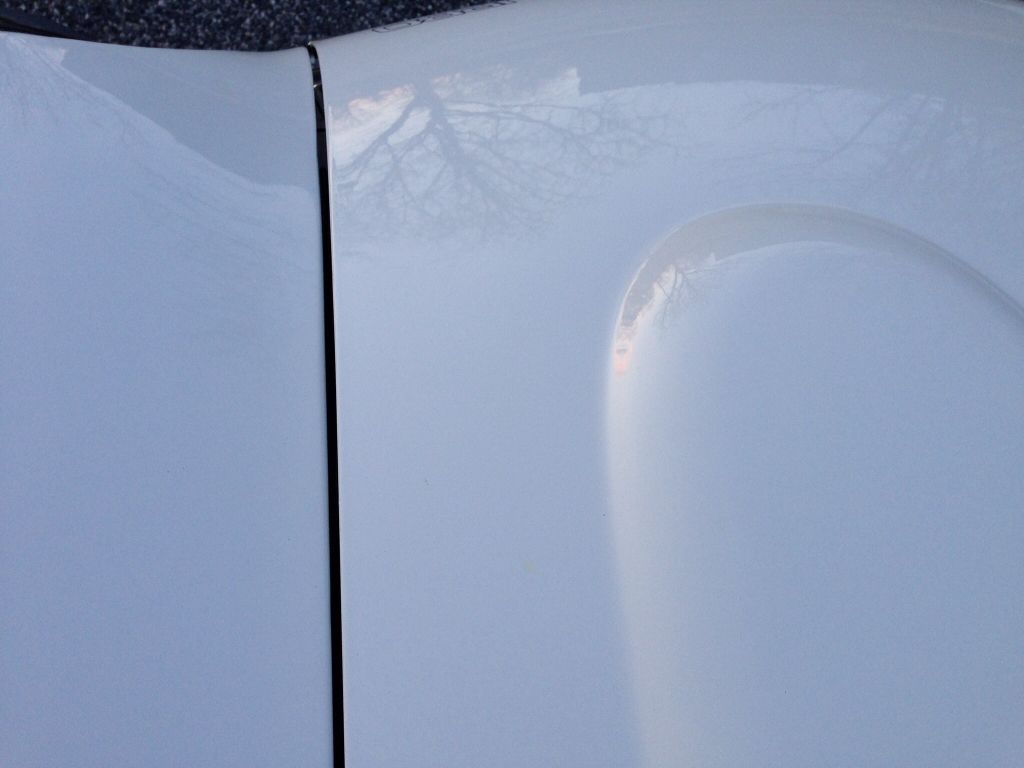
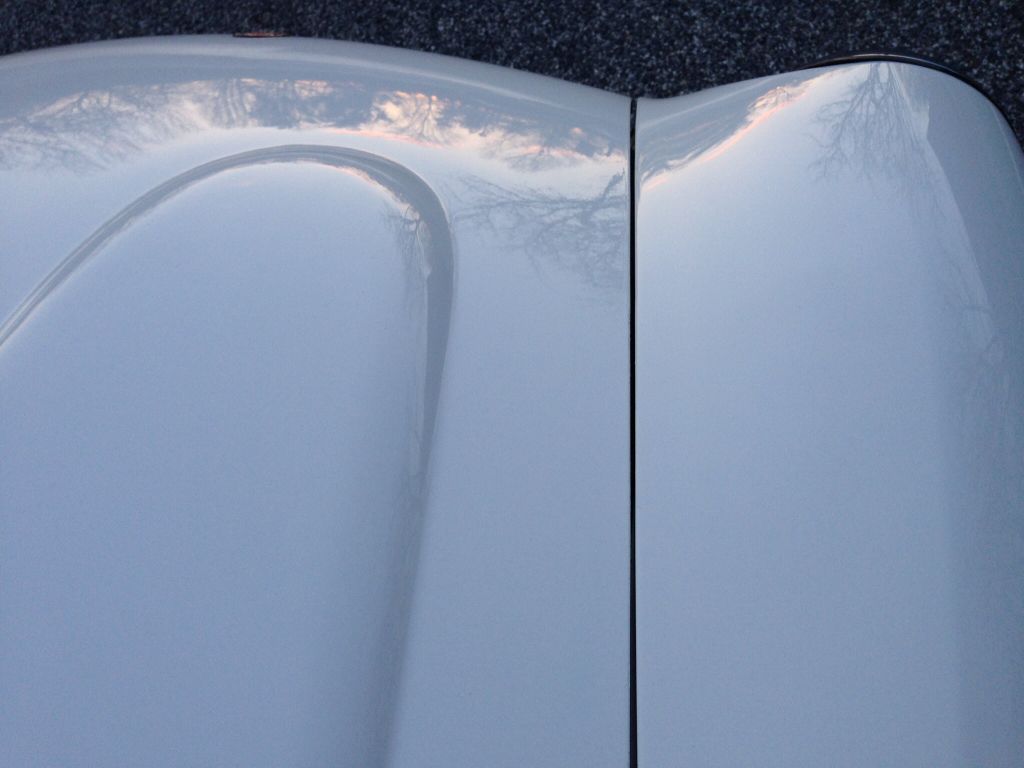
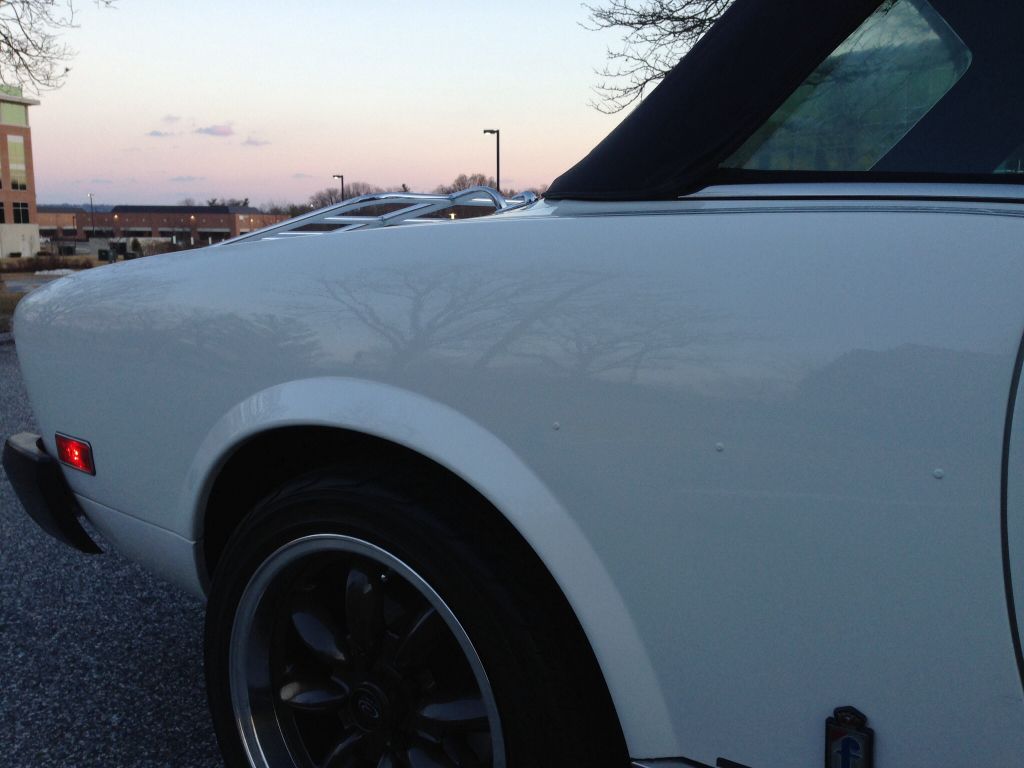
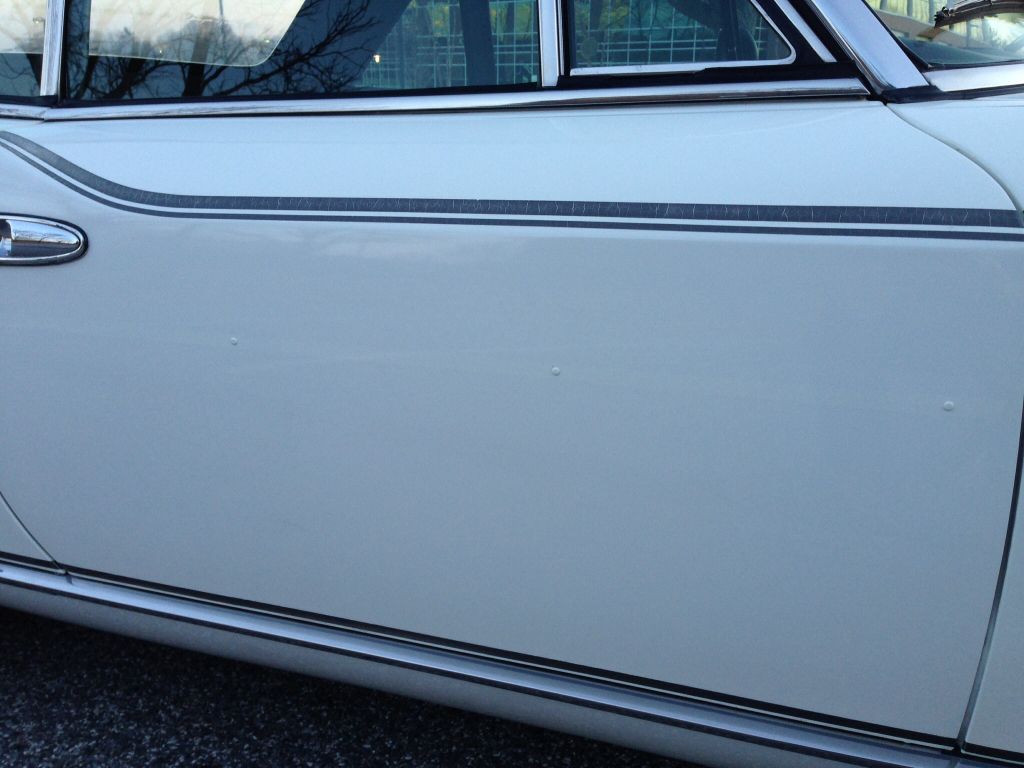
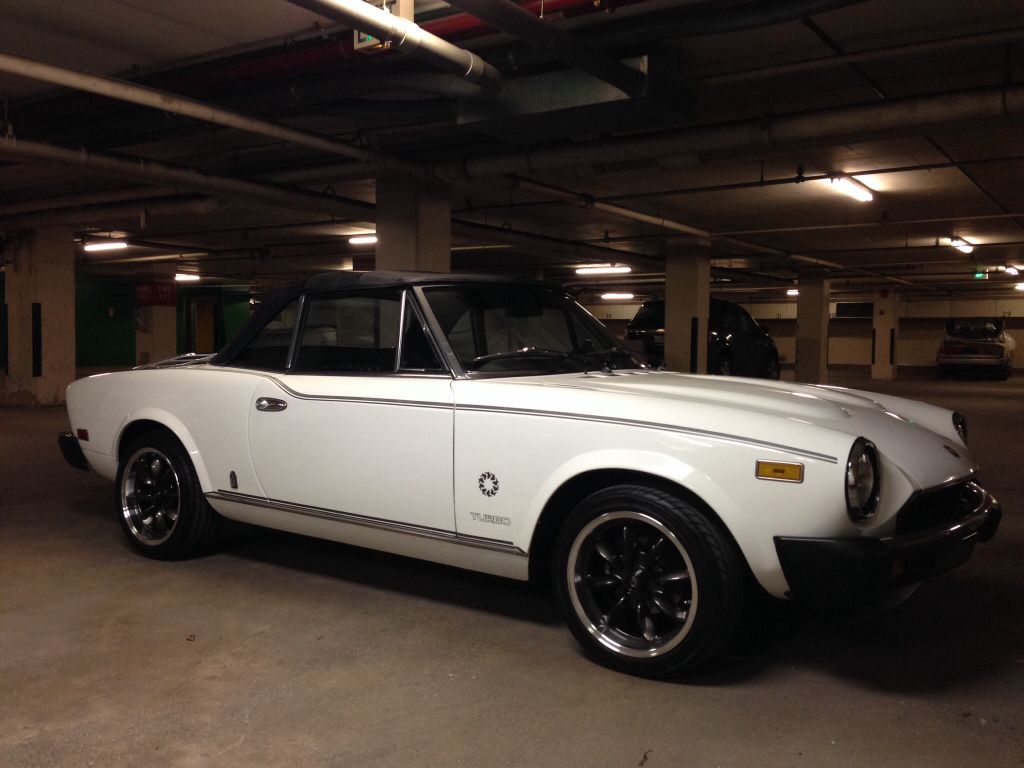
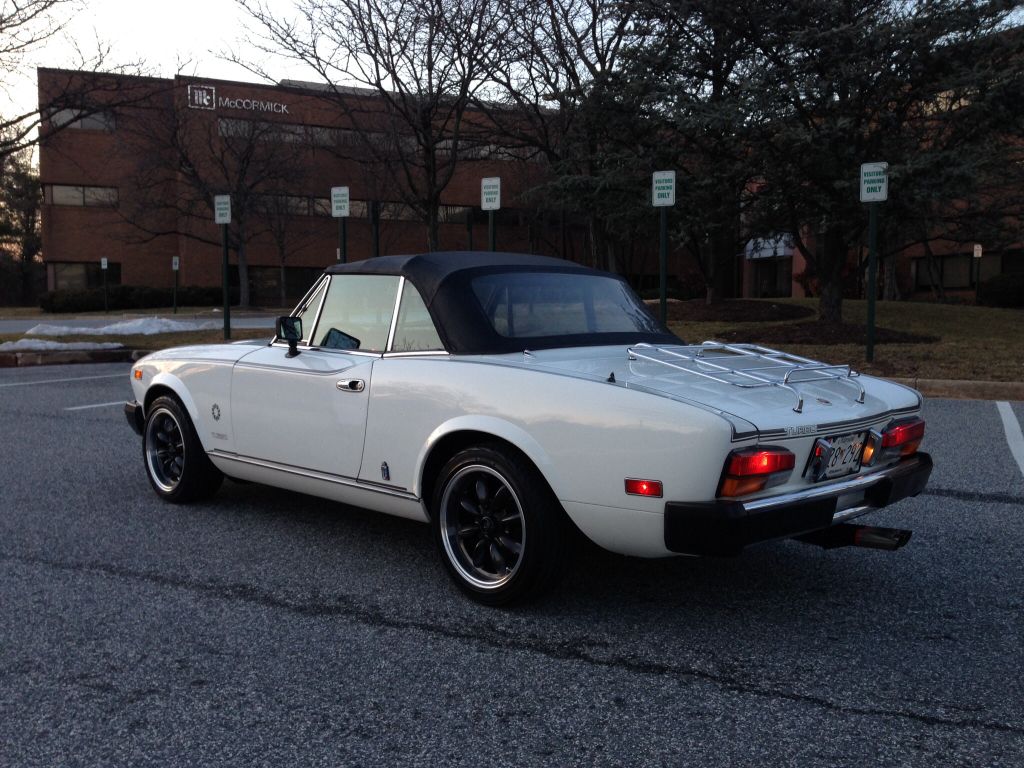
Hey guys it's been a few months since I've been on the forums but wanted to share what's been going on. I had originally planned on taking advantage of the winter for a full re-spray of my car so that she would be ready come spring time. Back in October I began looking at a few body shops and was narrowing down who I was going to hand over my baby to. Prior to getting the paint work done I had always planned on having all the dings/dents removed with paintless dent repair also known as PDR so there would be as little fill or skim coat insuring the best possible finish.
I was fortunate that my car was completely rust free so the body shop end was very straight forward. I planned in stripping completely just as I did with my '84. So I set up an appointment with a guy I've been using for about 15 years for all my cars when it came to ding repair. The guy is a miracle worker. As nice as my car was overall when I got her she looked like the previous 2 owners weren't to careful when it came to dings and small dents. The hood had at least 9/10 dings mostly innies and few outies from someone leaving tools under hood and then trying to close it. Same goes for the trunk in terms of quantity and type. Then I would estimate at least another 2 dozen throughout the rest of the body and sides that I assume came from careless parking lot shoppers.
I dropped the car off to him back in early December and he made me a great deal in that if I left it there and I wasn't in a rush to get it back, he would work on it from time to time to fill down time and he would go easy on me with the price. After about two weeks I get the call that he finally finished. WOW! What a difference having all the dings removed on the overall look of the car. It breathed a whole new life into her. I can't explain the night and day difference just having the dings removed made on the overall look of the car. The car look so much more crisp and clean improving greatly on its demeanor. I had mentioned to my PDR guy the plan after picking the car up that it was going to the paint shop. He said it was ashame as the car was rust free and now with all the dings removed didn't really need it.
I did agree with him and starting having second thoughts but the car was still wearing her original paint and looked a bit tired and dull. He said I should try and do a full cut and polish and see if I could bring back some luster, worst case scenario if I screwed up the paint she was going to the paint shop regardless. I swung by the shop one day while his helper was doing the very same thing on a black Mercedes Benz that needed serious paint correction and watched him and his technique. I figured why not try on the Fiat and practice. It was always something I wanted to do but feared to use my other cars as guinea pigs. He gave me the keys to the shop and I spent a few nights wet standings very carefully with 1500 then I graduated to 2000. That was scary seeing the car dull and sanded. I thought to myself there's no way she'll come back to life. Then I moved to a variable speed polisher with compound and it started to come back. I couldn't believe the shine was starting to shine through again.
After compounding the entire car it really started looking nice. Then I moved onto a different pad and stage 2 polish which removed even more of the small swirls left by the compound and then finally stage 3 polish and WOW did the car look incredible. I couldn't believe it was the same car. There are still some deep scratches in the paint (not to metal) that I didn't want to sand on to much as I'm no expert and without a paint meter and the condition of the old paint I had to walk a thin line and let some things go and just be happy with what it is, a 32 year old car and original paint. Needless to say I decided against the re-paint for the time being and looking at the pics you may also agree I made the right decision. I think I can get by for at least a year or two if I keep up with it, possibly even longer if the nothing happens. Moral of this story/book, don't always give up so easily and learn to live with imperfection in life! Of course she would probably look even better wearing new paint but I think I can live with what I've got and be greatful...
I almost had my car re-painted... Glad I didnt!
-
- Posts: 268
- Joined: Fri Apr 24, 2009 2:53 pm
- Your car is a: 1982 TURBO Spider 1979 Spider
- Location: Baltimore, MD
I almost had my car re-painted... Glad I didnt!
Giuseppe
1979 Fiat Spider
1982 Fiat Spider TURBO
1984 Pinninfarina Spider (gone but not forgotten)
1979 Fiat Spider
1982 Fiat Spider TURBO
1984 Pinninfarina Spider (gone but not forgotten)
-
- Posts: 268
- Joined: Fri Apr 24, 2009 2:53 pm
- Your car is a: 1982 TURBO Spider 1979 Spider
- Location: Baltimore, MD
Re: I almost had my car re-painted... Glad I didnt!
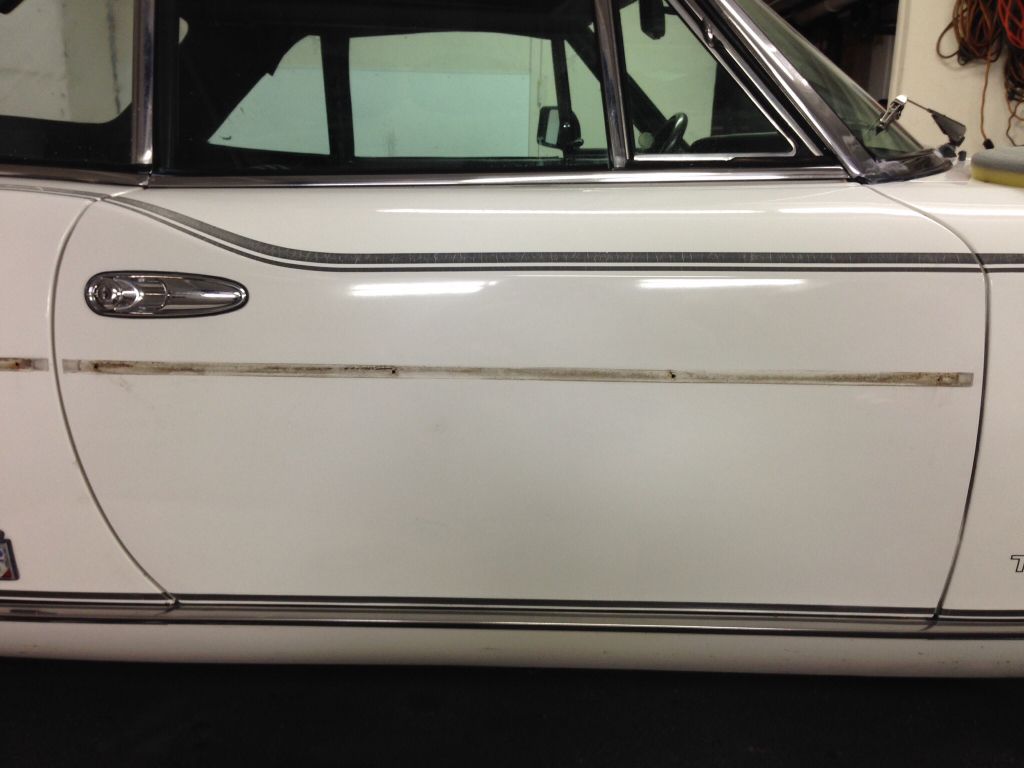
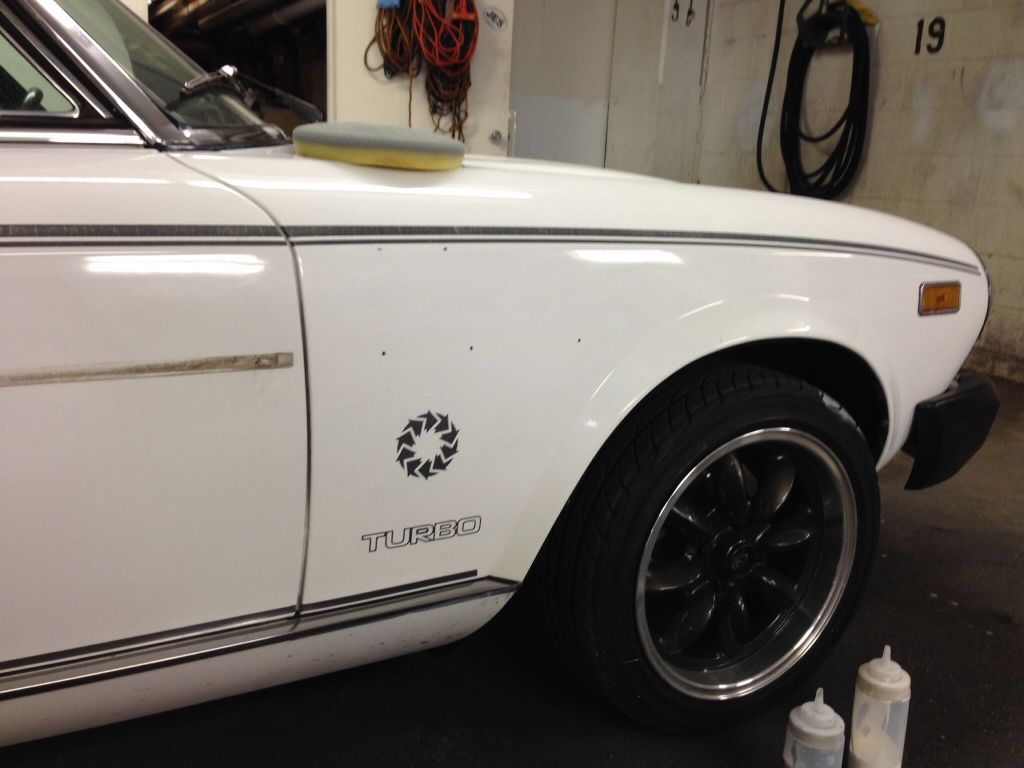
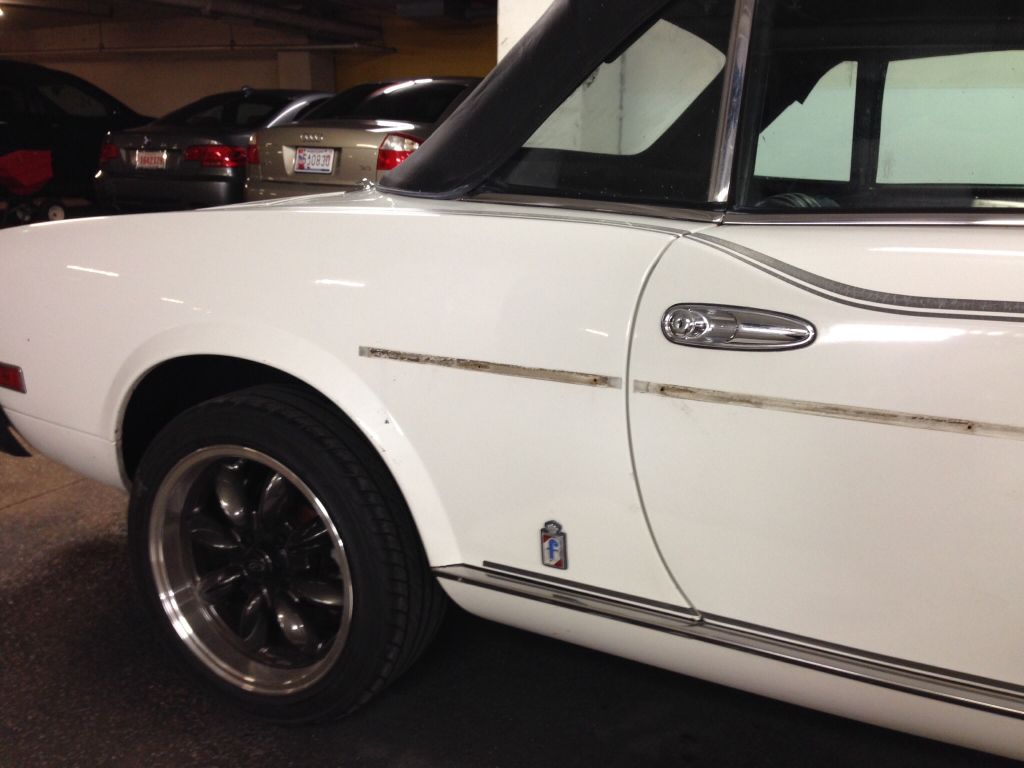
I also, removed the hideous side moldings/door ding stoppers, which did nothing in my case to prevent the dings, lol... Again, another reason why I was so eager to have the car re-painted was to eliminate them. After doing the full cut and polish and seeing those old faded black rubber strips drove me even more nuts as the car was shining like a gem only to be dulled down by those horrible strips. Coming off my win with the paint correction and remembering when I removed them from the '84 before going into paint they didn't do much damage to the paint below.
Out comes the drill and the rivets holding the strips on... Off with all the strips once and for all. Now I had these brown strips from 32 years of traded dirt surrounded by freshly buffed and polished paint and I was starting to regret the decision as I was convinced there was no way I would be able to get the paint come even remotely close to matching the rest of the car. After some heavy degreaser and light wet sanding I was pleasantly surprised yet again. The difference in paint color was negligible. There is a very faint color difference but you have to be pretty close to see it and I think I can live with it especially since it saved me a few shekels from not having to get a paint job.
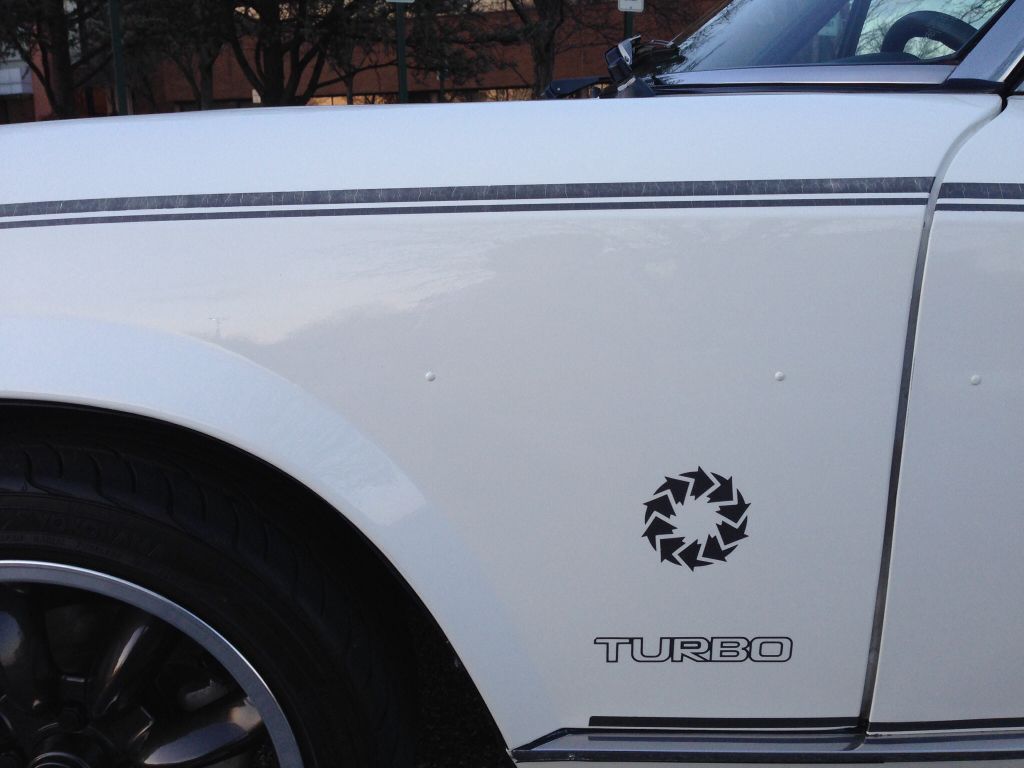
So now with the strips off, the paint thoroughly cleaned, buffed and polished I had to deal with all the holes left by the rivets, arghhhhh. I got the idea to use the very thing that made the holes, rivets. Got some rivets, pulled out the stem, filled the holes with body filler, sanded them down and then gave them a quick coat of paint. A dab of glue and wallah, holes filled with minimal effort and the least obtrusive way I could think of. All in all they do bother me but now after staring at it more and more I'm starting to not even see them anymore. All in all I think it came out nice and definitely presentable and not at all embarrassing to park amongst the restored classics at the local car gatherings throughout the summer.
To finish it off, I spent another night with a bottle of touch up paint and went around the entire car with these cool little long plastic toothpick like touch up brushes that have the tiniest little sponge on the head, about 1 to 2mm big, which was perfect to fill in all the chips and knicks in the paint without leaving to much paint like when using the brush it comes with. They are great at leaving just the right amount of paint and let you work with so much more precision. I spent a couple hours just doing this and again this also added to the overall effect of the outcome you see in the pics. It is truly amazing when you take all three things, ding repair, cut and polish and then the touchup paint it all came together to make it what it is and completes the entire picture... A HUGE improvement and each step just as important to the one prior.
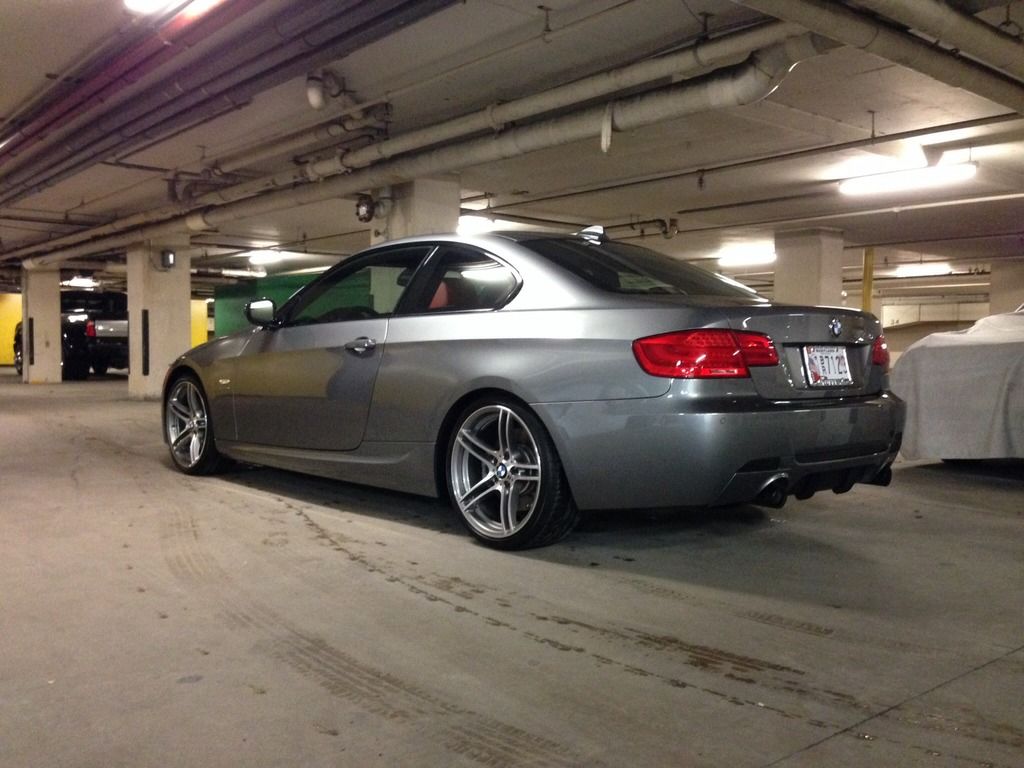
I had about 400 bucks into the ding repair which may sound like a lot but it was a steal considering they can get up to 50 bucks per ding and another 200 bucks, the cost of materials for the paint correction which he got for me at cost so not to bad considering. I've already done my Dad's Jaguar using the compound and polish and then my BMW. I have a new appreciation for guys that do detail work, it's hard, dirty and back braking work. Now I have so much more confidence with a high speed buffer and I'm not afraid to take it to any of my cars. Hopefully anyone considering removing the ugly side strips will be that more inclined to do so. Having removed two sets off two different cars with good luck in terms of no paint damage below and a simple way to fill the holes not requiring any further damage. Good luck!
Here you can see the strips removed:
Here you can see one of the strips cleaned and the holes left behind. The lowers rockers were addressed later on with the cut and polish:
Holes filed:
After polish and wax:
After 12hours, compound, polish and wax:
Giuseppe
1979 Fiat Spider
1982 Fiat Spider TURBO
1984 Pinninfarina Spider (gone but not forgotten)
1979 Fiat Spider
1982 Fiat Spider TURBO
1984 Pinninfarina Spider (gone but not forgotten)
-
- Patron 2018
- Posts: 1148
- Joined: Sat Apr 02, 2011 7:58 pm
- Your car is a: 1979 Fiat Spider
- Location: Montreal Canada
Re: I almost had my car re-painted... Glad I didnt!
You did well with stunning results. It definetely does not look like a car that needed a paint. The rivet fills didn't sound appealing to me as i was reading it but after i seen the photos they do not look intrusive, a bit irregular but not intrusive by all means. Those mouldings don't belong on these cars, they look so much better without them. I think they were a dealer add-on for the North american market. I never knew that they were drilled on, shame on them, i figured that they were self- adhesive. (They should have been made to fall off after the warranty period )
I too spent alot of time on youtube and autogeek learning about how to use the various tools, in combination with countless types of cutting/polishing pads and polishes that rate on a scale of 1 to 10 in terms of aggressiveness. It really is an art to get the hang of the rhythm of your polisher and choice of products. The intent in the industry is to start with the least aggressive materials in order to correct your paint and figuring out that fine line is a challenge.
I felt a bit intimidated at first contact with the paintwork on my Spider but i quickly caught on. I also settled to solve about 85-90 % of imperfections and live with the rest. Nobody will correct an older paintjob to perfection, so no use on removing unnecessary layers. Nonetheless my results were stunning with no swirl marks on my red paint finish (red's not easy ).
I don't recommend anyone going at this without a crash course from someone experienced or some reading up on it.
That said, i give alot of credit to detailers who do this the right way for a living. They charge a premium for it but it really is labor intensive.
- azruss
- Posts: 3659
- Joined: Sun May 30, 2010 12:24 pm
- Your car is a: 80 Fiat 2000 FI
Re: I almost had my car re-painted... Glad I didnt!
It came out pretty sweet. You will discover that older paint wants to dull back quicker than modern paints. Fortunately, your car is white, the most forgiving of all the colors. You might want to take a look at the driver door hinges, particularly where it bolts into the door to make sure you don't have any stress cracks in the door where the hinges bolt on.
- focodave
- Patron 2018
- Posts: 704
- Joined: Sat Jun 30, 2012 10:35 am
- Your car is a: 1980 Spider 2000 F.I.
- Location: Fort Collins, CO
Re: I almost had my car re-painted... Glad I didnt!
Your post begs the question -- is the turbo still installed and functioning?
1980 Spider 2000 F.I. (my hobby)
1970 MGB GT (my other hobby)
2008 Ford Expedition (daily driver)
2019 Harley-Davidson Electra Glide Standard
2019 Harley-Davidson Iron 883 Sportster
1970 MGB GT (my other hobby)
2008 Ford Expedition (daily driver)
2019 Harley-Davidson Electra Glide Standard
2019 Harley-Davidson Iron 883 Sportster
-
- Posts: 2130
- Joined: Wed Dec 24, 2014 10:21 pm
- Your car is a: 1978 124 Spider with Isuzu Turbo Diesel
Re: I almost had my car re-painted... Glad I didnt!
Agree 100%AriK wrote:You did well with stunning results. It definetely does not look like a car that needed a paint.
I don't recommend anyone going at this without a crash course from someone experienced or some reading up on it.
That said, i give alot of credit to detailers who do this the right way for a living. They charge a premium for it but it really is labor intensive.
I helped a dealer transport cars back in the day and he did the buffing himself because too many would just destroy a paint job in a heart beat. You should have seen what he could do with a half cup of touch up paint and a book of matches when working out a car that was just peppered with minor chips in the paint or moderately deep scratches. He would use the torn end of a match as a paint dauber going over the car in the evening and then the next morning buff it out and you would not believe that they were the same cars that you drove the previous day. He would give the buyers a kit with some good car polish and those that used it had cars that still looked great even after some years had passed.
One kid asked to borrow the dealers buffing kit, to spruce up his 6 month old Monte Carlo for a big date, which the dealer kindly allowed however the kid refused the crash course and showed up with the car looking freshly painted a few weeks later when he finally returned everything. He destroyed the factory paint job on a car that was not even a full year old yet. The kid actually buffed through to the bare metal in multiple locations and wasn't bright enough to stop after the first few burnouts so they had to paint the whole car and not just touch up a quarter panel or trunk lid.
That said a good man can buff out a car quite a few times however some can destroy a paint job in a moment, may not leave enough paint behind to allow it to be buffed out again in the future or may take so much off that it will start showing the primer through a few months later.
-
- Posts: 268
- Joined: Fri Apr 24, 2009 2:53 pm
- Your car is a: 1982 TURBO Spider 1979 Spider
- Location: Baltimore, MD
Re: I almost had my car re-painted... Glad I didnt!
Thanks guys... It was a rewarding experience and again, it's given me the confidence to do to any car. I've heard that it will require more upkeep to keep the shine but at least the hard work is done. The only thing left is to freshen up the pinstripping and turbo decals which are unobtainium. As far as the turbo goes, she is running sans at the moment but I have every piece as I removed it myself. I've been on the fence on what way to go on this matter.
The turbo is shot and needs rebuilding, the manifold has a few hair line cracks and last but not least the intake tube that gets squished up against the firewall has a few cracks as well. So the questions is whether to restore the original parts so it's 100% original or improve upon the original design. I've been also acquiring parts from a Lancia Delta that would be direct bolt on. I've already got the exhaust manifold and the intake manifold.
Next would be deciding on which turbo to go with and then fab up the front mount intercooler. I actually just got in touch with Matt over at Vick's for their programmable engine management system to do the fine tuning since the Legend stuff is so primitive and not all that great for a car running boost safely and reliably. I'm so torn at this point but I have a feeling the more parts I aquire for my custom turbo install, I'll nudge myself in that direction instead of returning back to stock configuration.
Giuseppe
1979 Fiat Spider
1982 Fiat Spider TURBO
1984 Pinninfarina Spider (gone but not forgotten)
1979 Fiat Spider
1982 Fiat Spider TURBO
1984 Pinninfarina Spider (gone but not forgotten)