One thing - you can do what you want, sure but I had very very bad experience with this - don't use that asphalt-based stuff - it is rather agressive (acid), if you do not have a proper paint under it. I have seen floors in Spiders being radically eaten up by it. Better use a proper paint and undercoat wax. Or POR-15 plus wax.
ciao,
Stefan
And The Saga Begins
- stefhahn
- Posts: 269
- Joined: Mon Oct 08, 2007 12:57 pm
- Your car is a: 1979 Spider 2000
- Location: Stuttgart / Germany
-
mdrburchette
- Posts: 5754
- Joined: Wed Jan 25, 2006 5:49 am
- Your car is a: 1972 Fiat 124 Sport
- Location: Winston-Salem, NC
Re: And The Saga Begins
I agree with Stefan that the best rust inhibitor is a good etching primer and paint. You have a less likely chance of capturing moisture this way.
1972 124 Spider (Don)
1971 124 Spider (Juan)
1986 Bertone X19 (Blue)
1978 124 Spider Lemons racer
1974 X19 SCCA racer (Paul)
2012 500 Prima Edizione #19 (Mini Rossa)
Ever changing count of parts cars....It's a disease!
1971 124 Spider (Juan)
1986 Bertone X19 (Blue)
1978 124 Spider Lemons racer
1974 X19 SCCA racer (Paul)
2012 500 Prima Edizione #19 (Mini Rossa)
Ever changing count of parts cars....It's a disease!
-
KRegester
Re: And The Saga Begins
Moved to the front passenger side.
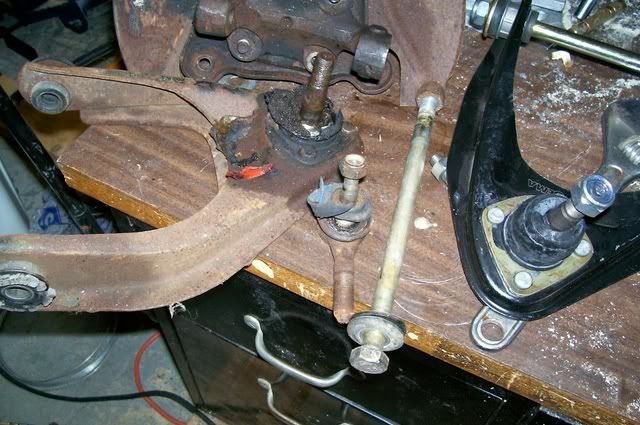
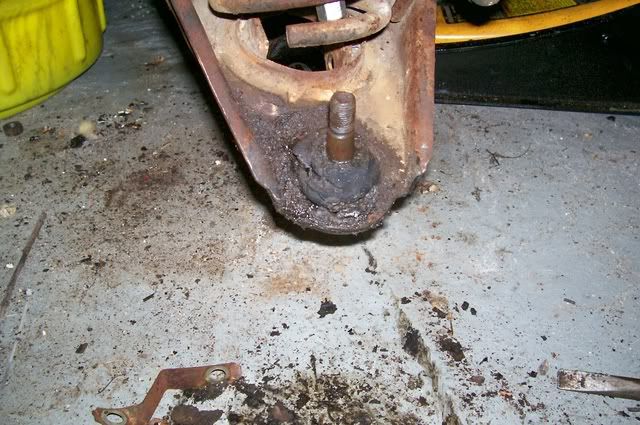
I think the PO's warning about the tires being worn and being careful getting it home was miss-direction. The RTV ON THE BALL JOINTS A NICE TOUCH...
passenger side upper ball joint and tie rod

passenger side lower ball joint

New control arms, ball joints, bearing, slave cylinder seals, shocks, pads and rotors going in as soon as I can get;
springs, spindles, brake shields, sway bar all cleaned, rerusted/neutralized and painted.
I think the PO's warning about the tires being worn and being careful getting it home was miss-direction. The RTV ON THE BALL JOINTS A NICE TOUCH...
passenger side upper ball joint and tie rod

passenger side lower ball joint

New control arms, ball joints, bearing, slave cylinder seals, shocks, pads and rotors going in as soon as I can get;
springs, spindles, brake shields, sway bar all cleaned, rerusted/neutralized and painted.
-
KRegester
Re: And The Saga Begins
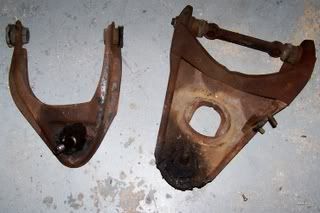
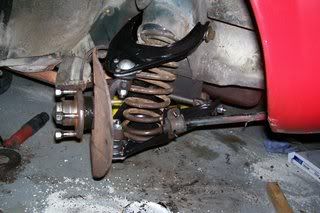
Well after adjusting the position of my external spring compressor a couple of times, I finally got the front passenger spring out. Then it was short work getting the worn out A-Arms out. After 28 years of use they are past ready for recycling.

I checked the shock tower and it looks good on passenger side.
I wirebrushed, painted & undercoated the metal aparts and pondered how to get the spring back in.
I tried but my external compressors are too long and the bolts hit when compressed on either the A-Arm of the shock tower.
I compressed the spring on the bench, put 3 industrial grade tie wraps on the compressed spring like I did on the rear but had to compress them a lot more. I tested it by backing off on the compressors enough to put the full pressure on the tie wraps but still be there to catch if the tie warps failed. They they held like a charm! I smacked the spring a couple of times with a 2x4 to see how secure they were and they still held.
Gently slid the spring in place, put floor jack under the new lower arm and lifted till the tie warps were loose. Cut the tie wraps and all was great.
Installing the shocks and tie rods comes next.
