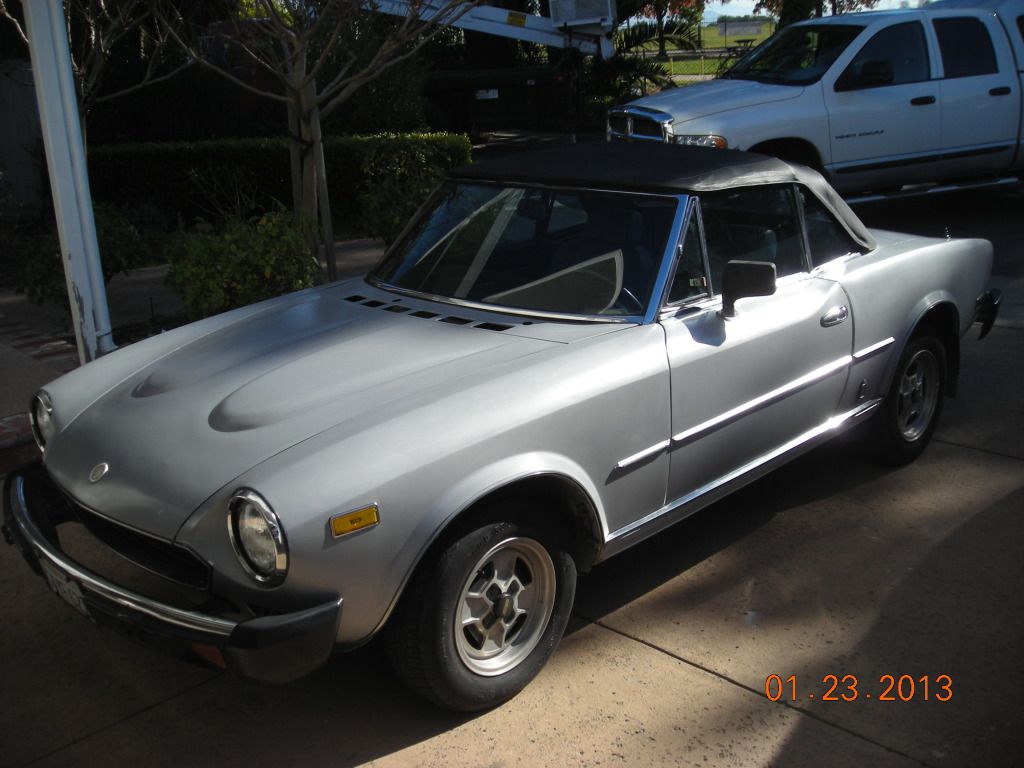
Finally. Wanted a Spider..more details!

General chat about the car goes in here.
Post Reply
wizard124
Posts: 752
Joined: Mon Oct 29, 2012 9:27 pm
Your car is a: 1980 124 spider FI
Location: Sheridan, WY exSan Rafael, CA

Re: Finally. Wanted a Spider..more details!

Post by wizard124 »

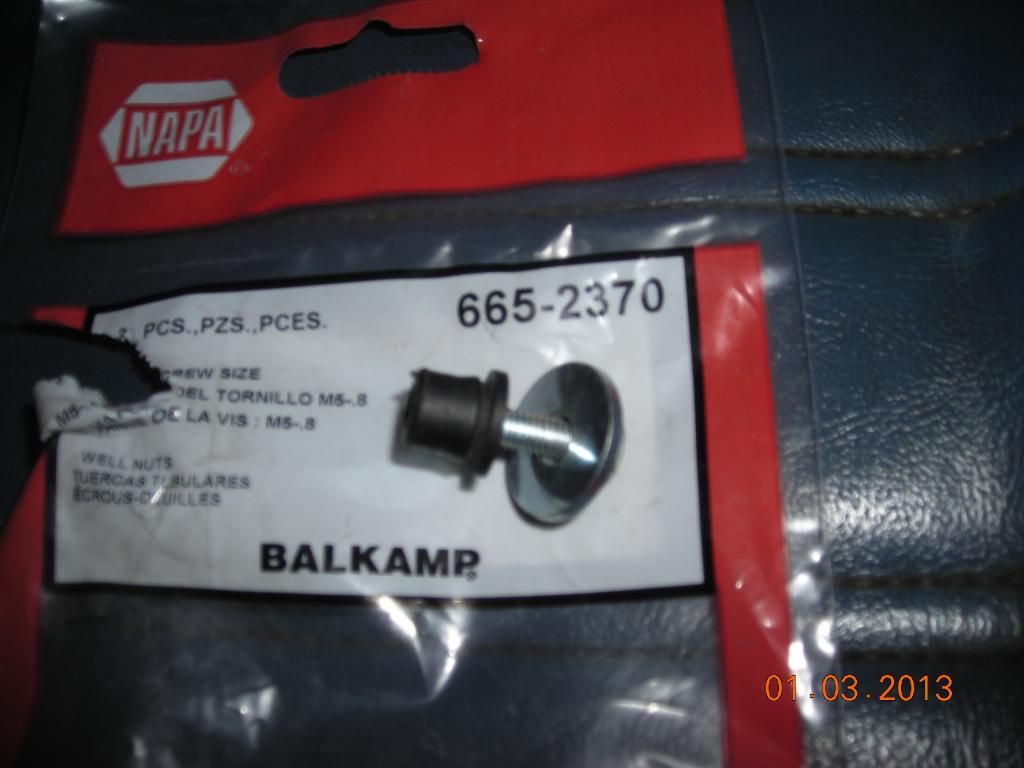
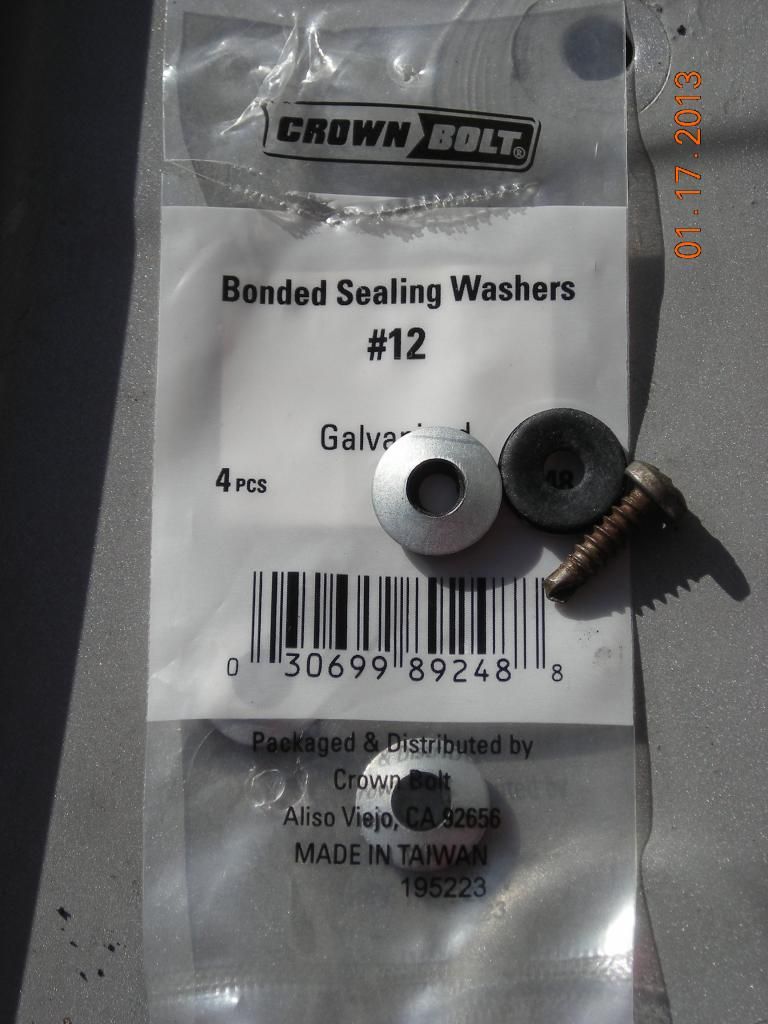
I re-installed the wiper cowling stripped of the wiper and washer fittings and the plastic grate (this had been paint sprayed and needs to be cleaned).At least I can drive it while I work to buff the paint. I found these little gems, which I used instead of the tired rubber washers...they are about 30 cents each. I should have bought #10s.
Image

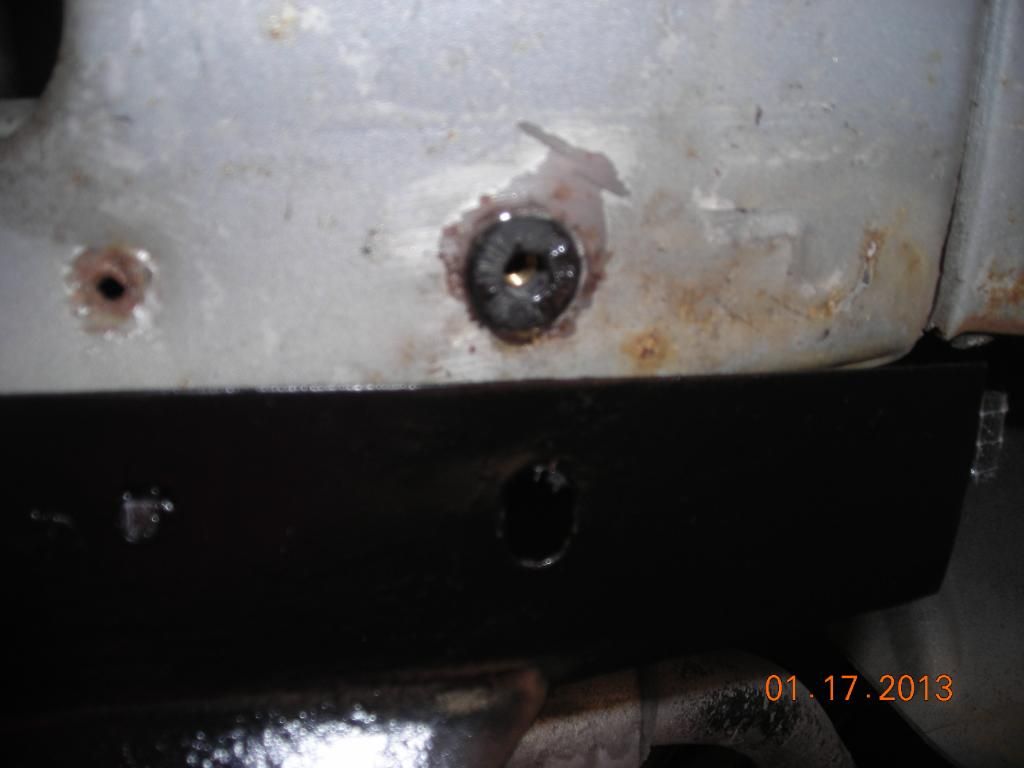
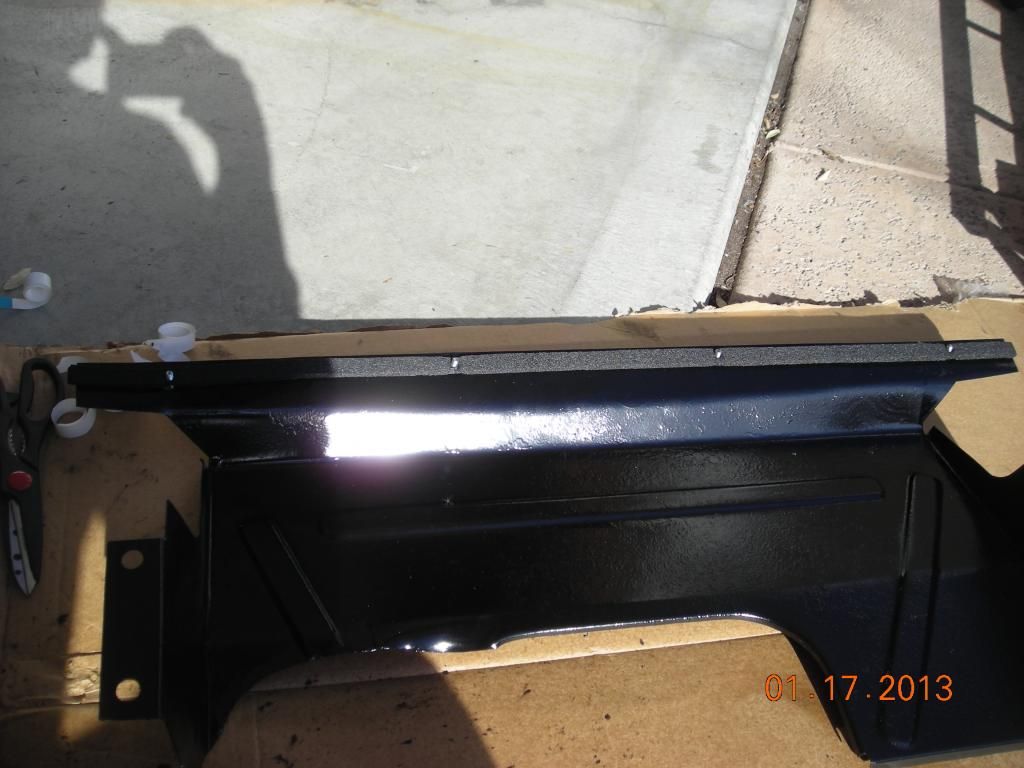
I also re-painted the chin plate using Rustoleum primer and black enamel. I intend to rubber undercoat this at a later date..I am sure I will be removing it again. The front 4 holes were enlarged and stripped. I was able to hammer these holes back flat. drilled them out to 3/8 inch, and used the well nuts shown set in epoxy. Works great! :)
Image

Image

Added some simple weather stripping to the plate to eliminate any rattles.
Image
Last edited by wizard124 on Thu Jan 24, 2013 9:13 pm, edited 1 time in total.
surfingfreeman
Posts: 388
Joined: Sat Jan 16, 2010 10:34 pm
Your car is a: 1982 2000 FI
Location: Burlingame, California

Re: Finally. Wanted a Spider..more details!

Post by surfingfreeman »

Gotta love the dremel........or some such device.
wizard124
Posts: 752
Joined: Mon Oct 29, 2012 9:27 pm
Your car is a: 1980 124 spider FI
Location: Sheridan, WY exSan Rafael, CA

Re: Finally. Wanted a Spider..more details!

Post by wizard124 »

I just want to keep this saga going :lol:

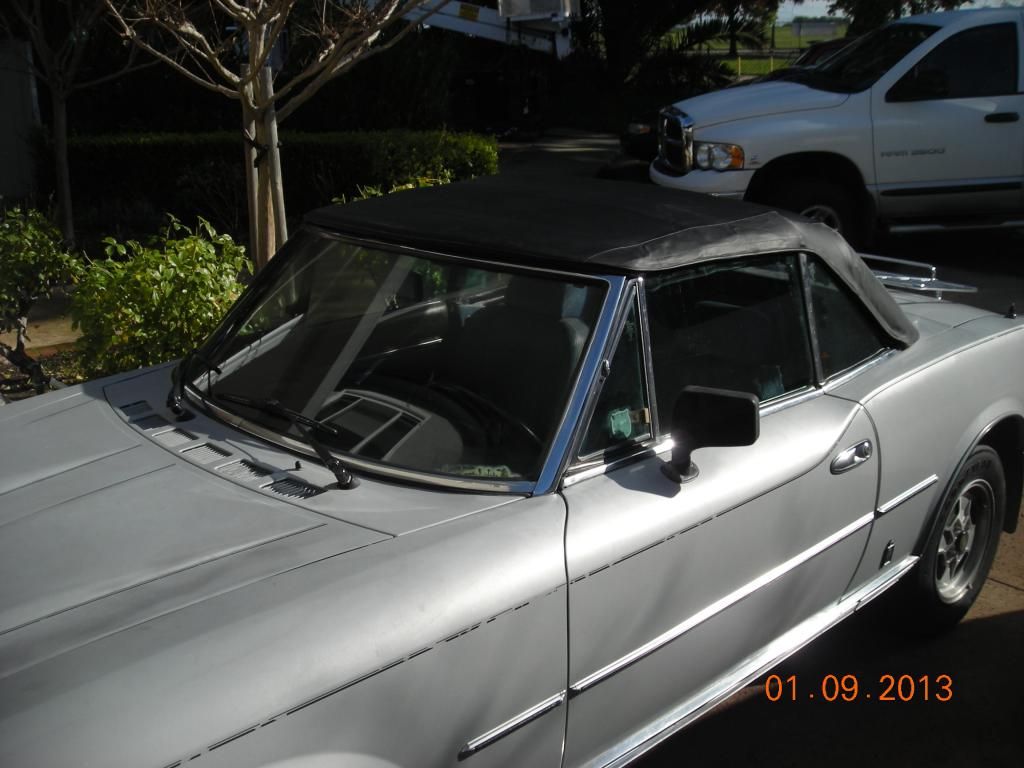
Having some free time this past week, I took to the old oxidized paint. The car was re-painted (poorly) at some point. There is some peeling and the masking and overspray is evident. The pressure washer lines I inherited were just too embarrassing :oops:

I wet sanded the entire car, foam buffed the front end using polishing compound and applied Nu Finish. it looks much better. More work to do...but, the car is starting to turn some heads!
Before:
Image

After:
Image
wizard124
Posts: 752
Joined: Mon Oct 29, 2012 9:27 pm
Your car is a: 1980 124 spider FI
Location: Sheridan, WY exSan Rafael, CA

Re: Finally. Wanted a Spider..more details!

Post by wizard124 »

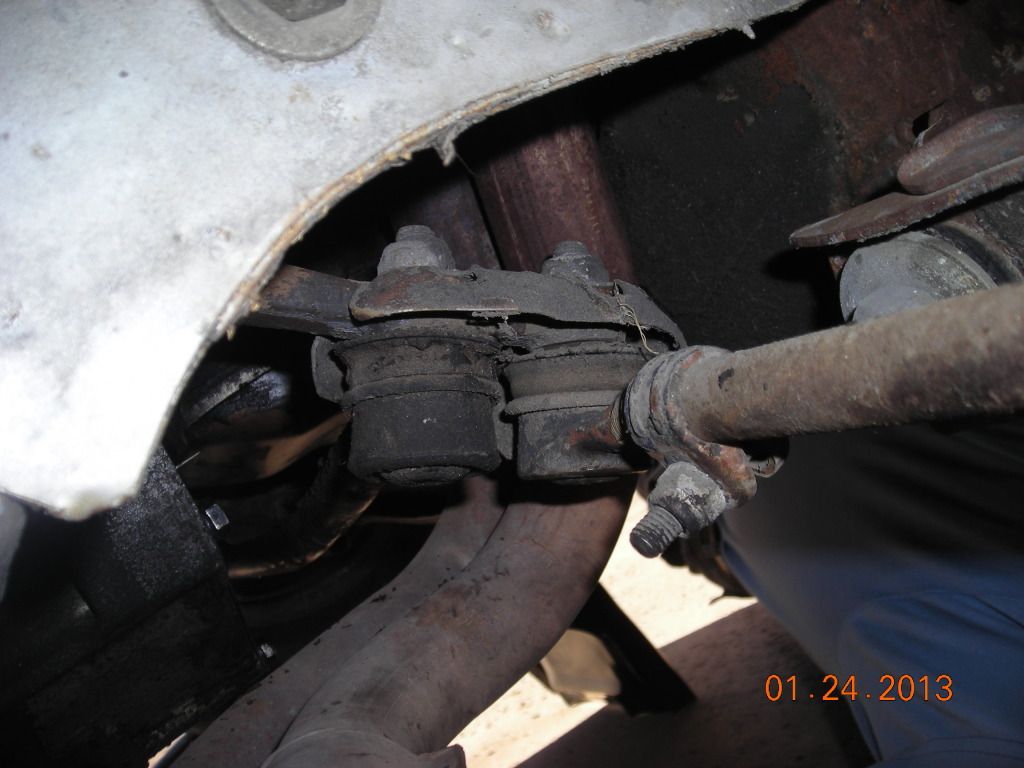
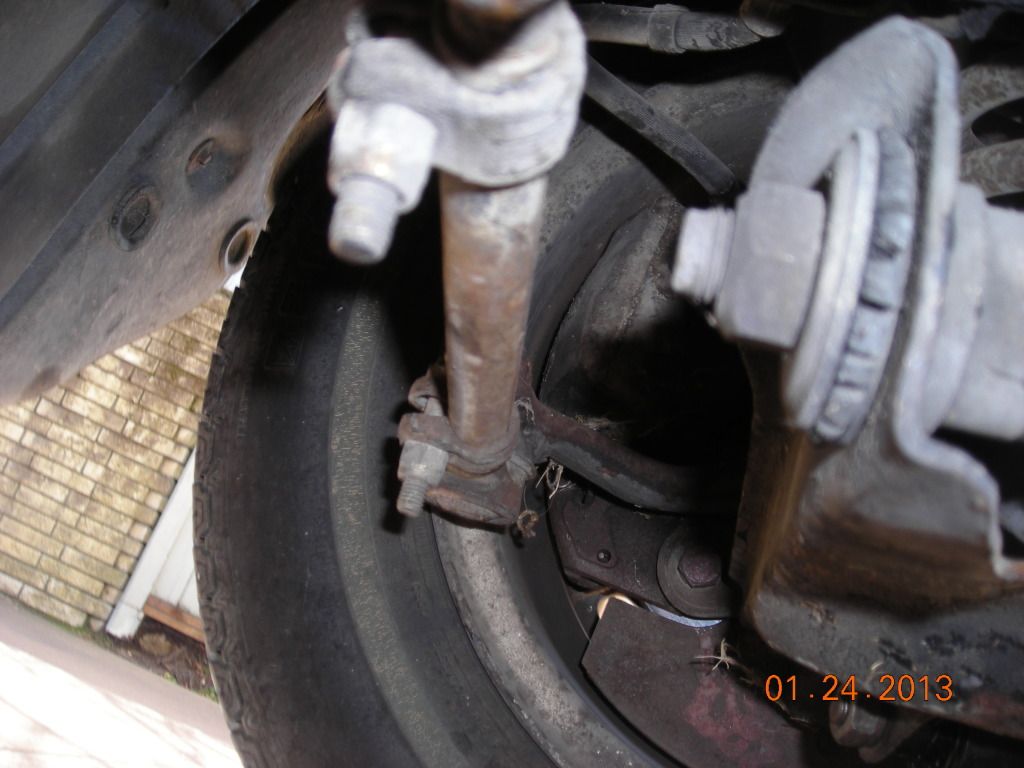
I got around to doing a better inspection of my front end. Suffice it to say that every piece of rubber in the front end is bad...ball joint boots, tie rods, bushings. For sure one of my lower ball joints has play.
Image

Image

Some other threads got my attention, so I checked the idler (dry with sediment) and the steering box (some fluid). I filled with 80-90w EP Valvoline. My thought is to find out if they leak and need replacing. Better to do all the components at once rather than re-visit it later.

For those that have accomplished all this, how tough a job is it :?: I have jack stands and room in the garage and all the tools I think I need (No impact wrench or air tools). I expect it is a b---h to pound the tie rods off while laying on a creeper. Advice needed :!:
nibbes123
Patron 2018
Patron 2018
Posts: 579
Joined: Sat Mar 22, 2008 8:45 am
Your car is a: 1979 Fiat 2000
Location: Mississauga Ontario Canada

Re: Finally. Wanted a Spider..more details!

Post by nibbes123 »

What grit if sand paper did you use to wet sand? also what is foam polish?
Thanks
Nick
wizard124
Posts: 752
Joined: Mon Oct 29, 2012 9:27 pm
Your car is a: 1980 124 spider FI
Location: Sheridan, WY exSan Rafael, CA

Re: Finally. Wanted a Spider..more details!

Post by wizard124 »

nibbes123 wrote:What grit if sand paper did you use to wet sand? also what is foam polish?
Thanks
Nick
I went too heavy with 320 initially. Then jumped to polishing compound and a foam pad on a variable speed buffer. This left some scratches. Better than before but left room for improvement. I did the trunk and sides with 600, then the polish. Better results.

I have buffed my boat's fiberglass but this was my first attempt on an oxidized car. From my learning curve: Let the water run under the car while wet sanding or you will be left with pigment stains on the driveway. You will also need to rinse the car frequently while sanding to judge your progress. I found a slower speed and a very damp applicator worked the polishing compound better. Wipe off the polishing residue frequently and reapply. As soon as it dries, the foam polisher binds and the stuff is harder to wipe clean. Don't be in a hurry.

Others may share their tips/techniques.....
User avatar
SLOSpider
Posts: 1140
Joined: Wed Mar 03, 2010 2:10 am
Your car is a: 1973 124 Spider 2.0FI
Location: Lompoc, Ca USA

Re: Finally. Wanted a Spider..more details!

Post by SLOSpider »

I would start dry sanding with a much finer grade 1000-1500. Its easy to cut through paint with courser grades. Better to take a little off at a time. Watch sanding at body creases, corners and edges as these have less paint and can go straight to metal.
1975 124 Spider
1976 Mazda Cosmo http://www.mazdacosmo.com
1989 Chevy k5 Blazer
1967 GT Mustang Fastback
narfire
Posts: 3959
Joined: Sat Dec 27, 2008 2:14 am
Your car is a: 1980 124 spider
Location: Naramata B.C.

Re: Finally. Wanted a Spider..more details!

Post by narfire »

SLOSpider wrote:I would start dry sanding with a much finer grade 1000-1500. Its easy to cut through paint with courser grades. Better to take a little off at a time. Watch sanding at body creases, corners and edges as these have less paint and can go straight to metal.
Likely your experience , but I watched while surfing the channels the other night and ended up on Speed and Gearz.. He demonstrated exactly what you have said.
Washed the car, wet sand with 2000 grit, think it was 3M brand, little bits at a time,very carefull around edges and curves/corners. Used a flat block, not with hands and fingers.
He used cut compound next ( fine) and a soft foam pad at slower rpm. Cut wax was squirted onto sanded surface(damp) and foam pad was damp as it will heat up and cut through the paint quickly if not careful.Keep pad damp. Wiped down and then a quality wax applied after that.
80 FI spider
72 work in progress
2017 Golf R ( APR Stg. 1)
2018 F350 crew long box
wizard124
Posts: 752
Joined: Mon Oct 29, 2012 9:27 pm
Your car is a: 1980 124 spider FI
Location: Sheridan, WY exSan Rafael, CA

Re: Finally. Wanted a Spider..more details!

Post by wizard124 »

I decided to have a look at the heater valve. It has evidence of some leaking in the past but doesn't seem to leak now. Well in taking some pliers to the stem, I ended breaking the valve off.. So, into the next adventure :shock:

Not only was the valve frozen, but the tube into the core was completely plugged! I removed the long pipe and observed fresh coolant running into the console area. This leads me to believe my heater core is functional and leak free :D

I removed the center console and decided to troubleshoot the inoperative fan. After wiggling the switch, the fan runs in low and high....but with some squeaking. I am guessing at this point it has some bad bearings. The switch is faulty also and there is no "off" position.

I need some instruction :?: I see there are 4 clips that allow the lower box to drop out (I haven't tried this yet). Once this is out of the way, does this allow removal of the fan and core also? Or, do you remove the entire plastic assembly?
Warren
rodman

Re: Finally. Wanted a Spider..more details!

Post by rodman »

Take the dash out everything will be a lot easier to get too..
wizard124
Posts: 752
Joined: Mon Oct 29, 2012 9:27 pm
Your car is a: 1980 124 spider FI
Location: Sheridan, WY exSan Rafael, CA

Re: Finally. Wanted a Spider..more details!

Post by wizard124 »

rodman wrote:Take the dash out everything will be a lot easier to get too..
Yikes, I am trying to stage my work on this car. If I pull the dash, I might as well replace it!. I don't think my center console and middle piece are spider pieces...so replace those too? Then the carpet,,,,,the door panels,,,,etc. :roll:

My immediate goal is to cherry the mechanicals. I intend to change the bushings and ball joints in the front end. Then, the body, paint and bumpers. Finally, work on the interior.

I used a barb connector so the heater hoses are now connected. I could easily, at this point, put off the heater/fan fixes, and keep the car drivable. My plan is to strip the lights, trim, windscreen, bumpers, etc to ready the car for new paint. Wouldn't it be a better plan, if I replaced the dash, fan, and core at that time? Then work on interior as the last stage? Except for a bad 4th syncro, I have no other need to pull the engine/trans at this time that I know of.
I am trying to be as time/effort efficient as possible. Advice is welcome :!:
rodman

Re: Finally. Wanted a Spider..more details!

Post by rodman »

wizard124 wrote:
rodman wrote:Take the dash out everything will be a lot easier to get too..
Yikes, I am trying to stage my work on this car. If I pull the dash, I might as well replace it!. I don't think my center console and middle piece are spider pieces...so replace those too? Then the carpet,,,,,the door panels,,,,etc. :roll:

My immediate goal is to cherry the mechanicals. I intend to change the bushings and ball joints in the front end. Then, the body, paint and bumpers. Finally, work on the interior.

I used a barb connector so the heater hoses are now connected. I could easily, at this point, put off the heater/fan fixes, and keep the car drivable. My plan is to strip the lights, trim, windscreen, bumpers, etc to ready the car for new paint. Wouldn't it be a better plan, if I replaced the dash, fan, and core at that time? Then work on interior as the last stage? Except for a bad 4th syncro, I have no other need to pull the engine/trans at this time that I know of.
I am trying to be as time/effort efficient as possible. Advice is welcome :!:
It seems a lot of people are having issues with the 4th syncro....
redcars
Patron 2020
Patron 2020
Posts: 487
Joined: Sat Jul 31, 2010 9:36 pm
Your car is a: 1981 Spider 2000
Location: Collinsville, IL

Re: Finally. Wanted a Spider..more details!

Post by redcars »

4th gear is seldome just the syncro. When you get the trany apart look at forth gear and the syncro ring close, as these will most likly need to be repaced.
1987 Lotus Super 7 clone
1981 Fiat Spider 2000 AT
1982 Fiat Spider 2000 5sd
1970 Fiat Coupe
wizard124
Posts: 752
Joined: Mon Oct 29, 2012 9:27 pm
Your car is a: 1980 124 spider FI
Location: Sheridan, WY exSan Rafael, CA

Re: Finally. Wanted a Spider..more details!

Post by wizard124 »

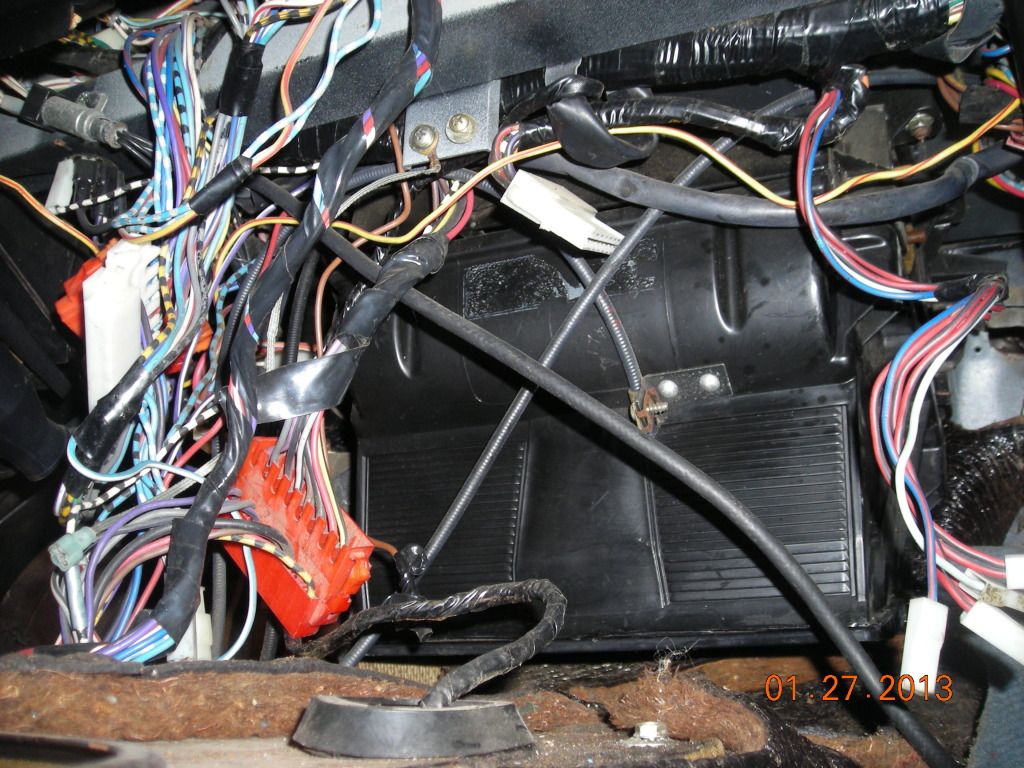
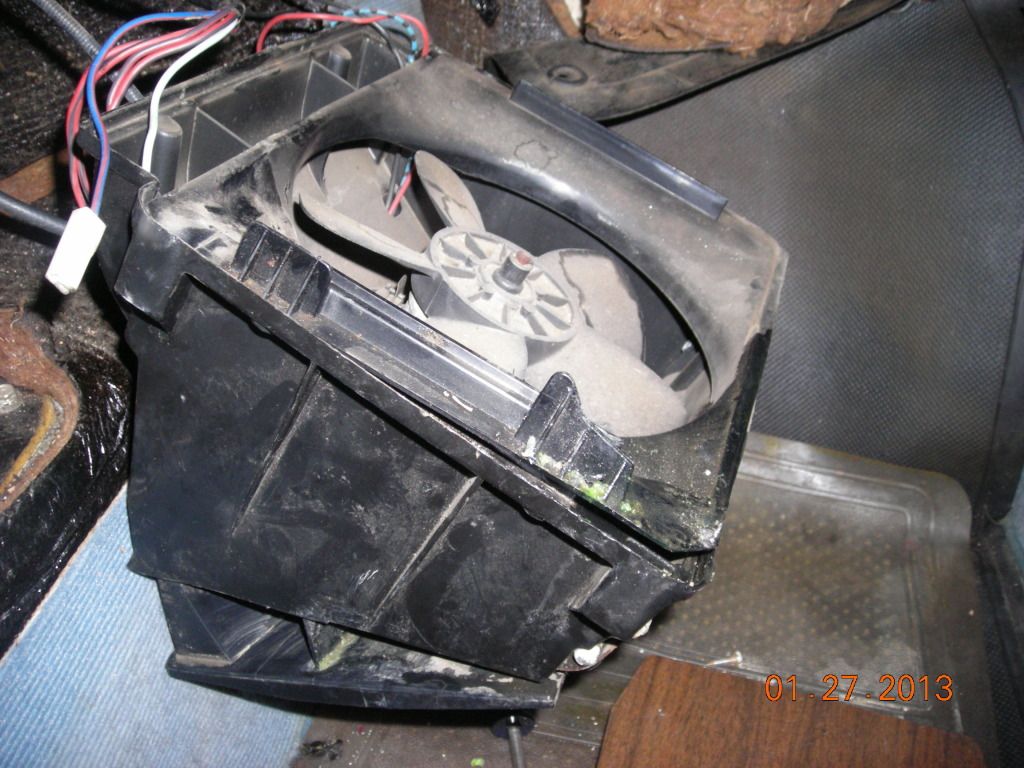
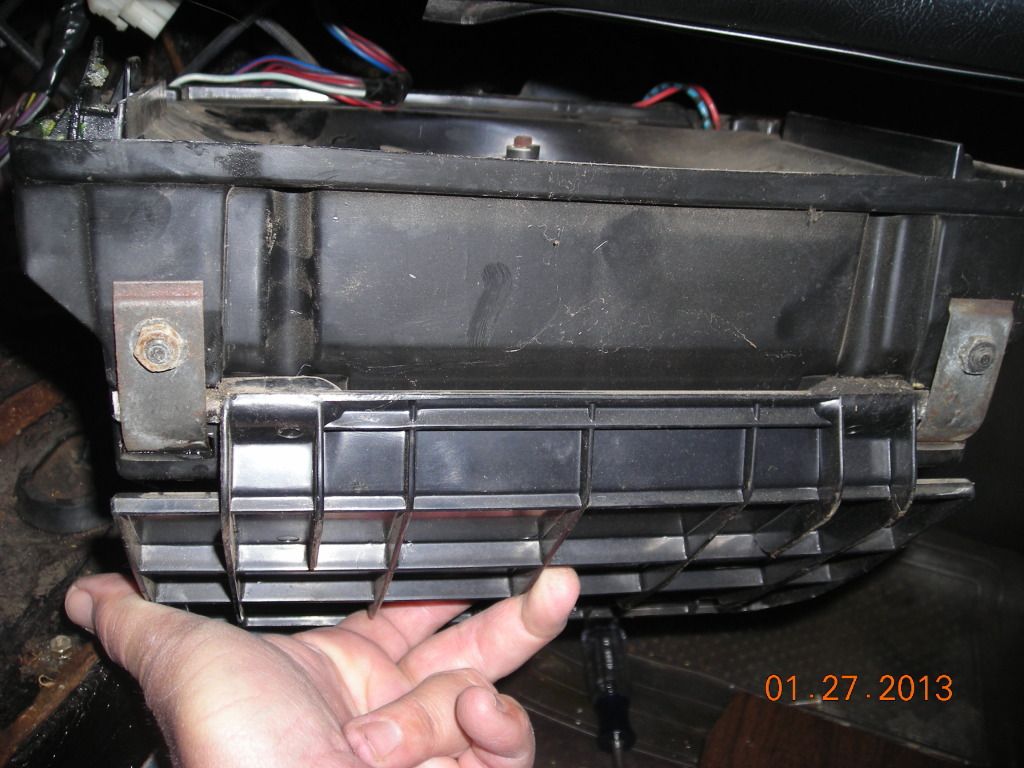
I took the next step..that is dropping the heater box. After I moved the wiring mess off to one side:
Image

Image

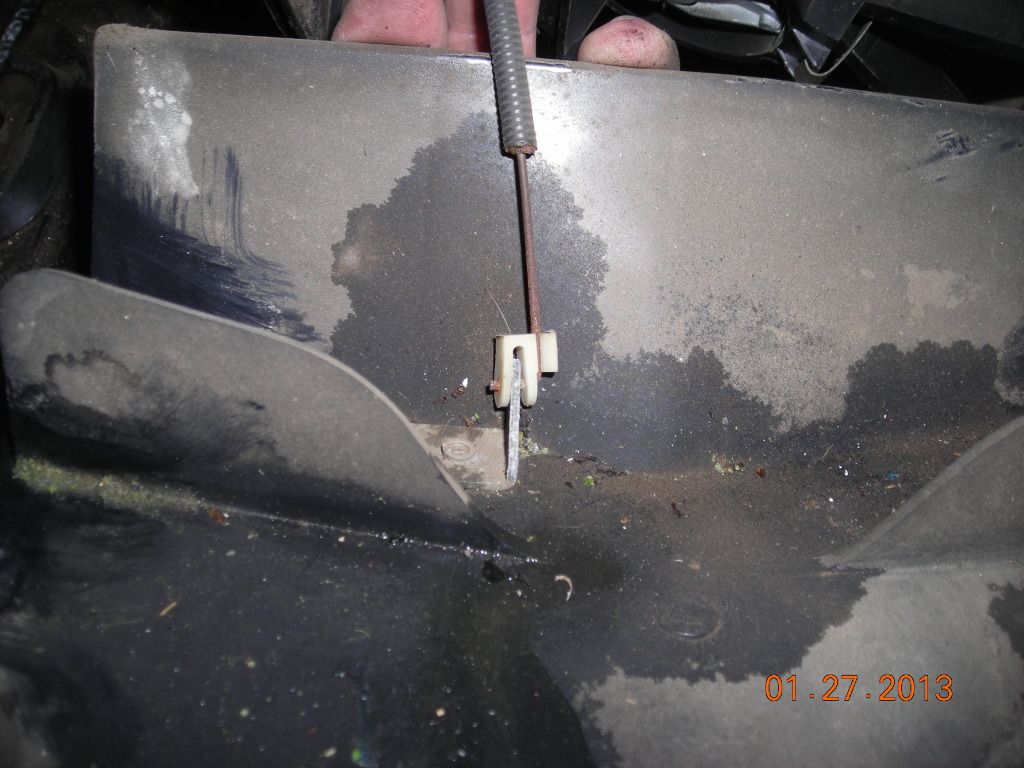
It was pretty easy. I hope it all goes back in as well. Removing the hinges on the lower flap allows access to the retaining pin holding the cable end. Once this is separated, the box and motor can be pulled from the car.:
Image
Image

I dis-assembled the fan motor, cleaned and lubed the bushings with lithium grease. Runs great..no more squeaks :)

I dropped the heater core. There was some crud visible. Flushing with a garden hose removed a good bit of stuff, but i could see there was more residue. I needed to try something more. I ended up using "Simple Green/ Lime Scale remover". This comes in a spray bottle. CLR warns not to use on brass/aluminum...this product does not state this limitation. I figured it must be gentler and it has a different active ingredient. I used it straight out of the bottle and let it soak for 5 minutes, flushed and repeated a second time (used the entire contents). Some ugly blackish water/cleaner flushed out so it must have had some effect. No leaks so it is ready to go back in. :)
AFSTmember

Re: Finally. Wanted a Spider..more details!

Post by AFSTmember »

Hello Everyone, son of a former dealer here, I will be posting a pic of my Spider soon. Just an FYI, I have the factory repair manual for the Spider (complete) if someone needs a hand I'm sure I can help, back soon with the pic.


http://s1325.beta.photobucket.com/user/ ... sort=3&o=0
Post Reply