Finally. Wanted a Spider..more details!
-
- Posts: 752
- Joined: Mon Oct 29, 2012 9:27 pm
- Your car is a: 1980 124 spider FI
- Location: Sheridan, WY exSan Rafael, CA
Re: Finally. Wanted a Spider..more details!
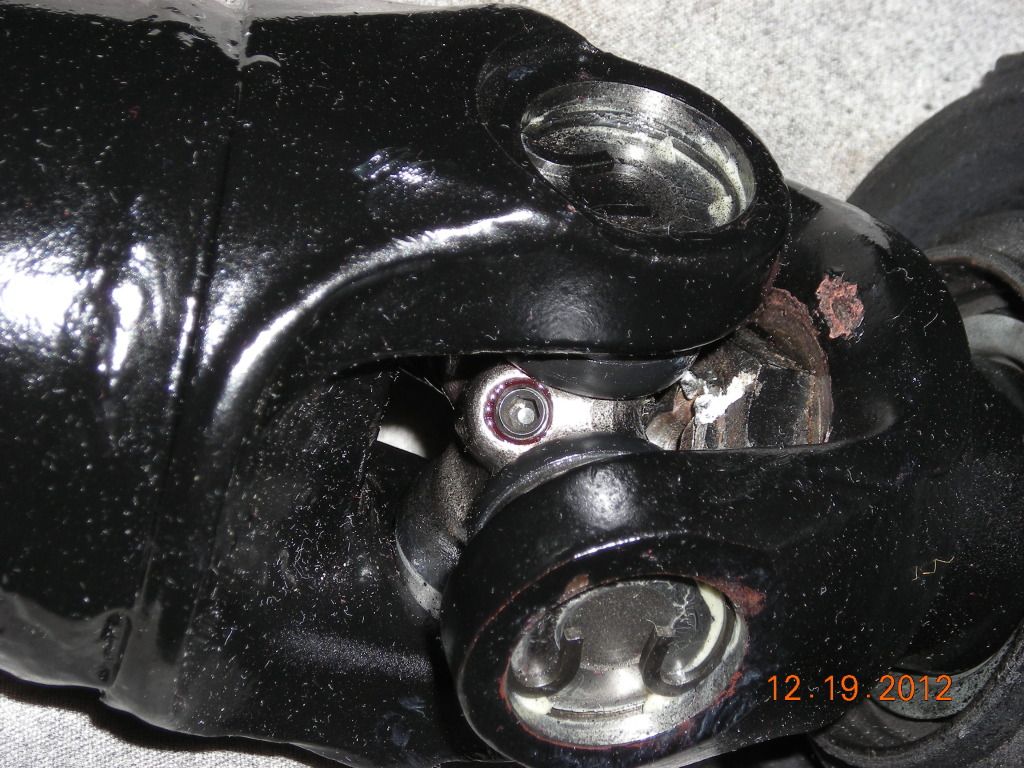
I put the drive shaft back together, having marked the original alignment of each piece including the back differential flange, both drive sections, the guibo mount, and the u-joint housing (which sides off the forward drive section). I learned the hard way a long ago when replacing a u-joint on my '71 Coupe that these drives are balanced and need to be put back exactly the same.
In my youth, I just beat on the caps to seat the u-joint. This time around, I applied some Lithium grease and used a C-clamp to press one cap until the retainer clip would seat and then turn the clamp around and do the other side. Very controlled.
I soon discovered that the long zirt fittings are prone to breaking. So, after applying grease to each u-joint, I removed the zirt and used a small allen screw and red threadlock to seal it.
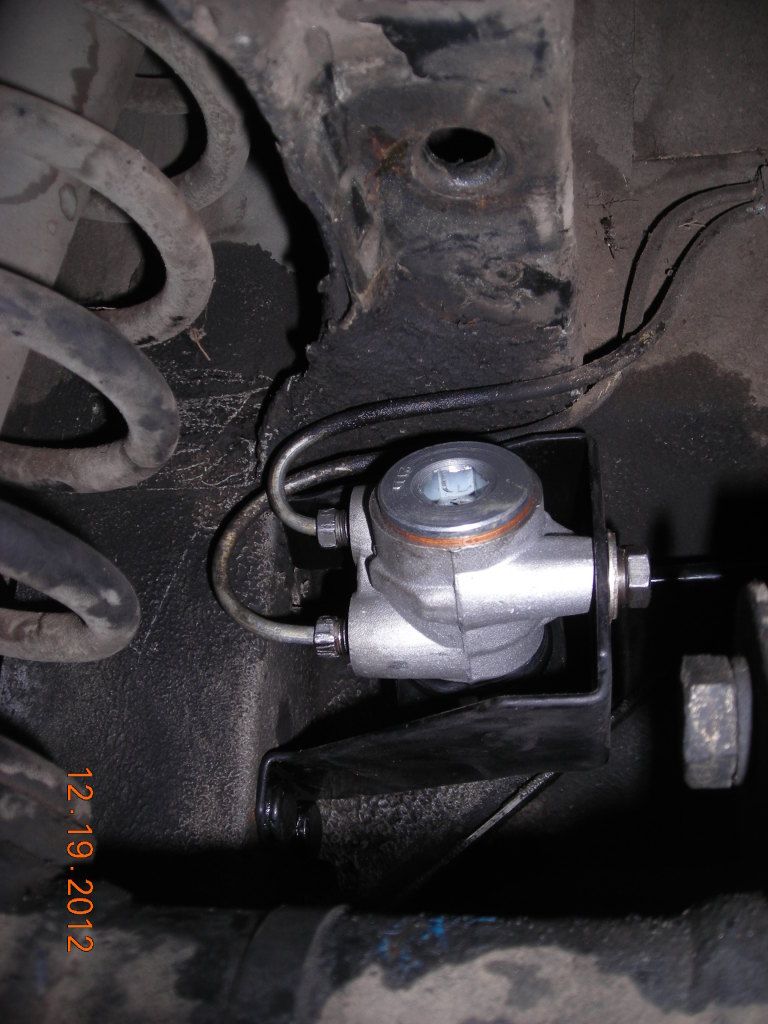
I got a bit confused bolting in the new brake compensator. I had taken photos before disassembly but initially I had the compensator 180 degrees out when I first mounted it into its housing. I secured the rubber boot with a zip tie. Re-assembled it as one unit with the compensator, housing, rod, and linkage. Slipped it past the loosened rear muffler and aligned it next to the 2 loose brake lines. Do the brake flare fittings first with the compensator still loose which makes the alignment and threading of the fittings easier. Once the housing is bolted tight to the frame, then tighten down the brake lines.
I went to Sears and bought a vacuum pump brake bleeder with the expectation that bleeding the rears would be a solo effort...wrong! Well, maybe if you had 3 or 4 hands. The vinyl hose around the brake nipple would leak air rather than suck fluid from the line. The hose to the pump came kinked from the way it was packaged and liked to pull the tube off the fitting and it was too large in diameter to fit tightly on the nipple...but they include a smaller diameter tube and a connection... which likes to pull apart once it is lubricated with brake fluid . So count them...4 hands......one to pump, one to work the bleeder wrench, one to hold together the connection, and one to secure the tube to the nipple. : And, the bleeder is in a position where you are basically working blind. What a mess. I waited until the boys got home from school and bled them the old fashioned way! We pumped a lot of old dirty fluid through the system
I put the drive shaft back in this afternoon. I had noticed that the pillow block had been bolted crooked to the mounting bracket. I thought it may be a good idea to let the drive find its own center. With the car still up on stands, I ran the car in 5th gear. With it still turning, I went back underneath where I loosened the 2 pillow block bolts to let it self-align and re-tightened. Thoughts on this? Is there a preferred procedure for this
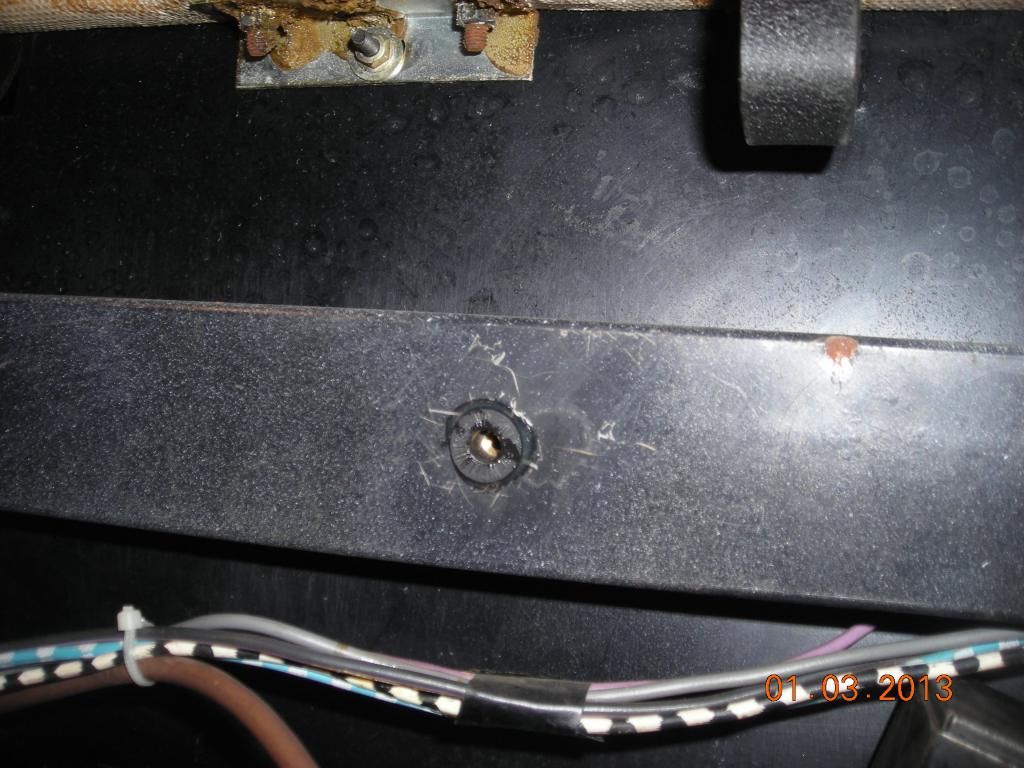
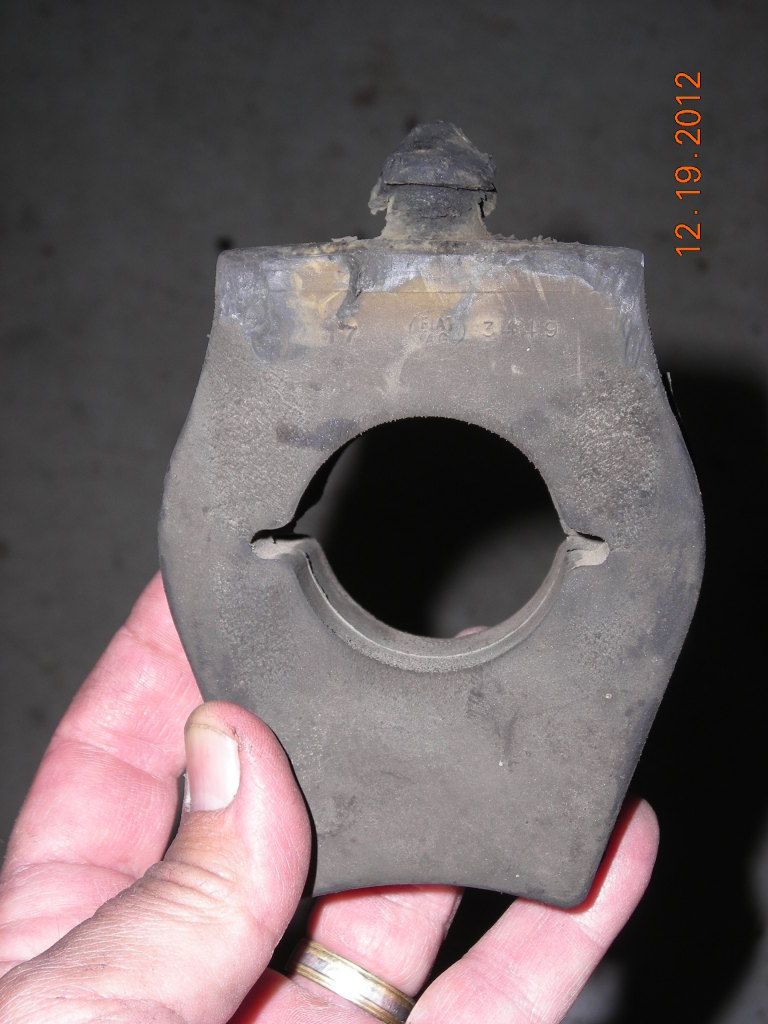
One issue I have is ...How do you re-install the rubber axle bumper In the above picture you can see the hole where it goes. But how do you work the flare end into the hole? A special tool? A sleeve of some kind? Please enlighten me
Bled the fronts. Took it for a short test drive. No drive vibrations that I could feel....a job well done (if I do say so myself).
More work ahead......I noticed both front brake lines are cracked, every rubber boot in the front suspension is shot, bushings are all split. Yikes My KYBs are being shipped. I want to put some miles on it before I tackle a major job. My inclination is to wait on the shocks until I am ready to do the front end. But the ride is so harsh now, I need to install the shocks. Thoughts? Advice?
Warren
In my youth, I just beat on the caps to seat the u-joint. This time around, I applied some Lithium grease and used a C-clamp to press one cap until the retainer clip would seat and then turn the clamp around and do the other side. Very controlled.
I soon discovered that the long zirt fittings are prone to breaking. So, after applying grease to each u-joint, I removed the zirt and used a small allen screw and red threadlock to seal it.
I got a bit confused bolting in the new brake compensator. I had taken photos before disassembly but initially I had the compensator 180 degrees out when I first mounted it into its housing. I secured the rubber boot with a zip tie. Re-assembled it as one unit with the compensator, housing, rod, and linkage. Slipped it past the loosened rear muffler and aligned it next to the 2 loose brake lines. Do the brake flare fittings first with the compensator still loose which makes the alignment and threading of the fittings easier. Once the housing is bolted tight to the frame, then tighten down the brake lines.
I went to Sears and bought a vacuum pump brake bleeder with the expectation that bleeding the rears would be a solo effort...wrong! Well, maybe if you had 3 or 4 hands. The vinyl hose around the brake nipple would leak air rather than suck fluid from the line. The hose to the pump came kinked from the way it was packaged and liked to pull the tube off the fitting and it was too large in diameter to fit tightly on the nipple...but they include a smaller diameter tube and a connection... which likes to pull apart once it is lubricated with brake fluid . So count them...4 hands......one to pump, one to work the bleeder wrench, one to hold together the connection, and one to secure the tube to the nipple. : And, the bleeder is in a position where you are basically working blind. What a mess. I waited until the boys got home from school and bled them the old fashioned way! We pumped a lot of old dirty fluid through the system
I put the drive shaft back in this afternoon. I had noticed that the pillow block had been bolted crooked to the mounting bracket. I thought it may be a good idea to let the drive find its own center. With the car still up on stands, I ran the car in 5th gear. With it still turning, I went back underneath where I loosened the 2 pillow block bolts to let it self-align and re-tightened. Thoughts on this? Is there a preferred procedure for this
One issue I have is ...How do you re-install the rubber axle bumper In the above picture you can see the hole where it goes. But how do you work the flare end into the hole? A special tool? A sleeve of some kind? Please enlighten me
Bled the fronts. Took it for a short test drive. No drive vibrations that I could feel....a job well done (if I do say so myself).
More work ahead......I noticed both front brake lines are cracked, every rubber boot in the front suspension is shot, bushings are all split. Yikes My KYBs are being shipped. I want to put some miles on it before I tackle a major job. My inclination is to wait on the shocks until I am ready to do the front end. But the ride is so harsh now, I need to install the shocks. Thoughts? Advice?
Warren
'80 spider FI, SnugTop hardtop
http://s940.photobucket.com/user/a7ewiz ... t=3&page=1
-
- Patron 2020
- Posts: 487
- Joined: Sat Jul 31, 2010 9:36 pm
- Your car is a: 1981 Spider 2000
- Location: Collinsville, IL
Re: Finally. Wanted a Spider..more details!
The front shocks are not that bad of a job. The top bolts are a little hard to get to, but the bottoms are a piece of cake. I would go ahead a change them now. When you do your front end rebuild you only have to take them loose on the bottom and leave them in place.
1987 Lotus Super 7 clone
1981 Fiat Spider 2000 AT
1982 Fiat Spider 2000 5sd
1970 Fiat Coupe
1981 Fiat Spider 2000 AT
1982 Fiat Spider 2000 5sd
1970 Fiat Coupe
-
- Posts: 3959
- Joined: Sat Dec 27, 2008 2:14 am
- Your car is a: 1980 124 spider
- Location: Naramata B.C.
Re: Finally. Wanted a Spider..more details!
For the axle stops, I put a bit of think it was marge or something like that on the end. With some fiddling, like most things on this car, it eventually seated.
80 FI spider
72 work in progress
2017 Golf R ( APR Stg. 1)
2018 F350 crew long box
72 work in progress
2017 Golf R ( APR Stg. 1)
2018 F350 crew long box
-
- Patron 2020
- Posts: 487
- Joined: Sat Jul 31, 2010 9:36 pm
- Your car is a: 1981 Spider 2000
- Location: Collinsville, IL
Re: Finally. Wanted a Spider..more details!
The problem with using a vacum pump to bleed bakes is that they suck are from around the bleed screw threads. I never found a way to stop it and with it sucking in air there you can not tell when you have the air out of the brake lines. I made an air coupling on an old brake resevoir cap and put 5PSI on it to bleed the brakes. you just have to be careful not to let the fluid get low.
1987 Lotus Super 7 clone
1981 Fiat Spider 2000 AT
1982 Fiat Spider 2000 5sd
1970 Fiat Coupe
1981 Fiat Spider 2000 AT
1982 Fiat Spider 2000 5sd
1970 Fiat Coupe
-
- Posts: 752
- Joined: Mon Oct 29, 2012 9:27 pm
- Your car is a: 1980 124 spider FI
- Location: Sheridan, WY exSan Rafael, CA
Finally, ,,,Pink Slip
She finally belongs to me
Mine was not the ideal way to buy a car! I have to confess to some anxiety and sleepless nights. Here is the story:
I responded to a Craigslist ad and went to check it out. After a test drive (problems noted in thread), and seeing the cache of parts included, I stated I would buy the car if it passed a California smog test.
Problem was the seller had never registered the car after obtaining it from the Original Owner, whom he had known for many years. This seller had put some effort to get the car running but his daughter didn't want the car so he was unloading it and didn't want to go through the expense of title. Well the engine is strong so I agreed to buy it.......feeling that with some time and money I could get it to pass smog. I load it on a trailer and its in my garage the next day. BTW, the new owner section of the title has not been filled in so registration should be easy once it is smogged
After many trips to the smog place and a new catalytic converter, my mechanic gets the car to pass. $600 About a month has gone by since I doled out the cash, so i am actually happy to have this smog hassle behind me and know I haven't pissed away my purchase dollars
Then comes queasy stomach number two I discover the OO had not endorsed the pink slip properly. He had signed in the release of Leinholder line and not as seller The DMV says it a no go I end up mailing the Title back to the seller so he can return it to the OO. More weeks go by...more anxiety and sleep loss Is this transaction going to go through Is the OO really still around The seller seems like a decent guy, I was at his house, met the family....Have I been conned
Finally, Wednesday, the endorsed Title arrived in the mail. I shoot down to DMV, wait my obligatory hour in line, pay $230 in fees (car had been non-operational since 2001. The clerk didn't ask if I had driven it to get it smogged. ), and walk out of there with plates in hand.
'80 spider FI, SnugTop hardtop
http://s940.photobucket.com/user/a7ewiz ... t=3&page=1
Re: Finally. Wanted a Spider..more details!
Great, you're on your way now. Don't worry there will be more bumps down the road, but you'll have a lot of fun.
-
- Posts: 752
- Joined: Mon Oct 29, 2012 9:27 pm
- Your car is a: 1980 124 spider FI
- Location: Sheridan, WY exSan Rafael, CA
Re: Finally. Wanted a Spider..more details!
With Title and insurance, and clear skies, I took the car out to run various errands today.
First run was to the hardware store to purchase hardware to hold down the hardtop. I found some 3 inch x 5/16 J hooks, while not pretty, seem to work well. This car with its old shocks rides like a go cart and has many assorted rattles and squeaks.
Do the folded frames of the convertible top rattle? The thump of the hardtop bouncing has been cured but there is more behind me making noises.
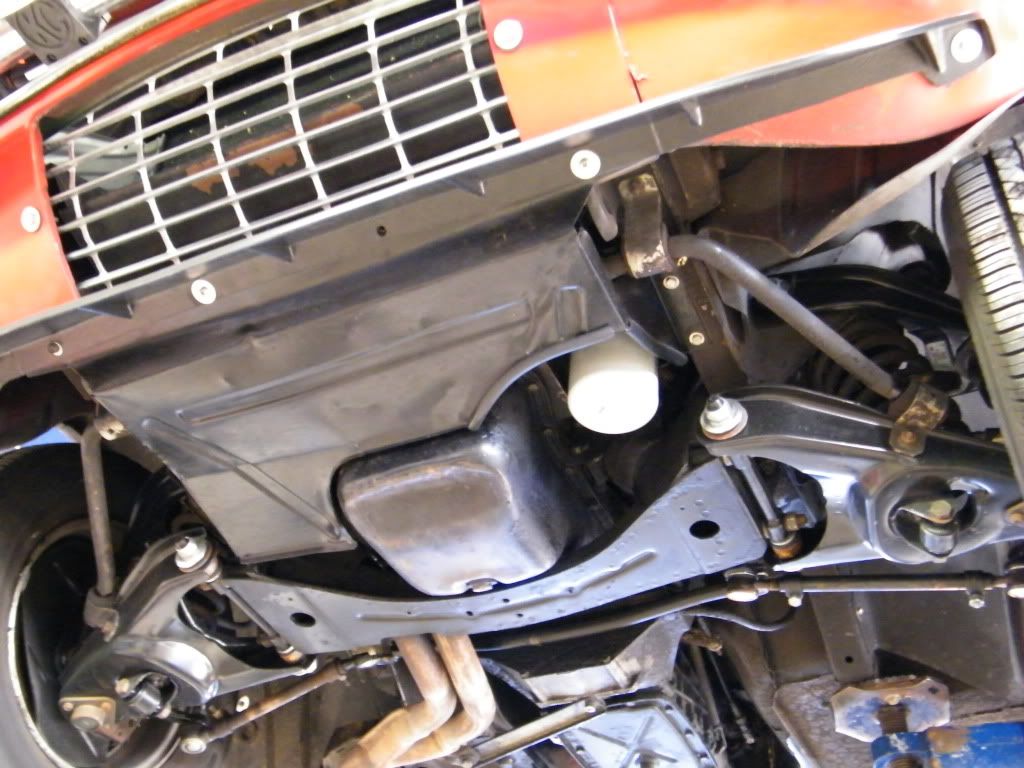
My car has a protective plate under the radiator which frames around the oil pan and bolts to the frame. This plate is missing most of its front sheet metal screws. Being only secured with 1 screw in front, it was a source of an annoying rattle. Once I removed it, I found the engine side to be a peeling greasy mess and the underside pretty rusty. Do most owners keep this? My thought is to clean it, spray a couple of coats of primer and then hit it with underseal on both sides. It looks like most of the body panel holes along that front edge have been enlarged and stripped out. There must be a fastener or self-securing nut that one could use which would be a better solution than a sheet metal screw......
I mentioned earlier my turn signals and hazards don't work. I removed that center dash panel and found the connector loose from the hazard switch. (another PO poor repair effort...)Once I plugged it back in, the hazards started to flash. Nice,, when something broken turns out to be a simple fix! I separated that switch using a linoleum knife. I used some needle nose pliers to bend down the locking lever, cleaned the contacts , and re-assembled it. Fixed
Funny how one thing leads to another I had a blinker not working. Removed the panel, found corrosion in the light sockets, dremel brushed each , noticed dirt on the insides of the light lenses, removed, soaking in the work sink, then the other side, repeat
My KYB shocks came today. I'm going to take Redcars advice and install them now rather than wait and include them with a suspension re-build.
'80 spider FI, SnugTop hardtop
http://s940.photobucket.com/user/a7ewiz ... t=3&page=1
- RRoller123
- Patron 2020
- Posts: 8179
- Joined: Sun Nov 13, 2011 2:04 pm
- Your car is a: 1980 FI SPIDER 2000
- Location: SAGAMORE BEACH, MA USA
Re: Finally. Wanted a Spider..more details!
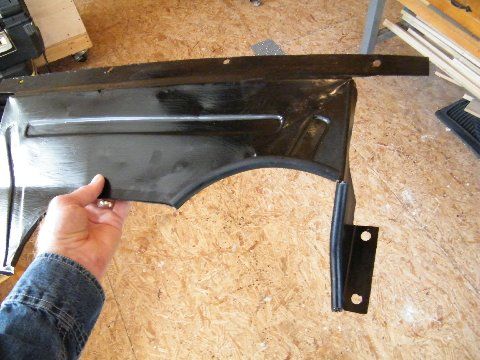
The general consensus is that these are useful for keeping splashes off the engine in wet weather, keeping rocks and such from interfering with the timing belt, and it assists in proper airflow around the engine, so it should stay on. You are lucky to have it, as it is uncommon to have one on these cars! They usually seem to have been discarded long ago by POs. I have one on mine, and found that it interfers with getting at the oil filter, so I cut a portion away as in the pic below, lined it with fuel line split lengthwise to cover the resultant sharp edges, and refastened it all around.
Here it is installed:
Last edited by RRoller123 on Thu Jan 03, 2013 11:45 am, edited 2 times in total.
'80 FI Spider 2000
'74 and '79 X1/9 (past)
'75 BMW R75/6
2011 Chevy Malibu (daily driver)
2010 Chevy Silverado 2500HD Ext Cab 4WD/STD BED
2002 Edgewater 175CC 80HP 4-Stroke Yamaha
2003 Jaguar XK8
2003 Jaguar XKR
2021 Jayco 22RB
2019 Bianchi Torino Bicycle
'74 and '79 X1/9 (past)
'75 BMW R75/6
2011 Chevy Malibu (daily driver)
2010 Chevy Silverado 2500HD Ext Cab 4WD/STD BED
2002 Edgewater 175CC 80HP 4-Stroke Yamaha
2003 Jaguar XK8
2003 Jaguar XKR
2021 Jayco 22RB
2019 Bianchi Torino Bicycle
-
- Posts: 752
- Joined: Mon Oct 29, 2012 9:27 pm
- Your car is a: 1980 124 spider FI
- Location: Sheridan, WY exSan Rafael, CA
Re: Finally. Wanted a Spider..more details!
I did various things to the car today.....
I installed KYB Excel shocks. Not too difficult, thanks to the advice available on here.. Huge improvement in ride as the originals were shot.....lost the go-cart stiff ride.
Cleaned up the tail lights and reinstalled. One note. I tried to remove the lenses from the plastic housing but found they must be glued. So, I quit before I broke them.
I used an exacto knife to pry and scrape the chrome plating off the center dash trim piece. Re-painting in black. This should be installed in the next couple of days.
The car is finally getting ready to be driven on a daily basis.....but not in the rain!
Warren
'80 spider FI, SnugTop hardtop
http://s940.photobucket.com/user/a7ewiz ... t=3&page=1
-
- Posts: 752
- Joined: Mon Oct 29, 2012 9:27 pm
- Your car is a: 1980 124 spider FI
- Location: Sheridan, WY exSan Rafael, CA
Re: Finally. Wanted a Spider..more details!
Good news was this car passed smog a few weeks ago. Bad news was it seemed to hesitate on accelerations and not have the performance it had prior to my mechanics' adjustments. Also, poor running when cold and high idle once fully warmed up!
I decided to poke around under the hood. I have the Fiat FI diagnostic manual for reference. I found the idle speed adjustment screw backed nearly full out...to the point where it could have vibrated and fallen out. . I screwed this tight, re-set the accelerator linkage stop screw then backed the air screw out (about 1/2 turn)to get a 900 rpm warm idle speed. Hooked up my timing light and found only about 5 degrees of advance. Re-set to 10 BTDC and re-set the idle speed. Engine revs much more smoothly now and more pep on the road. I'll find out tomorrow if the cold starting works any better. My mechanic told me that the auxiliary air regulator on the Bosch systems are trouble prone ....and were removed on later Bosch systems.
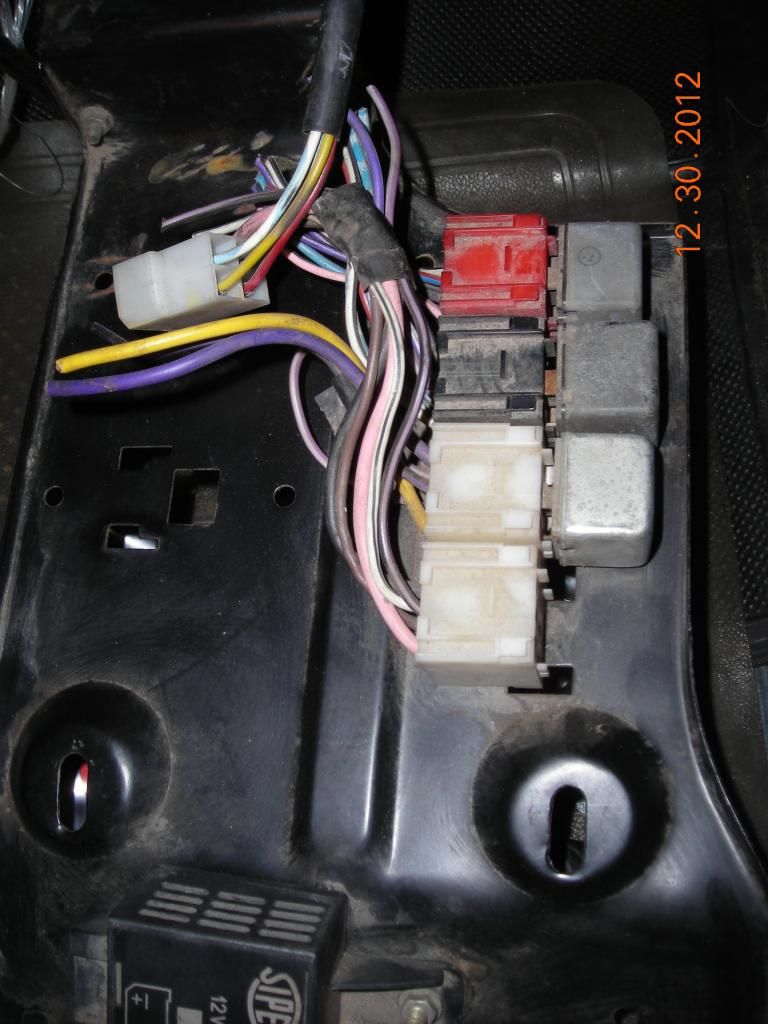
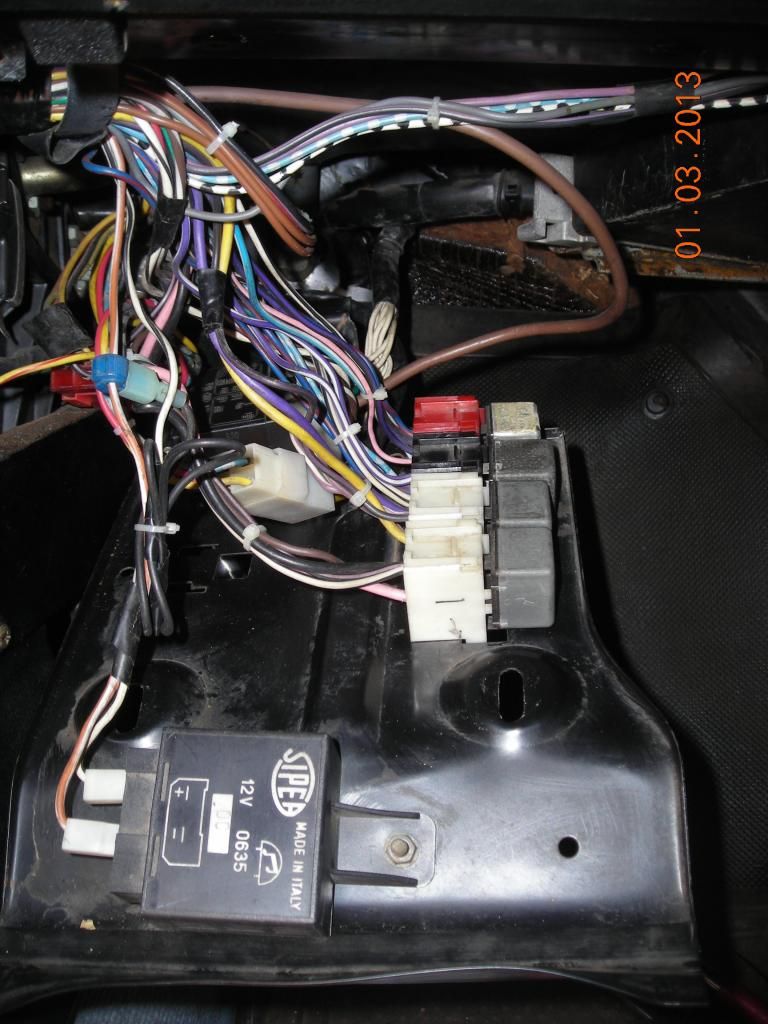
My car was missing the relay mounting plate which fits up under the dash on the passengers side. I bought one on Ebay. It came with most of the connectors and relays (nice to have spares!):
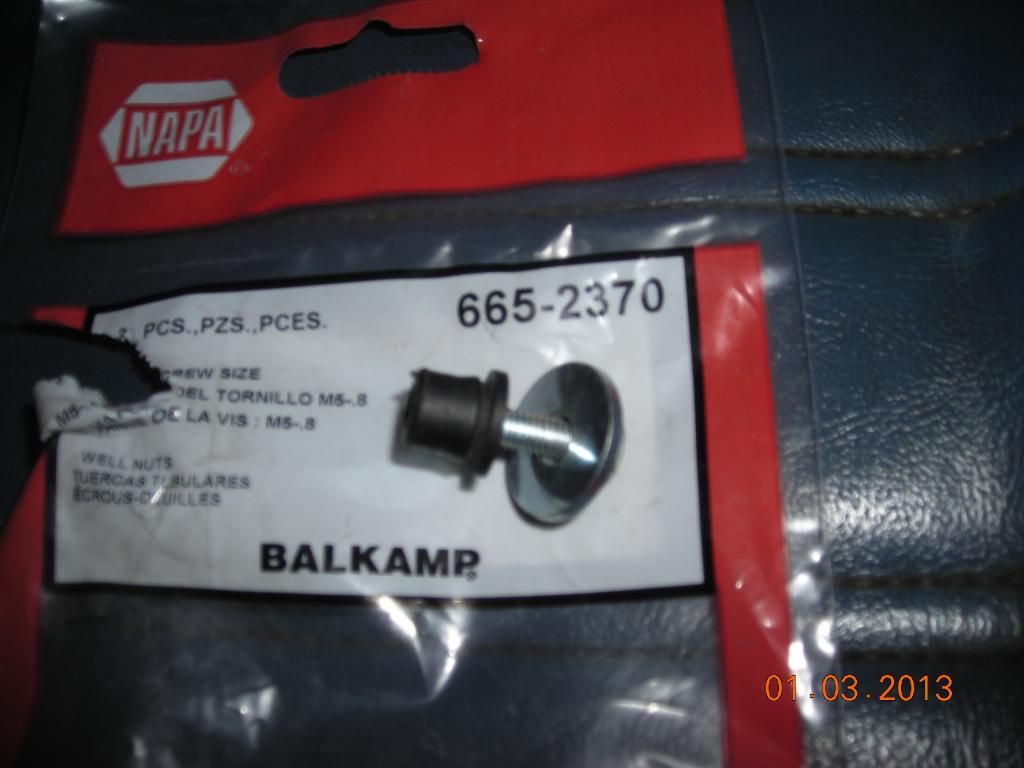
I looked up under the dash to find the 2 places where this plate attaches. One hole was missing the well nut so I pulled out the other to try to replace them both. I found these at Napa:
The diameter was just a nano to small. I set them with some epoxy:
Here is the panel with the existing connectors/relays. These new well nuts worked great! This car is well on its way to getting squared away.
'80 spider FI, SnugTop hardtop
http://s940.photobucket.com/user/a7ewiz ... t=3&page=1
- spidernut
- Posts: 1906
- Joined: Wed Jan 25, 2006 12:20 am
- Your car is a: 1979 Fiat Spider Automatic
- Location: Lincoln, CA
Re: Finally. Wanted a Spider..more details!
Looks like you're having fun!
John G.
1979 Spider (Owned since 2000)
1971 124 Sport Spider (Owned since 2017)
1977 Spider (Sold 2017)
1979 Spider (Disposed of in 2017)
1979 Spider (Sold 2015)
1980 Spider (Sold in 2013)
1981 Spider (Sold in 1985)
2017 Spider (Owned since 2019)
1979 Spider (Owned since 2000)
1971 124 Sport Spider (Owned since 2017)
1977 Spider (Sold 2017)
1979 Spider (Disposed of in 2017)
1979 Spider (Sold 2015)
1980 Spider (Sold in 2013)
1981 Spider (Sold in 1985)
2017 Spider (Owned since 2019)
-
- Posts: 752
- Joined: Mon Oct 29, 2012 9:27 pm
- Your car is a: 1980 124 spider FI
- Location: Sheridan, WY exSan Rafael, CA
Re: Finally. Wanted a Spider..more details!
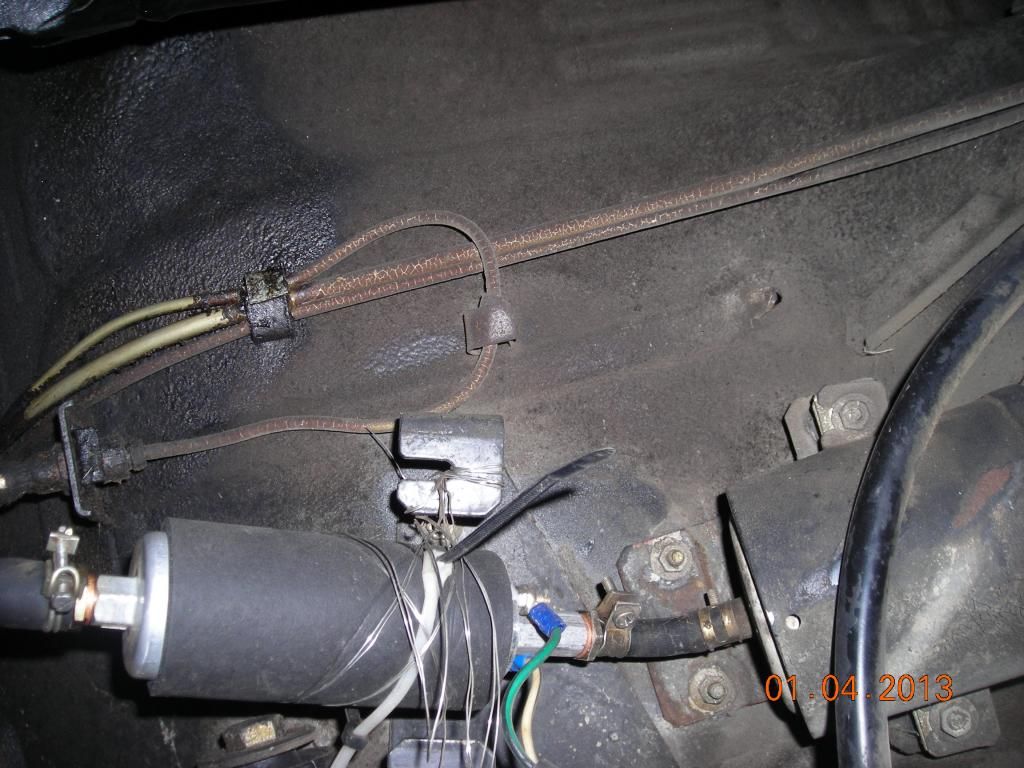
My FI fuel pump went from this :
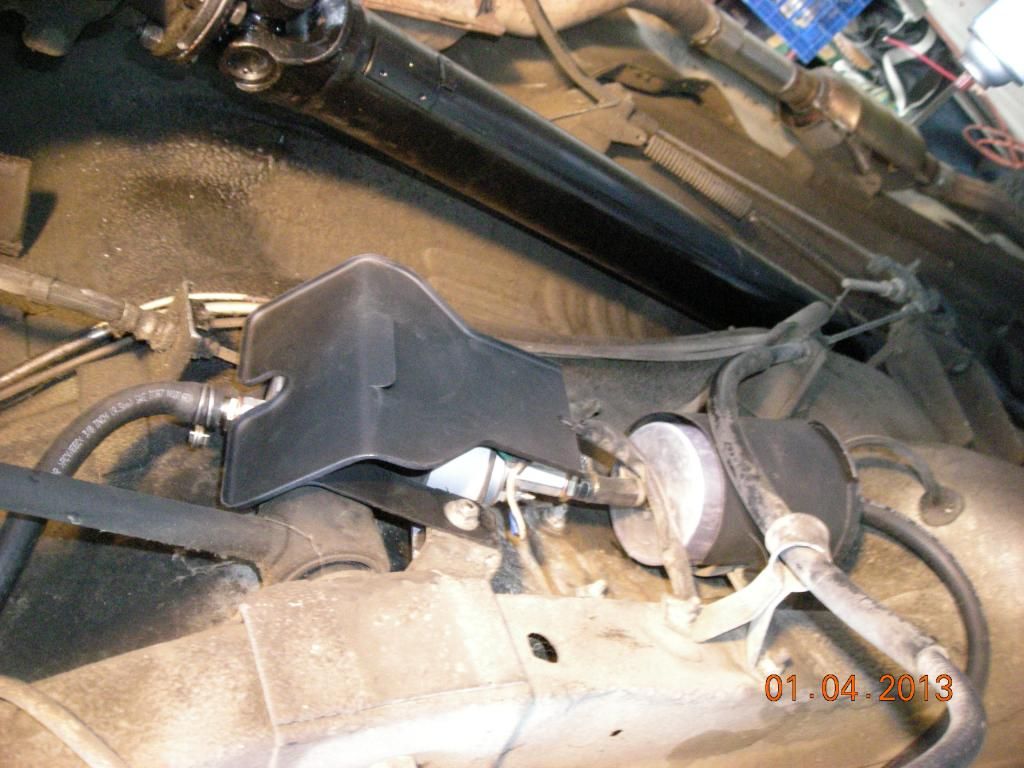
To this :
I am loving Ebay! I bought the fuel pump and filter brackets and covers as well as new rubber mounts. The job took longer than I anticipated (that's seems to be the norm...) I used an exacto knife to cut the hoses where they ran over the hose fittings. They removed very easily. I had to refit the pump and filter a few times, trial and error, until the covers fit properly. Pushing the hoses from under the car, into the trunk seemed to work best. Lithium grease made the hoses install easier over the metal fuel lines, just hard to get the grip to get the hoses seated.
New Mann fuel filter, WK830/7.
For those on the forum thinking of doing this. It takes 3 feet of 3/8 hose to run from the fuel tank to the pump. I bought 10 feet of 1/4 inch hose for all the other lines, including the charcoal canister line. With the exception of the 3 lines that run from the tank to the common vapor connector, I replaced all vapor, feed and return lines at the rear of the car. I will need approximately 2 more feet of 1/4 to change out those 3 vapor lines.
Warren
Last edited by wizard124 on Sun Mar 31, 2013 6:47 pm, edited 1 time in total.
'80 spider FI, SnugTop hardtop
http://s940.photobucket.com/user/a7ewiz ... t=3&page=1
-
- Posts: 752
- Joined: Mon Oct 29, 2012 9:27 pm
- Your car is a: 1980 124 spider FI
- Location: Sheridan, WY exSan Rafael, CA
Re: Finally. Wanted a Spider..more details!
Just one vent line left to do in the trunk. I ran out of 1/4 inch line, went to the hardware store where I had bought it last week to find they were sold out. No problem...over to O'Reillys. I learned the hard way, their product doesn't enough elasticity and won't fit over the barb on the 3-way connector. I'll wait until the hardware store re-stocks.
With the trunk empty, I proceeded with some clean-up. A toilet brush proved excellent in reaching those nooks and crannys. A bit of cleaner/de-greaser and a FW rinse and no more crud down in those lower inner fender areas.
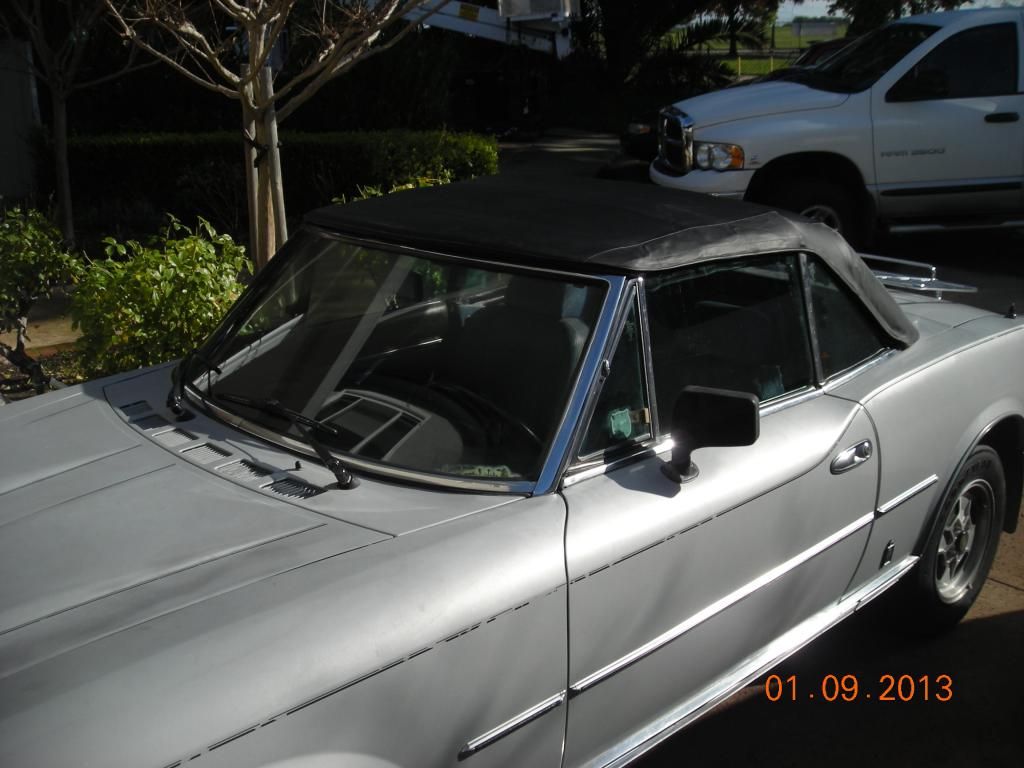
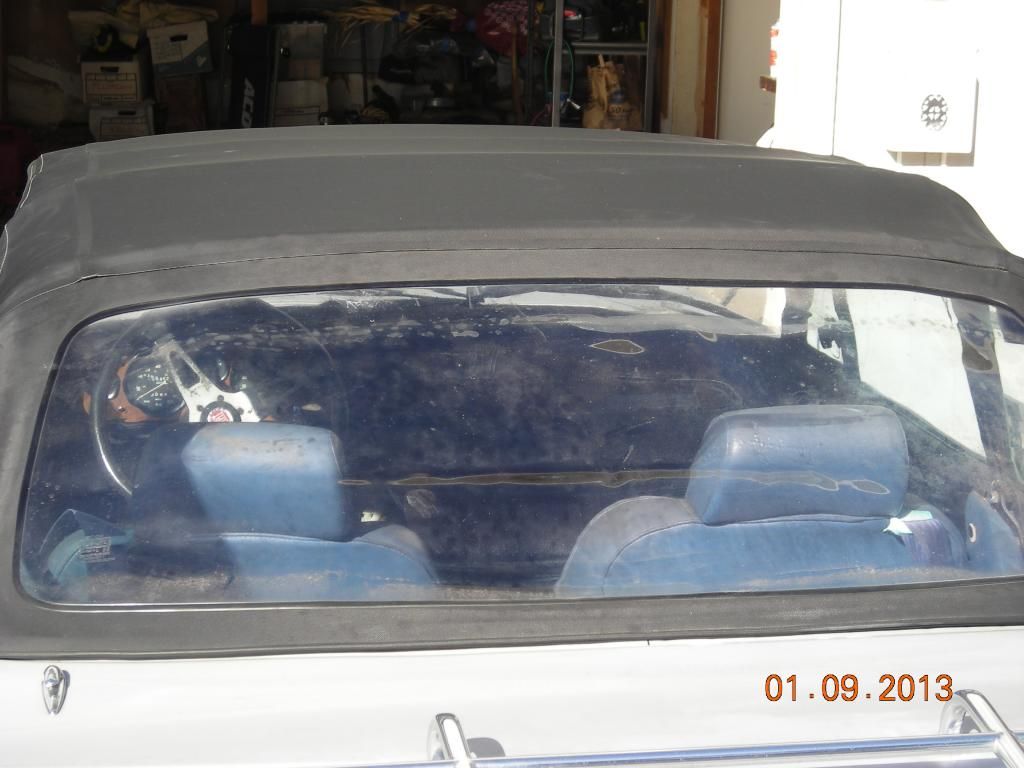
I removed the hardtop. This gave me my first good look at the convertible top. I'd give it a 90% Some trim pieces are cracking and there is a bit of haze around the edges of the rear eisenglass. The hardtop had given it a lot of protection over the years . An 86 is inscribed on the rear panel.
I think my next step will be to remove that pinstriping (heatgun and plastic scraper). See if I can put some shine into that paint?
'80 spider FI, SnugTop hardtop
http://s940.photobucket.com/user/a7ewiz ... t=3&page=1
- RRoller123
- Patron 2020
- Posts: 8179
- Joined: Sun Nov 13, 2011 2:04 pm
- Your car is a: 1980 FI SPIDER 2000
- Location: SAGAMORE BEACH, MA USA
Re: Finally. Wanted a Spider..more details!
Great progress!
'80 FI Spider 2000
'74 and '79 X1/9 (past)
'75 BMW R75/6
2011 Chevy Malibu (daily driver)
2010 Chevy Silverado 2500HD Ext Cab 4WD/STD BED
2002 Edgewater 175CC 80HP 4-Stroke Yamaha
2003 Jaguar XK8
2003 Jaguar XKR
2021 Jayco 22RB
2019 Bianchi Torino Bicycle
'74 and '79 X1/9 (past)
'75 BMW R75/6
2011 Chevy Malibu (daily driver)
2010 Chevy Silverado 2500HD Ext Cab 4WD/STD BED
2002 Edgewater 175CC 80HP 4-Stroke Yamaha
2003 Jaguar XK8
2003 Jaguar XKR
2021 Jayco 22RB
2019 Bianchi Torino Bicycle
-
- Posts: 752
- Joined: Mon Oct 29, 2012 9:27 pm
- Your car is a: 1980 124 spider FI
- Location: Sheridan, WY exSan Rafael, CA
Re: Finally. Wanted a Spider..more details!
I pulled the cowl and tore into my wiper problem. Go here for the full description: http://ww.fiatspider.com/f08/viewtopic. ... 43#p170743
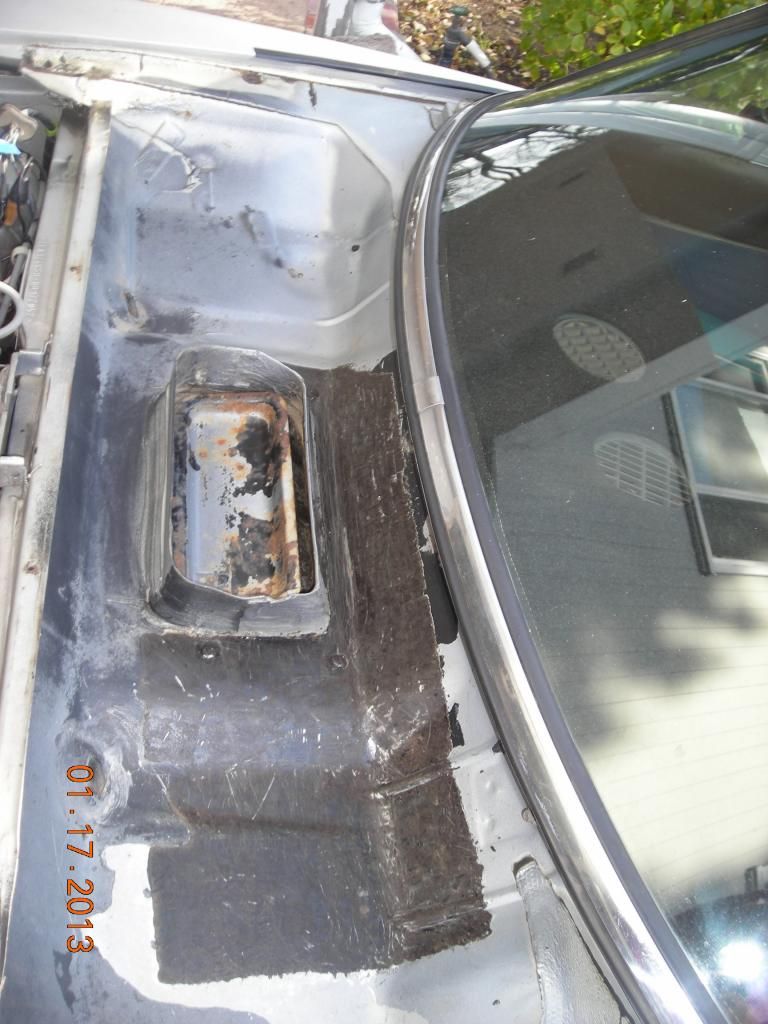
I decided to clean the area under the cowl. What is that tar paper like stuff that Fiat uses and why? I had a patch of it on the driver's side (near that drain hole) but none on the passenger's side. If it was to prevent rust, then why on one side only? Is it for sound deadening or panel stiffening? How do most owners treat and protect that area? Mine is rust free. I was thinking of painting in some colored and thickened fiberglass resin. Then, applying more sealant around the base of the vent housing.
Warren
I saw where the product "Lizard Skin" was suggested. I don't want to/can't spray per the instructions. Can it simply be brushed in?
Last edited by wizard124 on Sun Mar 31, 2013 6:50 pm, edited 1 time in total.
'80 spider FI, SnugTop hardtop
http://s940.photobucket.com/user/a7ewiz ... t=3&page=1